Bottom Paint Removal
The first big job is removing the bottom paint. After wasting a bit of money on different grits of sandpaper (36-80 grit) and using both orbital and conventional sanders and blowing toxic dust all over everything, I decided to try the chemical stripper route and so far that seems to be the less abusive but very slow. Sanding is finicky and a worker can easily cut through the gel coat. A coarser grit sandpaper is faster but the chances of gel coat damage increases. A finer grit sandpaper is just plain slow but more important to me, much too dusty. A chemical stripper also would seem to be easier when it comes to multiple start ups. The preparation and clean up would seem to go much smoother than with sanding.
12/15/07 Well after trying both sanding and chemical stripper I have concluded rotary sanding is potentially damaging and very dusty and the chemical stripper is very slow and smelly. We have since tried scraping with a high quality carbide paint scraper with a long handle. This is hard physical work, but it gets the paint off with minimal dust or smell. You can get 3 or 4 helpers on the boat without covering each other with a cloud of dust or obnoxious fumes. Scraping will be our predominant method of bottom paint removal. We are taking a minimum of 4 coats of bottom paint off. I ground off the sharp points on both sides of the scraper blades to keep those edges from gouging the gell coat That seems to help.
More Bottom Paint Stripping
2/17/08 I have about 3/4 of the bottom sanded to the gel coat. The Fein does a pretty good job cutting through the 5 layers of bottom paint with 36 grit sand paper with minimal dust and the Bosch does a great job of finishing up with 60 grit on what paint is left and getting down to just the gel coat. If you don't want to cut into the gel coat, you better find another way than sanding with 36 grit paper. But I plan to add a barrier coat. If I had to have one sander it would definitely be the Bosch 6 inch orbital. It has a nice rotary mode that takes off a lot of paint and is much easier to hold and control than the 8 inch Fein. I have also taken more hardware off: cleats, winches, wood trim in cockpit, and hardware on the mast. I have taken all of the chainplates off and cleaned and inspected them. They all look in good condition and usable. The only difficult chainplate to take off was the port/aft chainplate. I had to cut the 1/4 inch ply self that runs the length of the cabin in half at the chainplate so I could rotate that chainplate out of the deck slot. The repair will be minor. None of the deck hardware has backing plates and only the stanchion bases were backed up by washers. Everything else was just a bolt and nut. I will reinstall all the hardware with a backing plate where possible.
Bottom Paint is Gone!
.JPG)
I have finished removing the bottom paint by sanding. I used a carbide scraper to get as much off as possible and then sanded with 60 grit using a Bosch 6 inch orbital sander mentioned above. I have since purchased a Festool RAS 115.04 E Rotary sander with vacuum that I will use to remove the gel coat. It is the most aggressive and user friendly sander I have ever used. Can?t say enough good about it. If I were doing it over, I would have not purchased the Fein 8 inch sander and would have replaced it with the Festool.
Prepping and Painting Deck
.JPG)
.JPG)
.JPG)
Deck before and after painting.
I have done much prep work on the deck trying to get it painted before cold weather hits. That way I can start screwing this boat back together this winter. I have cleaned the deck using and also Interlux 202 wash. The Interlux 202 wash would melt most protective gloves I was using. I finally found a cheap pair of nitrile gloves at Home Depot that held up nicely. They were only 3 to 4 bucks a pair. I spent days patching screw holes and dings. I then tried to roll on Interlux Primecoat and quickly realized spraying was the way to go. It sprayed on nicely and was then sanded with 320 grit sandpaper. I rolled on a coat of Perfection with Interlux?s Anti-Skid Compound on all the non skid areas. I did not have to tape anything off because the Rasmus has raised non skid sections. I then rolled a second coat on the non skid. I then sprayed the entire deck with Interlux Perfection using a positive pressure respirator. It sprayed on very nice. I have cut the paint 1/1 with a Interlux's Flattening Agent. It took much of the shine out and I think is looks good and will provide an easier surface to play on.
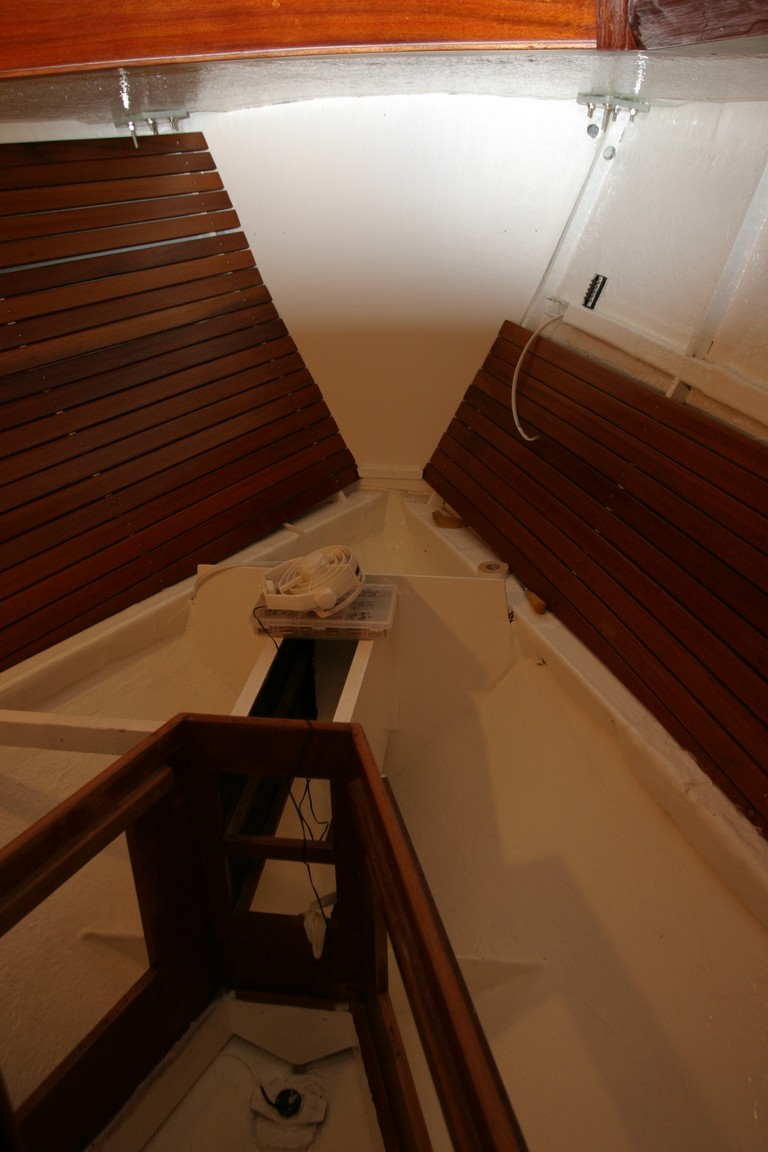
Painted Interior Hull
.jpg)
I removed all of the interior mahogany slats,cleaned, and applied 3 coats of single part polyurathane paint.
Painting the Mast
.jpg)
I have stripped the mast of hardware,cleaned, and have applied a coat of Perfection on it and the boom. I need to replace all the sheaves on the masthead and also the halyards. I used gravity feed spray gun for paint application. I bought the sheaves from Rig Rite. They have been slow to deliver their products and charge a huge restocking fee. Not too happy with this company so far.
Varnishing
I have been putting final touches on some interior woodwork before installation. I am using Old Masters semi gloss spar varnish and it seems to look pretty good and matches the original finish well. FYI: Hallberg Rassy used a epoxy finish on all the interior woodwork. You have to clean well with solvents to get all the wax and other stuff previous owners have put on it and then sand it up so the new finish can get a bite. I have been sanding with 150 grit and I give it a quick once over(1-12-2010).

Shelves ready to be installed.(above)
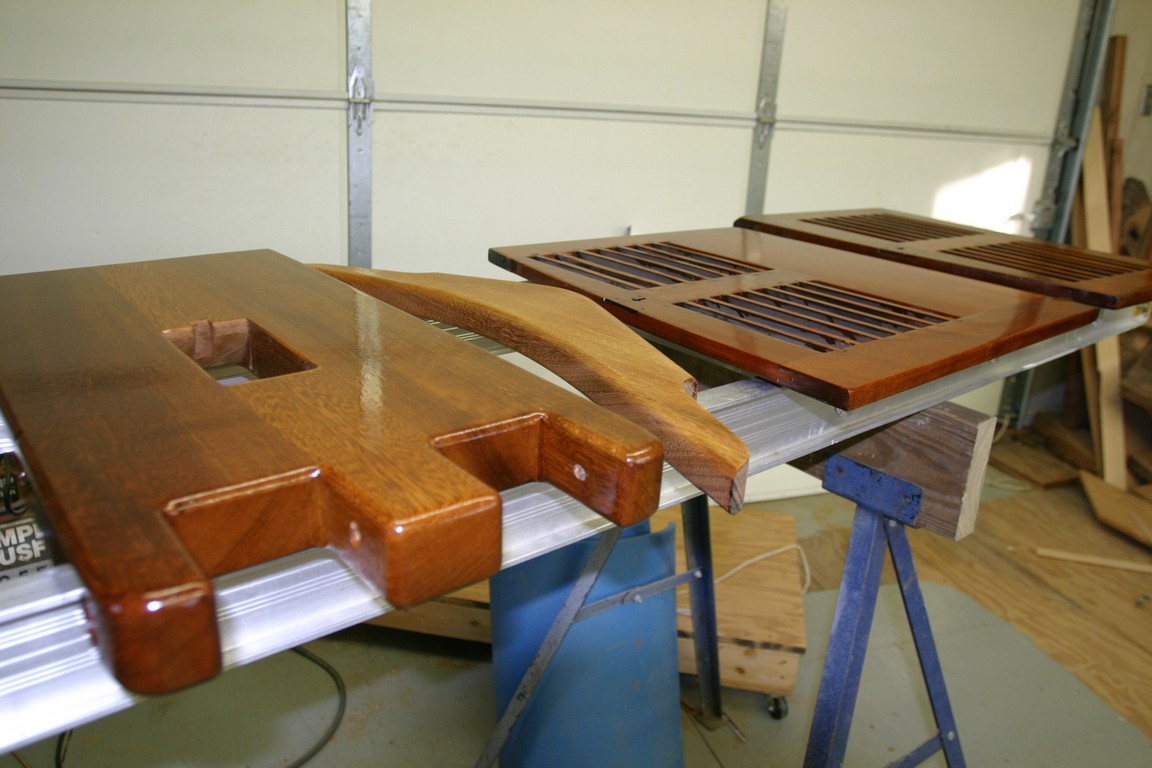
Here is exterior woodwork getting varnish. I used Flagship on the exterior wood.(above)
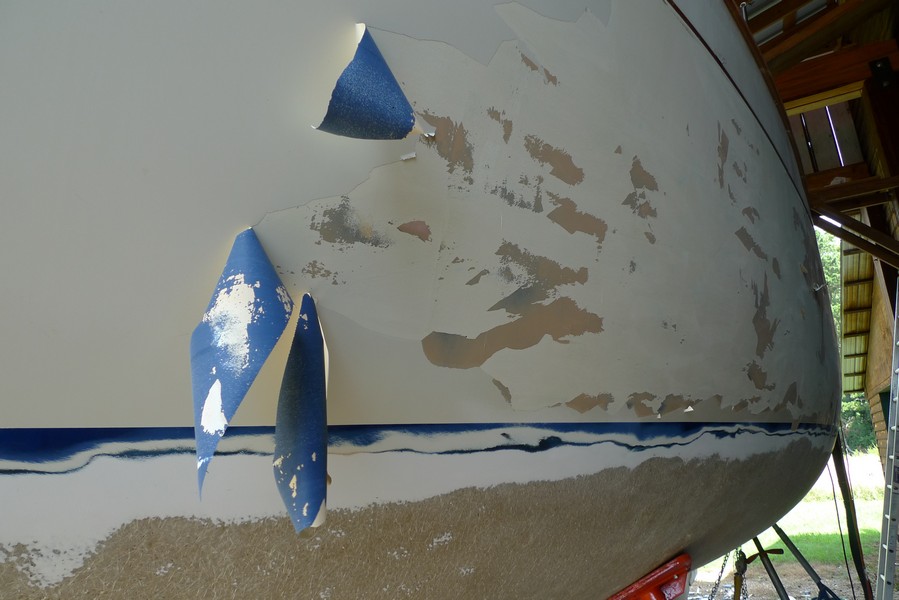
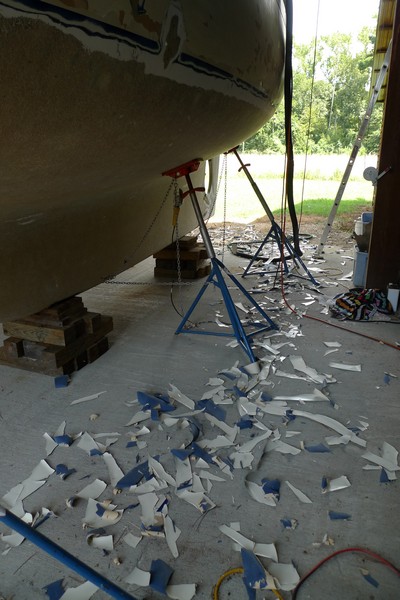
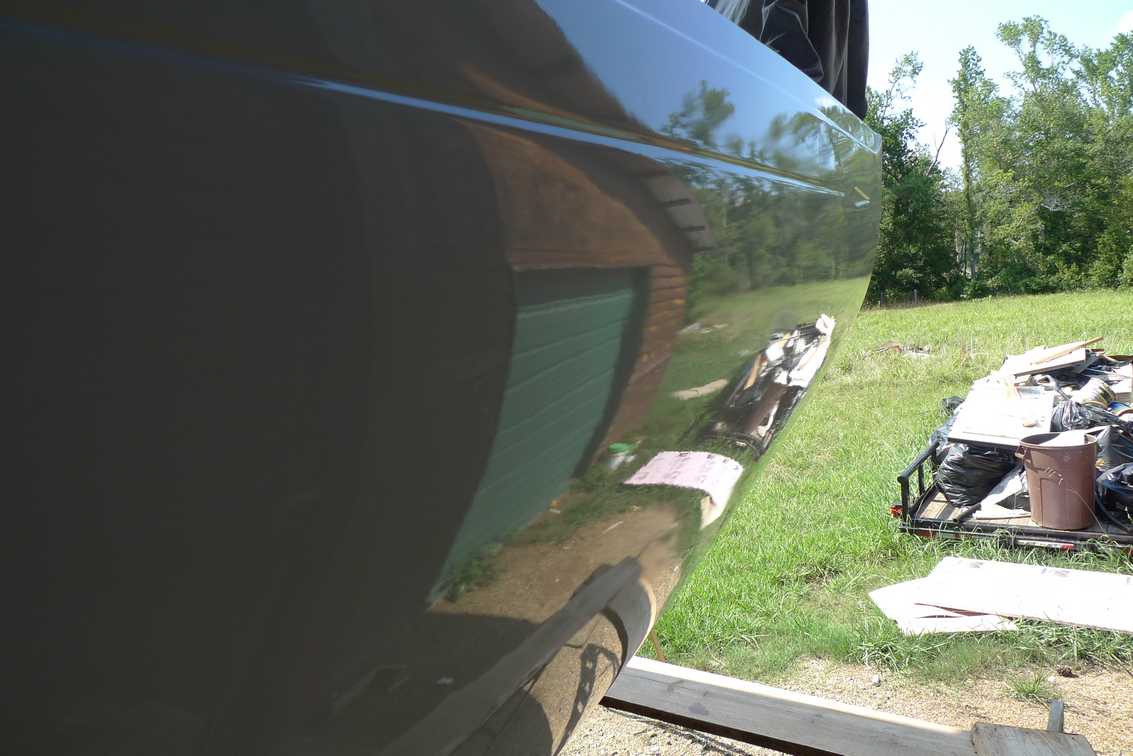
Topside Paint not Bonded
I WAS preparing to paint the topsides and as I was removing some caulking with a scraper a large sheet of paint came off instead. After doing some investigation, I find the entire topside paint job has a weak bond between the 3rd and 4th coat. There are 6 coatings on the topsides. So, I scraped all the paint off down to the 3rd coat and will do some more reasearch on what to do next. It is a definate setback. Below are pics.
Painting
Marking the waterline
This is how I did it. I had scribed the old waterline into the gel coat. The problem was that the old waterline was not very well done. So, I decided to try and make it right. I leveled the boat so it would sit just like it was in water. I did this by using 4 of the old water line marks, one aft at the transom, one forward on the bow, and one on each side amidship. I did this with a water level and thought I had right within an 1/8 inch or so all the way around. I then set up a transom level and had my wife hold the ruler and marked the waterline all the way around every 12 inches. I then took a wooden batten and made I nice fair line using a sharpie pen all the way around. The new waterline looks more fair than the old one, but I don't how close it will be to the true waterline. Only time will tell.
I then taped off the waterline mark and set up for painting.
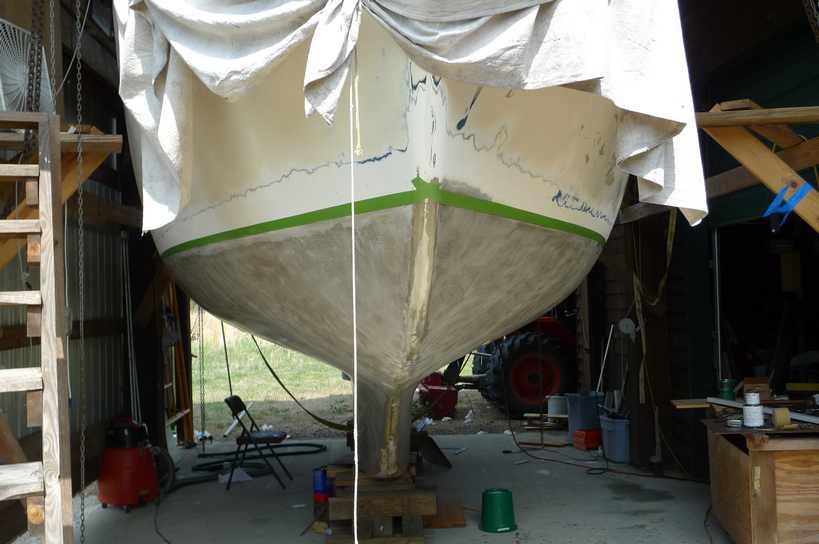
Waterline taped off and epoxy barrier coat sanded and ready for paint.
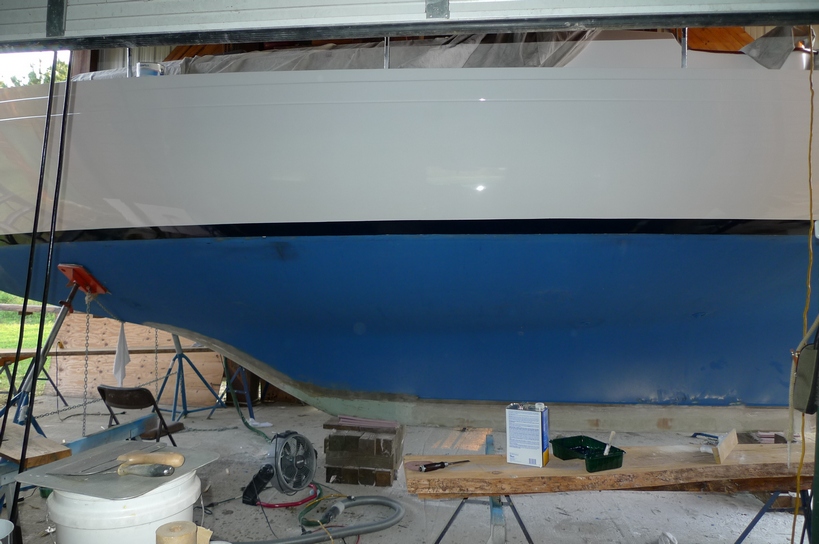
Painting the bottom
I sanded the epoxy barrier coat with 80 grit sandpaper using a small finish sander. I then wiped with a rag and alcohol. After thoroughly mixing the Petit Hydrocoat bottom paint, I rolled it on using a foam roller, the same roller cover used for the epoxy barrier coat. It worked great.
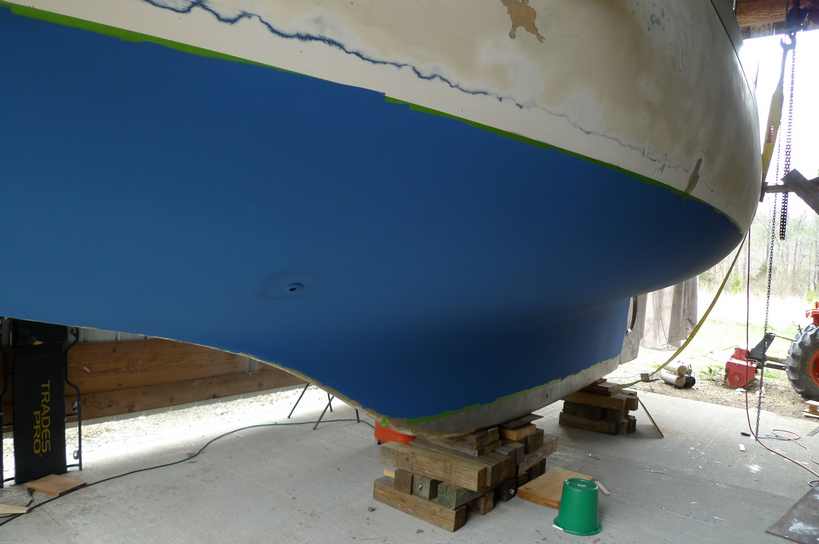

Fresh paint on the bottom. I left the bottom of the keel unpainted for repairs I will make in the next week or so. Next will come repairing the scars on the topside, priming, and painting with Interlux Perfection.
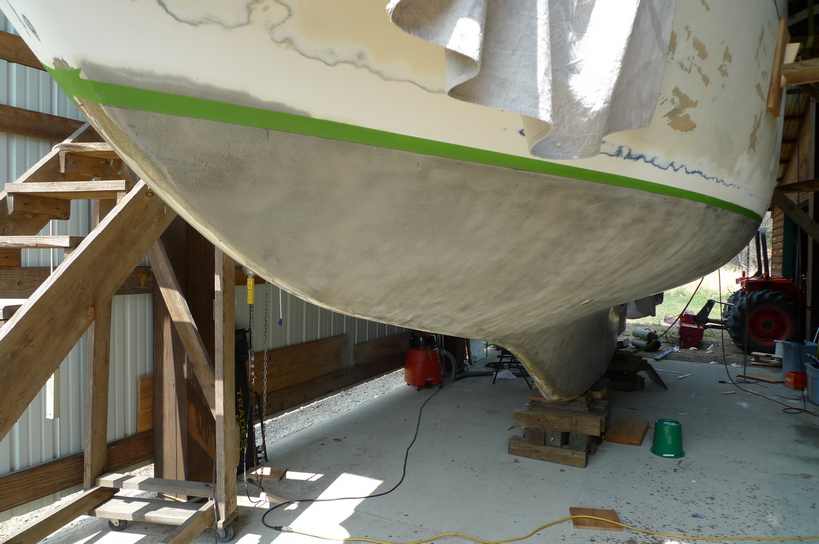
Painting: Sanding the Topsides Down to the Gelcoat
I started sanding all the old topside paint off the topsides down to the gelcoat. The paint was not bonded well and I have no idea what the problem is or what is actually on the boat so I decided to take it all off. There are 6 layers of coatings. The third layer is very tough. I scraped the first 3 coats off and they came off in sheets. Now I am using 36 grit sandpaper and a rotary sander to take this tough third layer down to the first coat. I am then switching to 60 grit and using a random orbit sander to take it down to the gelcoat So far I have spent about 18 hours sanding and have a little over half of it done. It's a big job.
I finished the removal of the topside paint. There were 5 coats, not six. It took approximately 40 hours of sanding. The work revealed another problem. The gelcoat is in really poor shape along the midship section of the hull. It looks like the boat banged against the dock during heavy weather and produced cracks in the gelcoat. It looks like this damaged caused the gelcoat to degrade more rapidly than the areas that were not damaged. The gelcoat in this area of damage is very chalky and loose and the bond between it and the underlying laminate is poor. I decided to just remove the gelcoat in this mid section area on both sides of the boat and inspect the underlying laminate, repair any laminate damage, and replace the gelcoat with epoxy and glass with much fairing I am sure. Below are pics.
Painting: Cherry table
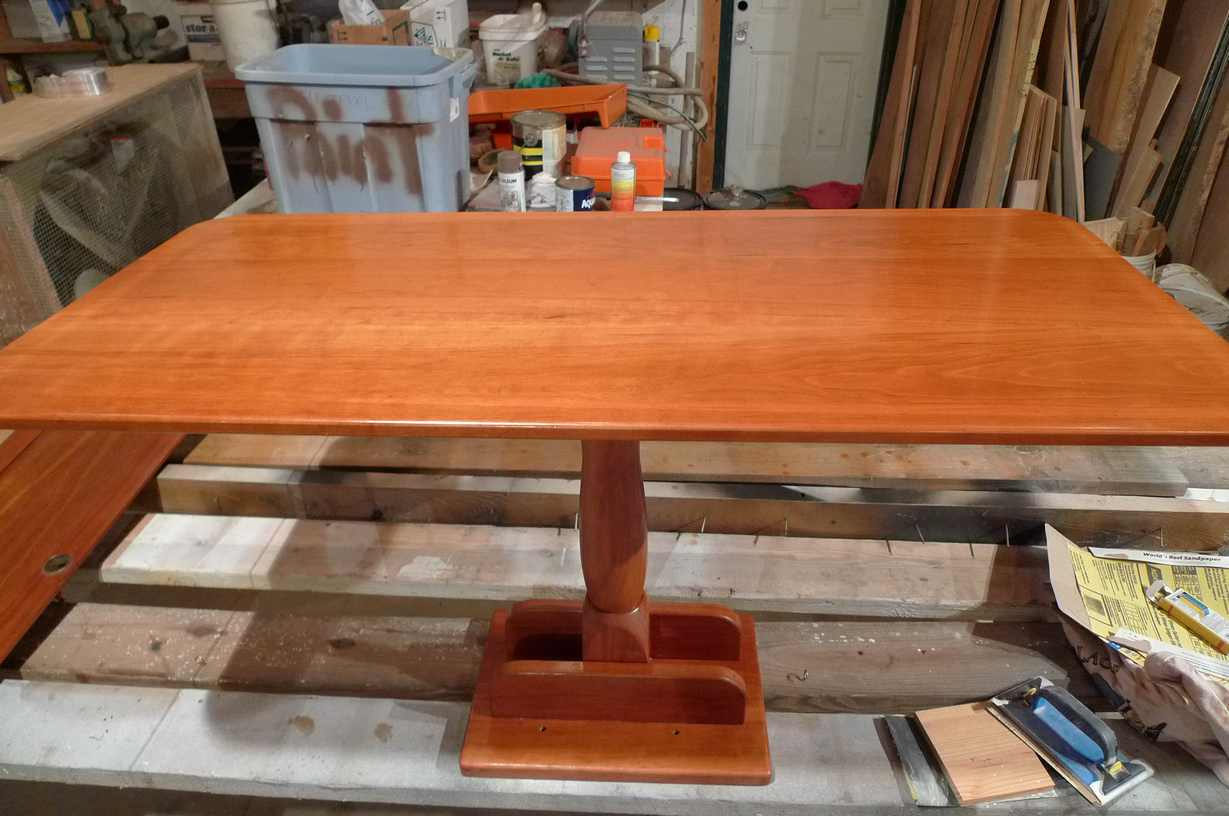
I have started to finish out the cherry galley table with Old Masters semi gloss varnish. It gives I nice pleasant look.
Painting: Topsides
Today I sanded the epoxy clearcoat with 80 grit and applied Interlux Primekote on the transom and starboard sides. It was joyous, having completed all the prep work prior. It went on nice and easy even with the ridiculously steamy weather we have had lately. Below are pics.

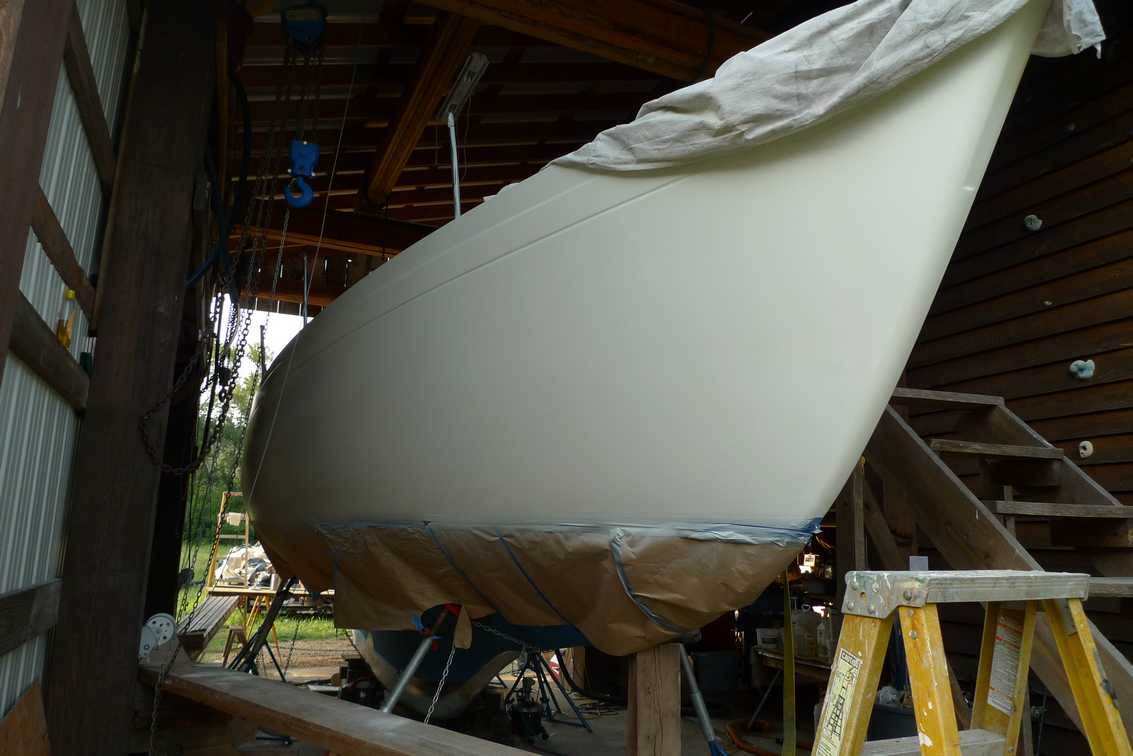
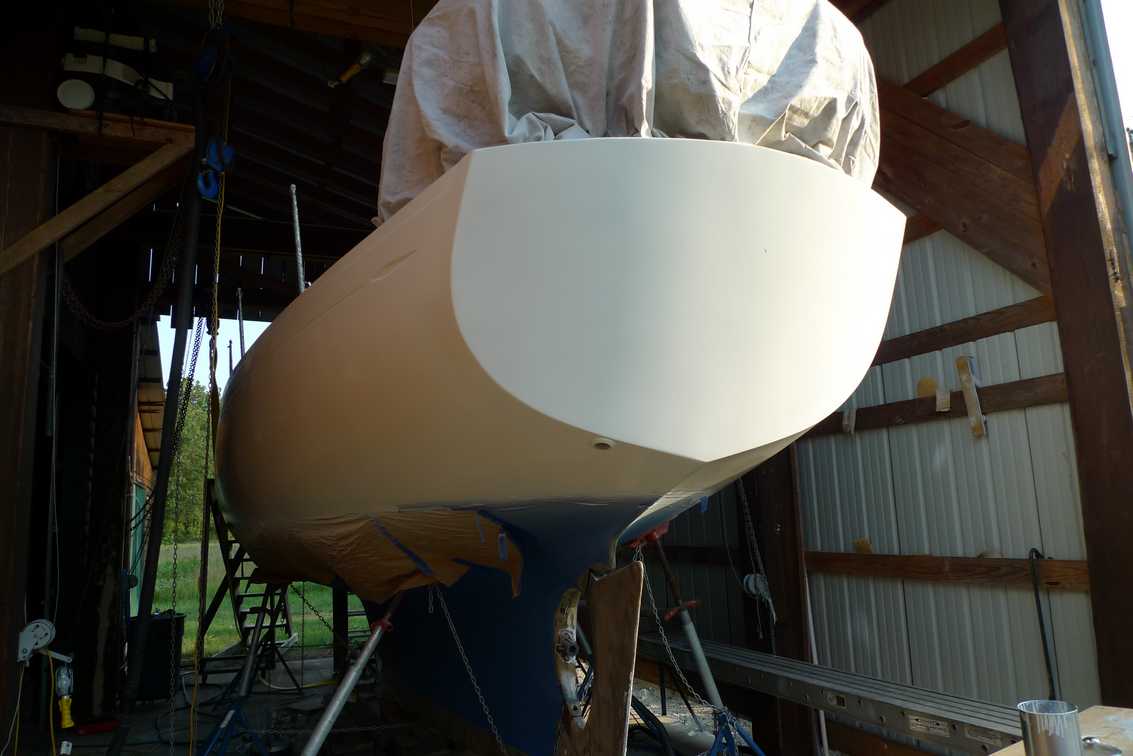
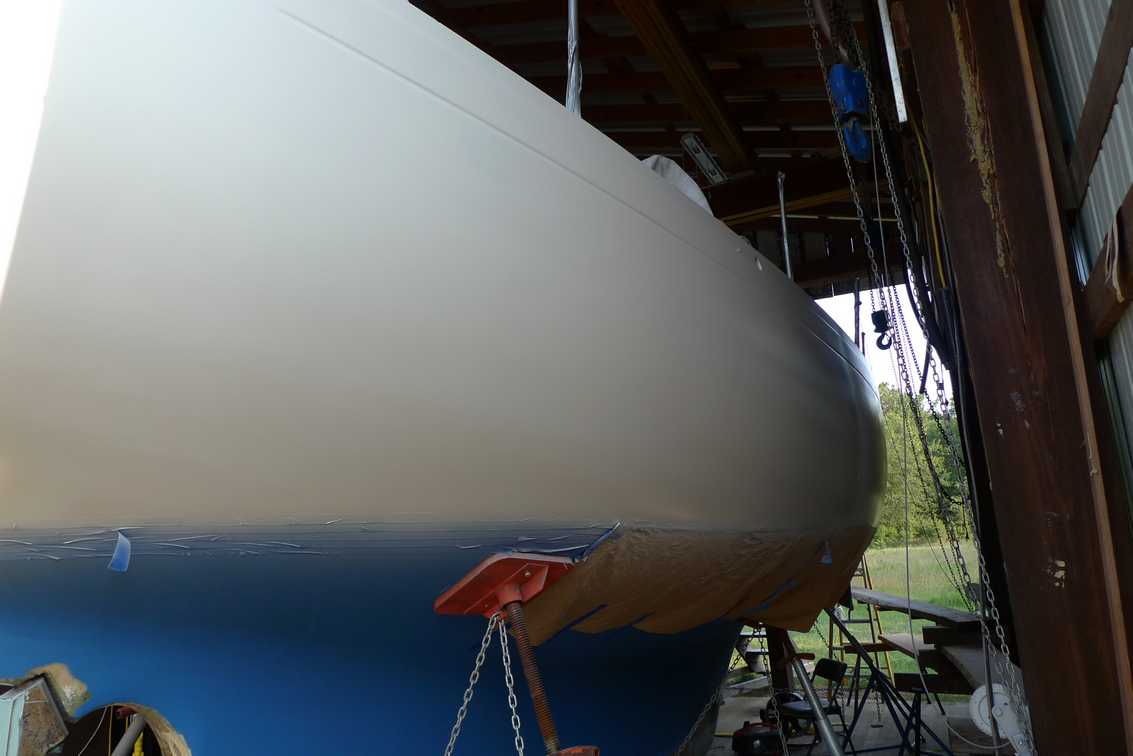
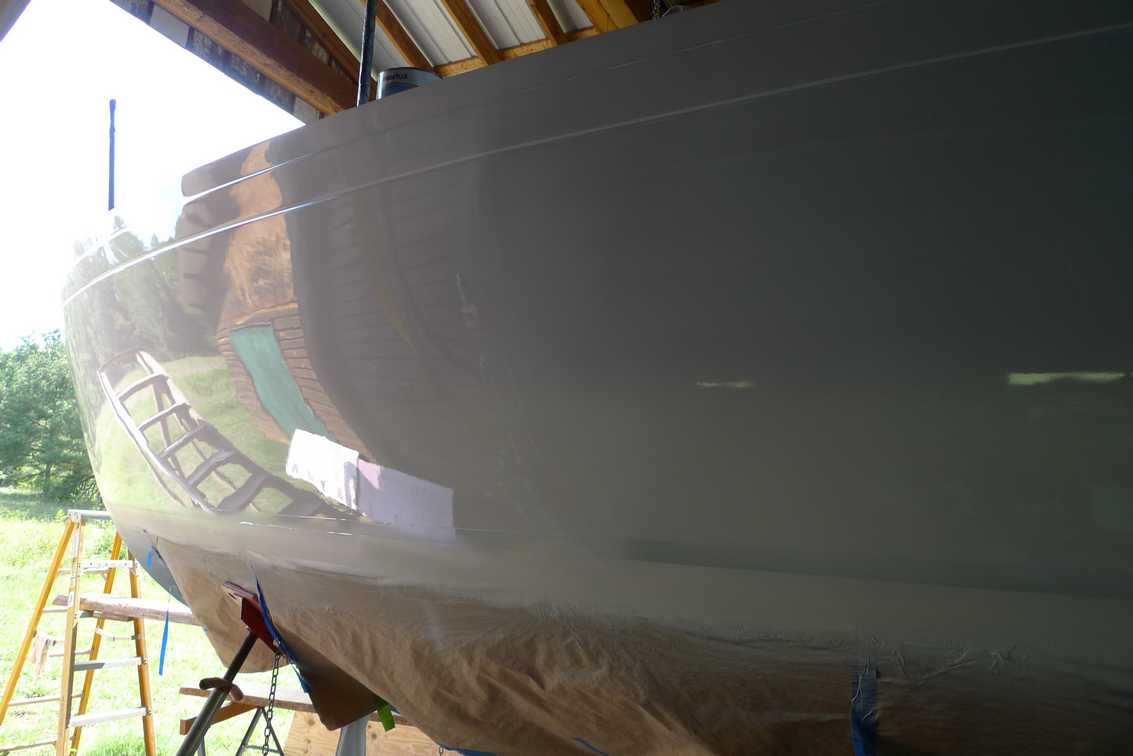
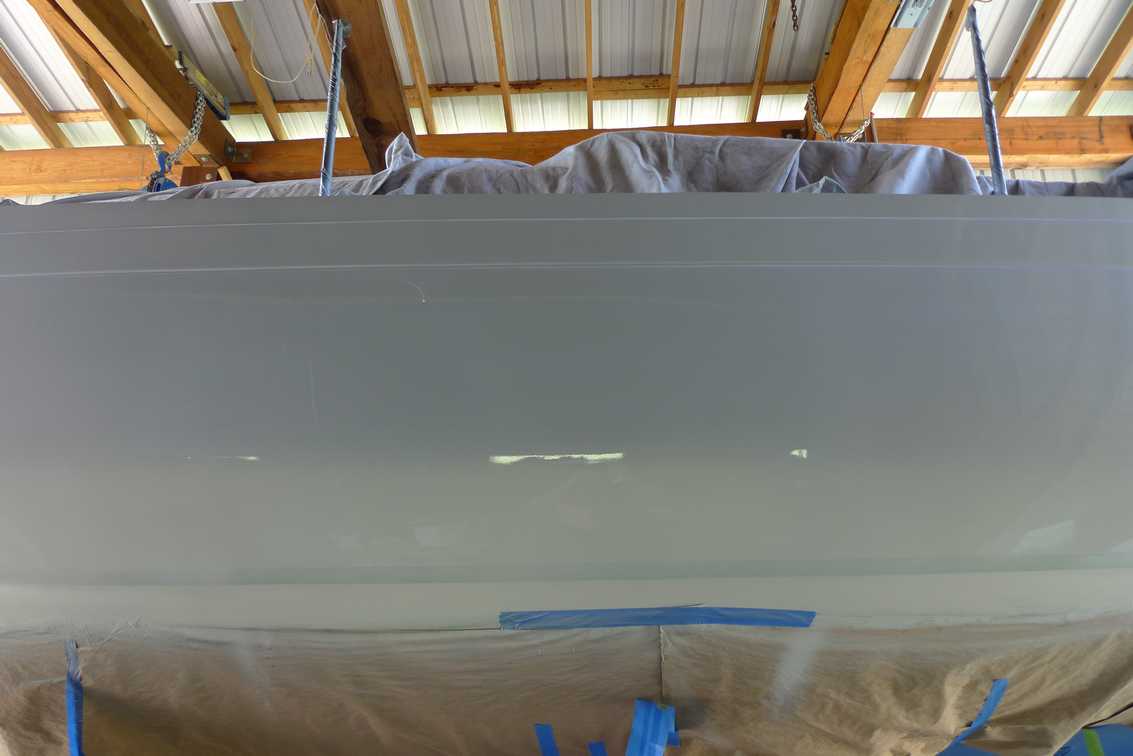
Hull/Painting: Topside Painting with Interlux Perfection
Today I sprayed on the first coat of Perfection two part polyurethane paint. It sprayed on really nice except for overheating in my tyvek suit and full face positive pressure respirator. I got so hot I had to stop and get inside to cool off before I could go back out and finish the job. Prior to painting I sanded with 240 grit sandpaper using a festool finish sander with vacuum attachment. I wiped hull clean with Interlux 2333N solvent and then vacuumed the hull. That produced a very clean hull to paint. Humidity was 65% with 94 degree F temps. Below are pics.
8-24-2011 Hull: Fairing Keel and Painting Bootstripe
It was cool here today(72) and was a great day to grind down my keep cap and get it ready for epoxy gelcoat. Also I applied the port side bootstripe. Pics below.
Two coats of Interlux bootstripe one part polyurethane enamel
.