Here is a list of things I have learned throughout this process. I am going to place them in order, starting with what I think is the most important and ending with least important. I am sure this order will change throughout the evolution of this project, but for now, here it is:
1. Initial purchase price of a boat can be very deceiving. I paid 16K for my boat. Some might think I made a good deal on a 35 foot Hallberg Rassy. This was not true in my case. There were so many things in disrepair that the initial purchase price was, in my case, too much.
2. I would only attempt a project of this magnitude if, and only if, A: I could work on the boat at my house, B: I had a shed to work under, C: I had the money to buy a new boat, D: I had a part time job, at the most. E: I really love a challenge and working on boats. I believe if you can't meet those requirments, a person with limited experience working on projects like this has a good chance to fail. You might think C is crazy, and it is. If I had saved all the money I have spent on this project over the years I have worked on it, I could come very close to buying a new boat. But hey, I would have missed all this fun.
3. You will order many parts over the internet on a project like this. Save all orders in PDF form in a folder. I use CuteWriter to change all my invoices into PDFs. Here is the link: CutePDF
4. Check all merchandise as soon as it arrives. Hook up electrical items to a battery and make sure it works. Check everything. Retailers always make mistakes, trust me.
5. Buy only what you need in the near future. Don't stockpile items, warranties will run out and things will get lost.
6. Go simple. Buy simple and keep it simple. One of the reasons I liked the Rasmus was because all systems were basic and simple. Keep it that way. If I had it to do over again I would have left off the custom refrigerator. It took many hours to build.
7. Pay attention to boat construction methods. From what I know now, I would stay away from boats that are built in two halves. Boats built in halves and joined together create hull problems such as delamination which is evident on my boat. I would also stay away from iron keels in favor of boats with lead keels, and boats with keel stepped masts instead of deck stepped.
8. Buy during sales. A project like this takes years. So a person has time to buy during sales events from the retailers. This can save much money.
9. Take many pictures, from start to finish.
Mystery Groove
 (Small).JPG)
I found a groove running down the centerline of the boat on the bottom about 3/8 inches wide that had been patched with grey epoxy putty. The putty was getting old and flaking a bit. I wondered if it was from construction or damage so I emailed Hallberg-Rassy and they gave me a prompt response. The Rasmus is built in halves and the halves are bonded together, thus the patch running down the centerline of the boat. You learn something everyday! I will dig out the flaking putty and apply a new patch, probably with thickened epoxy.
Boat Stands Too Short!
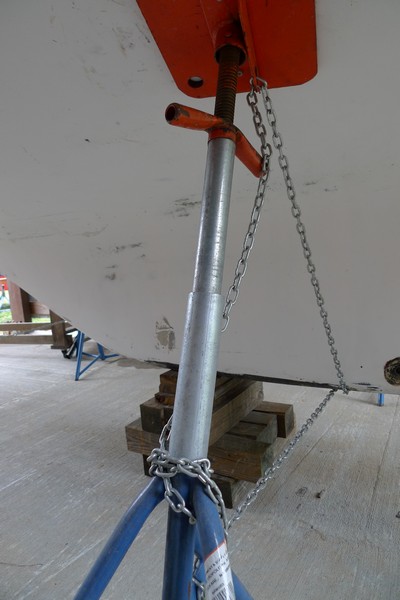
10/07 The first obstacle was to overcome the wrong sized sailboat stands (too short). I cut 12 inch lengths of similar diameter pipe as the sailboat stand pipe and extended the stands using a larger diameter pipe as a collar to hold the extension pipe in place. I then placed the screw pads into the extensions and used two 3/16 inch chain to hold both the stand pads and stand bases together. This seems to work well.
Saving Money
3/1/08 I have been amazed at the money you can save searching the internet for deals. I picked up two ICP Sunseu SE-8000 130 Watt solar panels for 50% percent off what most retailers were selling them for. I bought them at Amazon.com. I went back to the same site a few days later to buy two more and they had gone from $599 to $1200. I then searched for several days to find another good deal on them and found the same panels for $416.00. We will see if they come in good condition. I have noticed that most of the items I have purchased at significantly reduced prices have had some flaws, usually chipped, scratched or dented, but all items have worked properly and I have been more than happy to keep these damaged items at their huge discount prices.
I have used Defender Marine for most of my purchases. Their prices seemed to be quite a bit better than West Marine. I told Defender I was doing an extensive restoration and gave them an approximate dollar value I would be spending and they promptly gave me a 10 percent builders discount.
New Tool Shelves
 (Small).JPG)
 (Small).JPG)
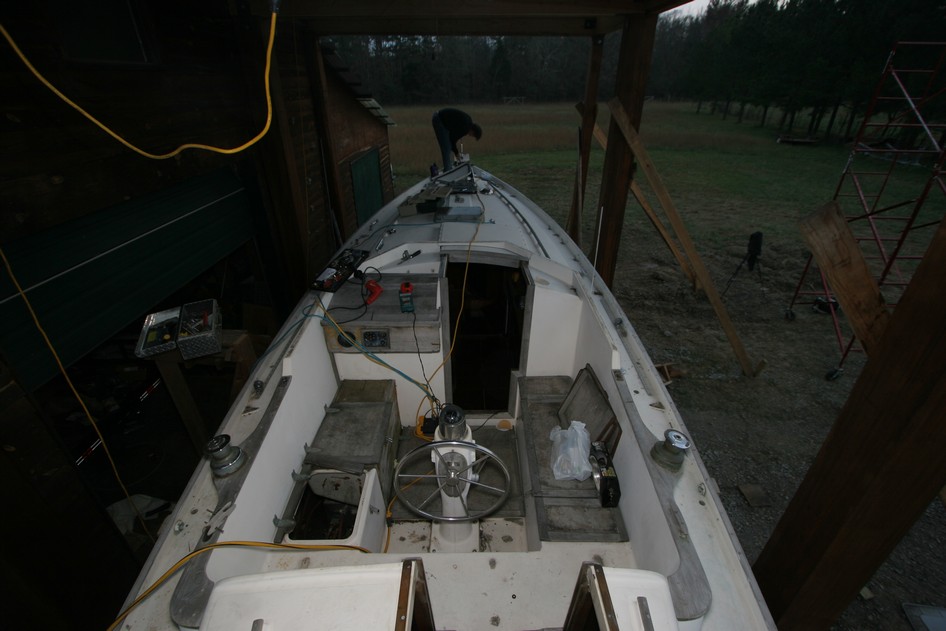
Anything that can make work go more effeciently is worth doing. I added two shelves onto the shed at deck level and it saved me much time climbing up and down for supplies. I also placed a plank that ran from my second floor shop straight on to the deck of my boat.
A Plan
I didn't have a clear idea of to what extent I was going to restore this Hallberg Rassy. It took some time to really look over the boat and decide what was worth keeping and what wasn't. The degree of restoration was also going to depend on the level of restoration I wanted and the money I wanted to invest. These decisions didn't happen overnight. The restoration "evolved" and became more involved as it progressed. I would think, heck if I went to all the trouble to get this looking good, I might as well do this too. And so it went, becoming more extensive every week.
I have just started removing parts and don't have a clue to the extent of this restoration at this point. The degree of restoration will "evolve" as we go.
Take Pictures
10/11/07 My bud Darryl (who is a fantastic photographer) offered to photo document the vessel and help work on it for beer. In particular, Guiness Stout. We photo documented the boat for future reference in case we forgot where parts went and also labeled them as we dismantled the boat. Initial work included: removing teak toe rail, removing stanchions and bases, removing teak anchor base, removing rotted teak in cockpit area, removing stainless steel fish box in cockpit, and removing aluminum wind shield. The teak toe rail took 2-3 hours to come off. I used a drill bit to remove the wooden bung and then removed the rest of the bung with a straight slotted screw driver bit attached to a battery operated drill, using the drill to roto clean the bung hole. Stanchions and bases took about 4 hours to come off and was much faster with two people, one on deck and one below. One could do it alone using a small vise grip to hold the nut below while backing the screw out on deck.
 (Small).JPG)
All screws, bolts, and small hardware were bagged and labelled for later refernce.
Stay Organized
The last three days have been dedicated to organizing my shop for the new year. Aways feels better to work in a clean and organized space.
Bang for the buck
I have been curious in the relationship between PHRF and a given amount of sail area. I have been impressed with what I thought was good PHRF (186) given to the HR Rasmus with it's small sail area of 485 feet. So, I thought I would do a little more research into this and just see how the Rasmus stacks up with other boats its approximate length. I took 32 sailboats that are recognized as good cruisers with a few racers thrown in. I took the average of their PHRF ratings and divided their own PHRF rating with this average. I then divided that ratio by the sail area. It looks to give a pretty good indication of the relationship between PHRF and sail area among the boats sampled. Don't know if the math is completely sound, but the order looks to be reasonable. The HR Rasmus has the smallest sail plan in the group at 485 ft^2. And the PHRF is at the lower end of the group at 186. But the Rasmus jumps to the upper end of the list when considering sail area/average PHRF/PHRF. The list does give a comparison on how much speed the boat may have with the amount of sail a sailor may want to wrestle with. Any ideas?Click here for pdf file on sail area to PHRF comparison
.jpg)
Above is a list of 32 sailboats that are sorted according to their sail area divided by their average PHRF divided by their own PHRF. Included is motion comfort and hull speed. The larger the number under motion comfort the more comfortable the motion.
.jpg)
Above is two lists, one sorted according to their sail area and the other sorted according to thier speed rating. Boat Ratios Page
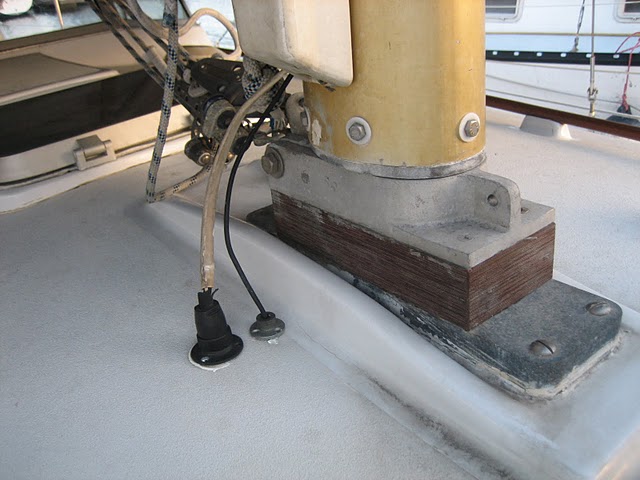
Bulkhead/Compression post in relation to Mast Step
I was asked about the location of the Bulkhead/Compression Post in relation to the mast step. I placed tape on the cabin top where the bulkhead and post lay. You can see the six bolt holes where the mast step bolts down on the cabin top. I looked at pics of an older Rasmus and noticed that the "landings" are different sizes. It looks like on the later models they extended the landing to reach from the two bulkheads forming the head area in order to strengthen the mast support. I wonder if Hallberg Rassy had problems with deflection on the earlier model Rasmus. Anyone know?
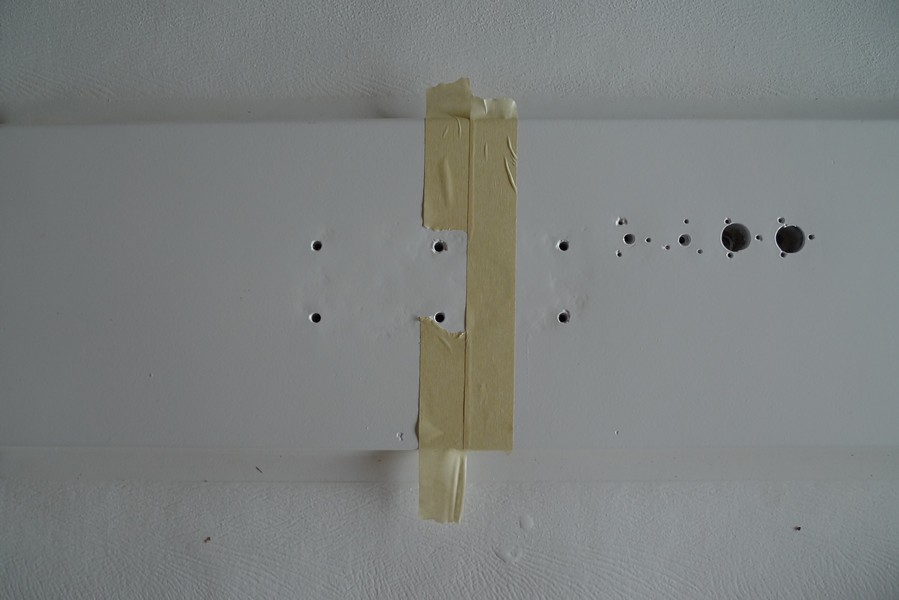
Pics above are the mast step "landing" area of a 1974 HR Rasmus hull #337. The tape is the location of bulkhead/compression post.
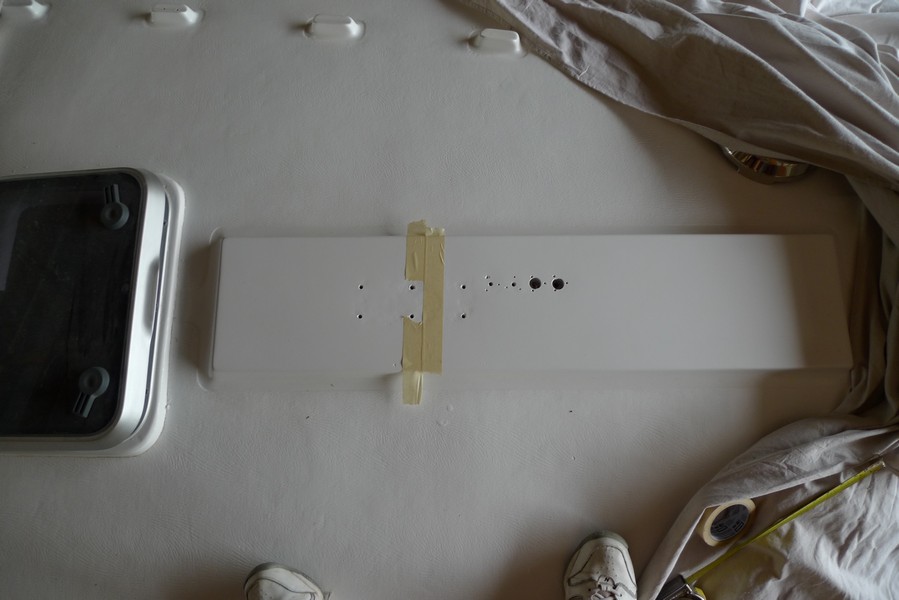
Pic above is the mast step of a 1972 HR Nab/Rasmus hull #100.