2011
The Break is Over
Well, I have taken a nice break (2 months)from the boat project. I was waiting for warmer weather and just needed a little refueling on my motivation. Drove down to Key West (24 hours from Little Rock) in a blizzard for 8 of those hours which turned to a downpour for the next 11 hours. My brother and I and a friend took two kayaks down to do some kayak fishing in the Dry Tortugas. We spent three nights camped at Dry Tortugas National Park and fished our tails off. We caught so many mackeral and barrucuda it was rediculous. Finally got a nice snapper for supper and ended with a wild 20 minute ride after hooking into a 7 foot shark that attacked my hooked up barracuda. I have never witnessed such a display of wild savagery. It was lucky if I landed a whole fish. Most were shreaded by barracuda or shark. Jack London would like this place. But now its time to get back to work.
Paint:bottom
I have just ordered 2 gallons of Petit Hydrocoat. I chose it mainly because it can sit out of water without losing effectiveness and because of good reviews.
Plumbing: Drains
I ordered plumbing hose and bronze T's and nipples for plumbing. I am not going to skimp on any plumbing system that can sink my boat. I am using ShieldsFlex II on all below waterline plumbing and bronze fittings. Below is a shematic of the plumbing fixtures.
Rasmus plumbing specifications.Plumbing: Thru Hulls
I installed all (5) bronze thru hulls(Groco) using 3M 101 sealant. They went on with a fuss, I had to cut 1/4 inch off the threads of two because they were too long
.
Painting: Waterline
Marking the waterline
This is how I did it. I had scribed the old waterline into the gel coat. The problem was that the old waterline was not very well done. So, I decided to try and make it right. I leveled the boat so it would sit just like it was in water. I did this by using 4 of the old water line marks, one aft at the transom, one forward on the bow, and one on each side amidship. I did this with a water level and thought I had right within an 1/8 inch or so all the way around. I then set up a transom level and had my wife hold the ruler and marked the waterline all the way around every 12 inches. I then took a wooden batten and made I nice fair line using a sharpie pen all the way around. The new waterline looks more fair than the old one, but I don't how close it will be to the true waterline. Only time will tell.
I then taped off the waterline mark and set up for painting.
Waterline taped off and epoxy barrier coat sanded and ready for paint.
Painting: Bottom
I sanded the epoxy barrier coat with 80 grit sandpaper using a small finish sander. I then wiped with a rag and alcohol. After thoroughly mixing the Petit Hydrocoat bottom paint, I rolled it on using a foam roller, the same roller cover used for the epoxy barrier coat. It worked great.

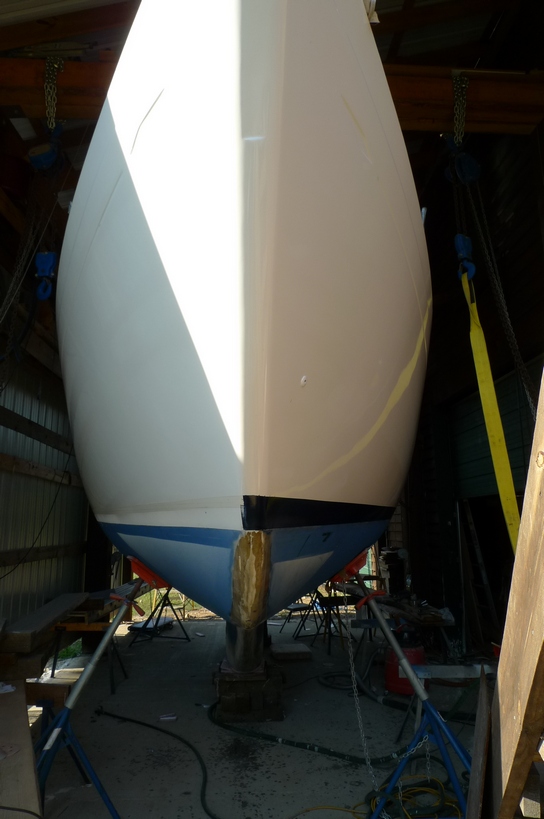
Fresh paint on the bottom. I left the bottom of the keel unpainted for repairs I will make in the next week or so. Next will come repairing the scars on the topside, priming, and painting with Interlux Perfection.
Painting: Sanding the Topsides Down to the Gelcoat
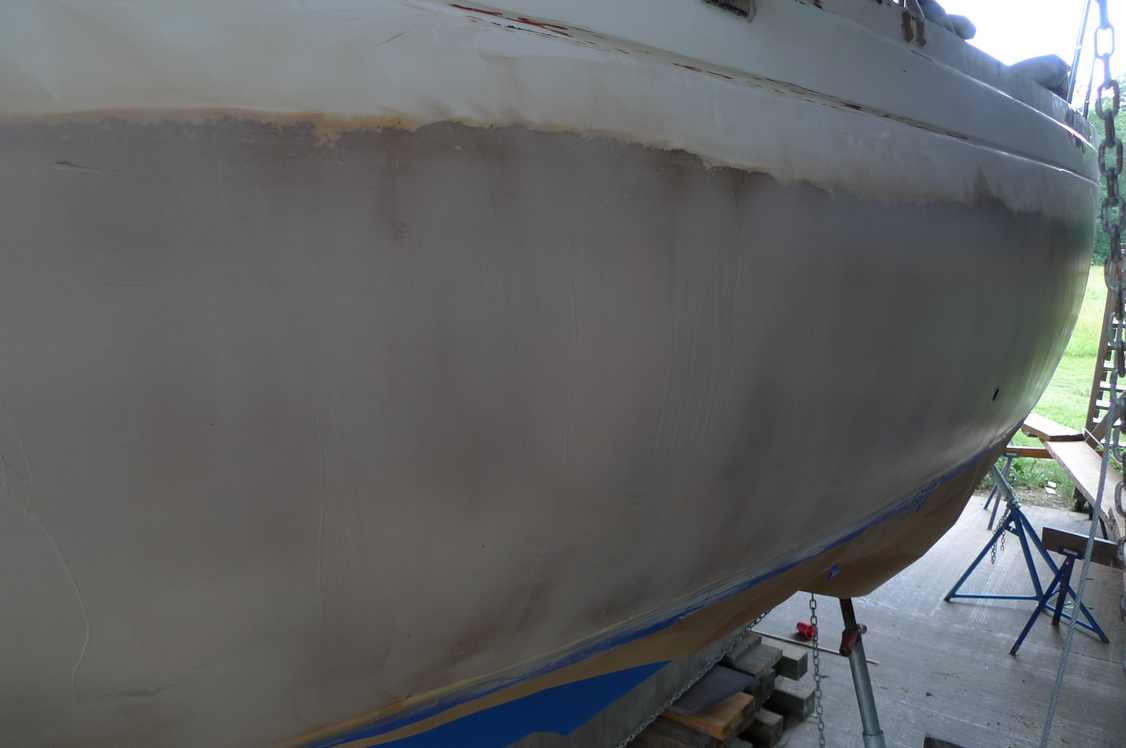
I started sanding all the old topside paint off the topsides down to the gelcoat. The paint was not bonded well and I have no idea what the problem is or what is actually on the boat so I decided to take it all off. There are 6 layers of coatings. The third layer is very tough. I scraped the first 3 coats off and they came off in sheets. Now I am using 36 grit sandpaper and a rotary sander to take this tough third layer down to the first coat. I am then switching to 60 grit and using a random orbit sander to take it down to the gelcoat So far I have spent about 18 hours sanding and have a little over half of it done. It's a big job.
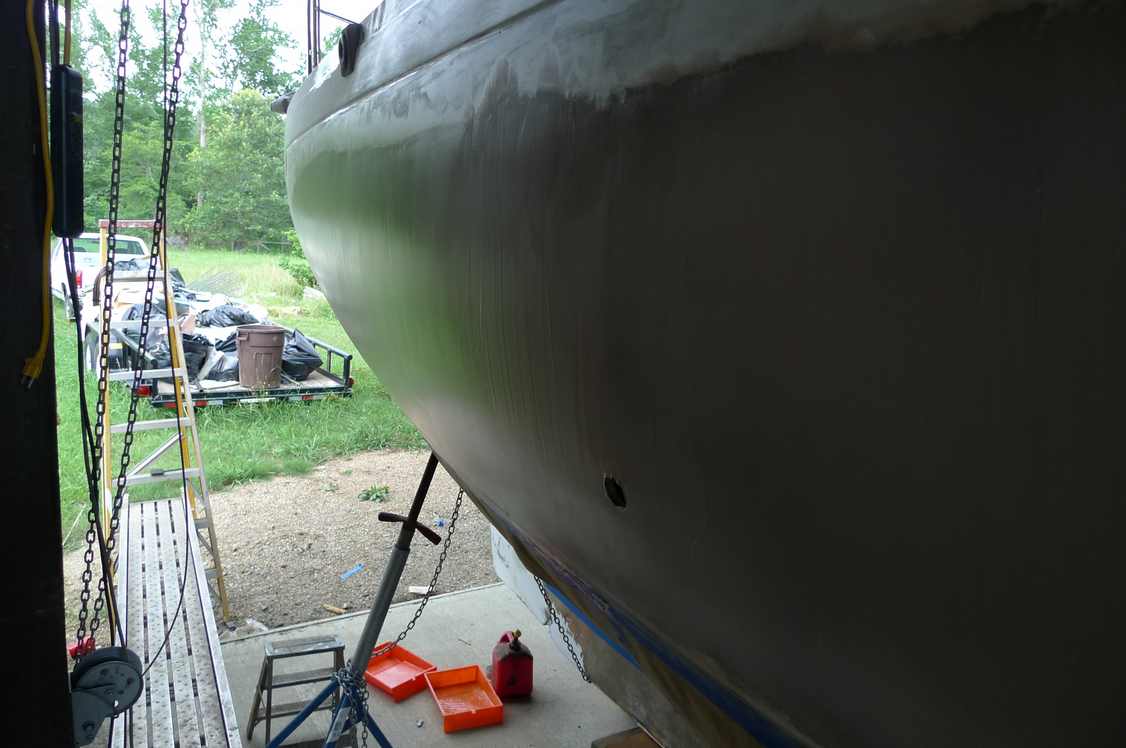
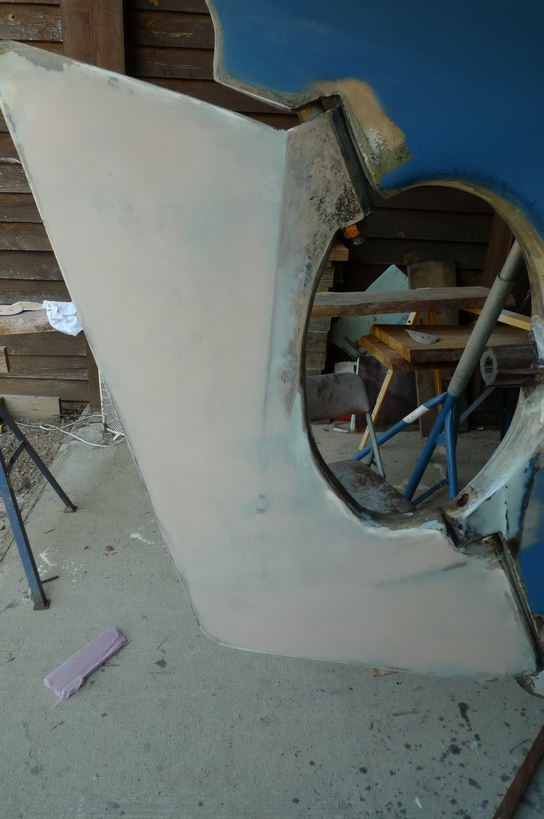
I finished the removal of the topside paint. There were 5 coats, not six. It took approximately 40 hours of sanding. The work revealed another problem. The gelcoat is in really poor shape along the midship section of the hull. It looks like the boat banged against the dock during heavy weather and produced cracks in the gelcoat. It looks like this damaged caused the gelcoat to degrade more rapidly than the areas that were not damaged. The gelcoat in this area of damage is very chalky and loose and the bond between it and the underlying laminate is poor. I decided to just remove the gelcoat in this mid section area on both sides of the boat and inspect the underlying laminate, repair any laminate damage, and replace the gelcoat with epoxy and glass with much fairing I am sure. Below are pics.
Hull: Removing the Gelcoat
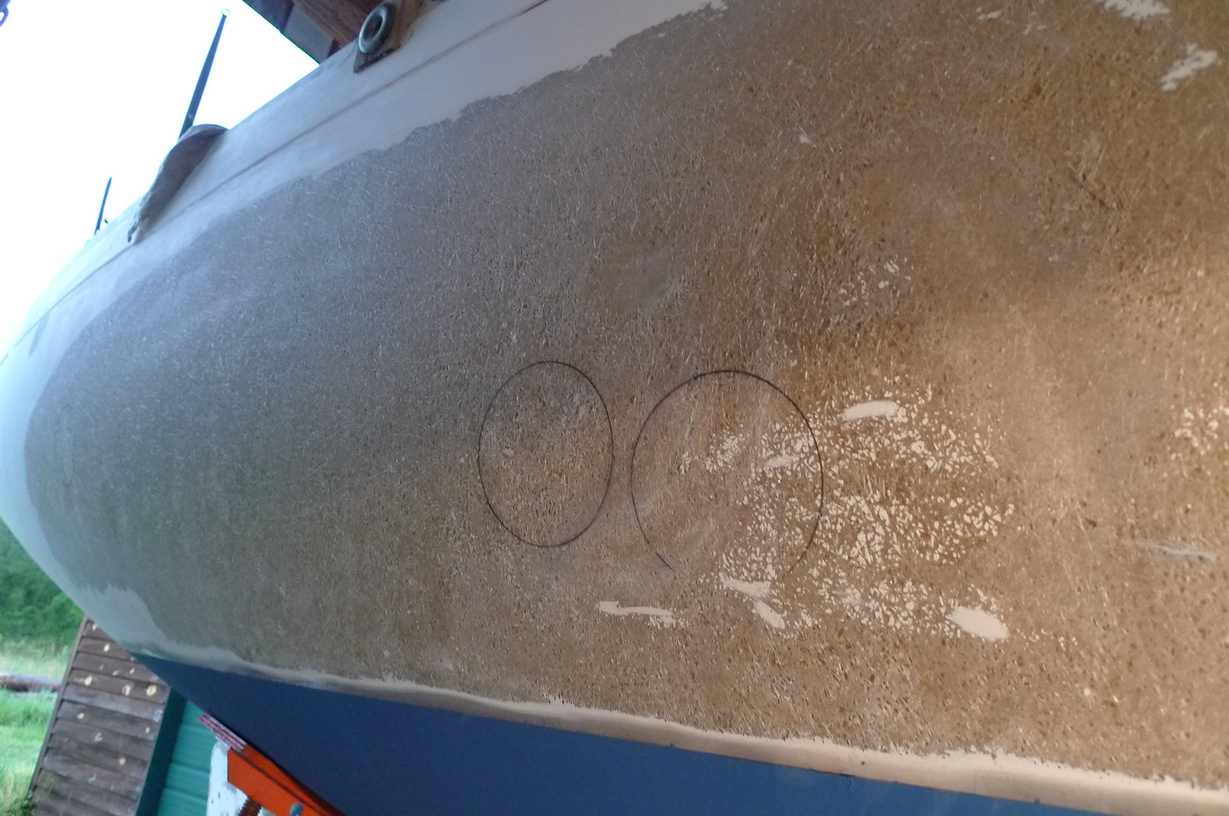
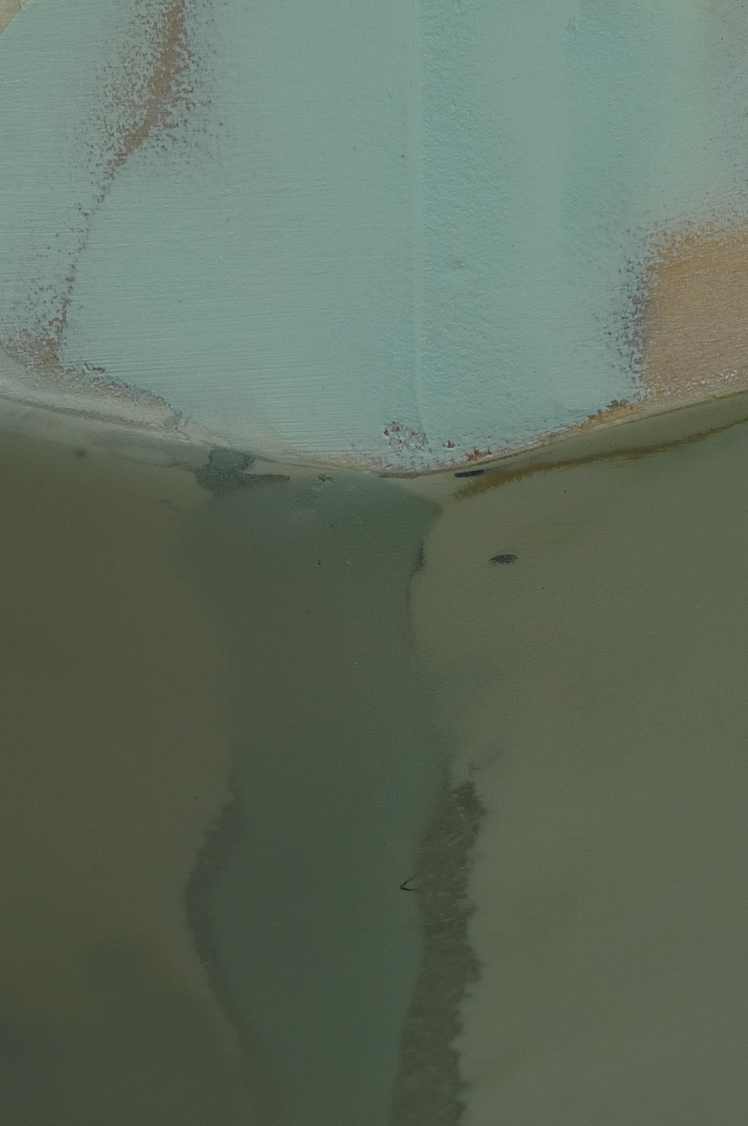
I removed the gelcoat in one morning using 24 grit sanding disc and grinder and finishing with 36 grit using random orbit sander. The pic above shows the work. I have circled hydrolized laminage to remove with a disc sander and repair.
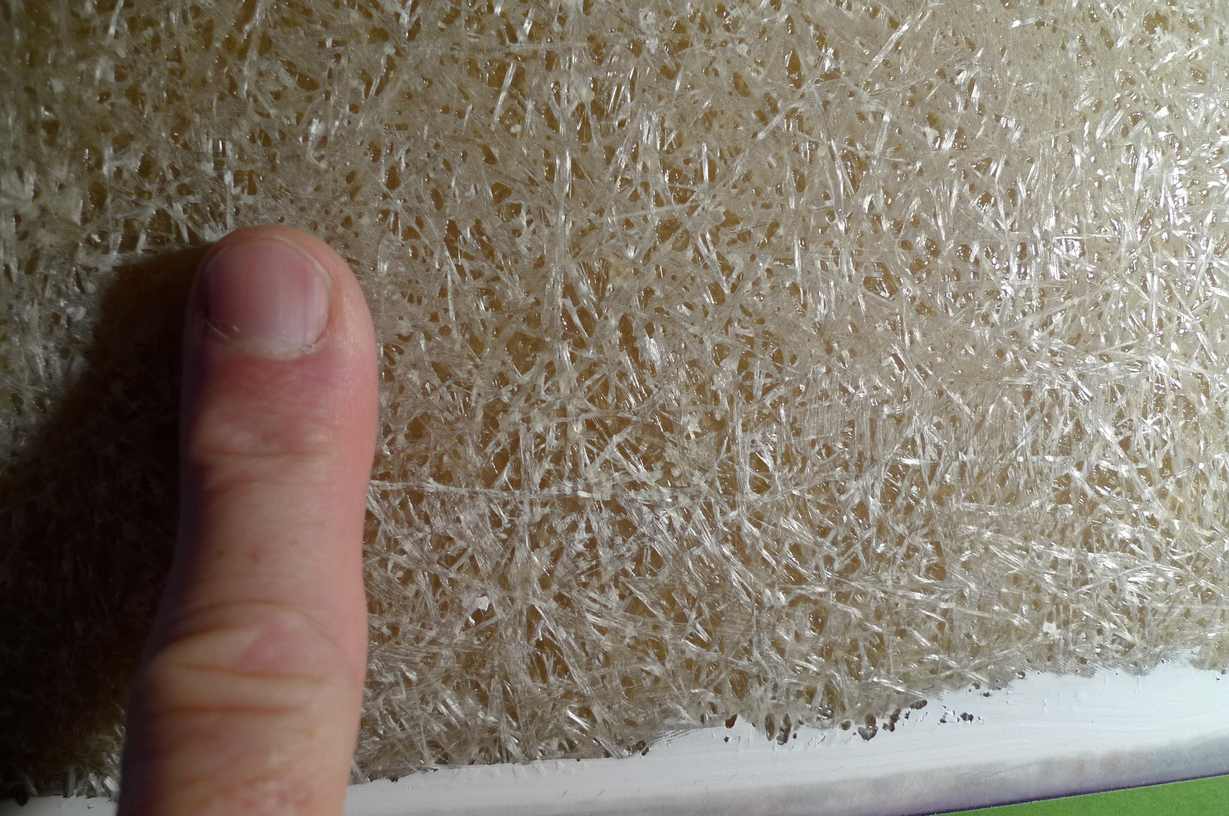
The above pic shows the level of hydrolysis on the topside laminate? I question this because I don't really know if that what it is. It could also be the 35 year old chaulky gelcoat chipping off the laminate during the sanding. Anyway, the gelcoat in the midsection of boat was so chaulky and loose that I decided the only real solution was revoval.

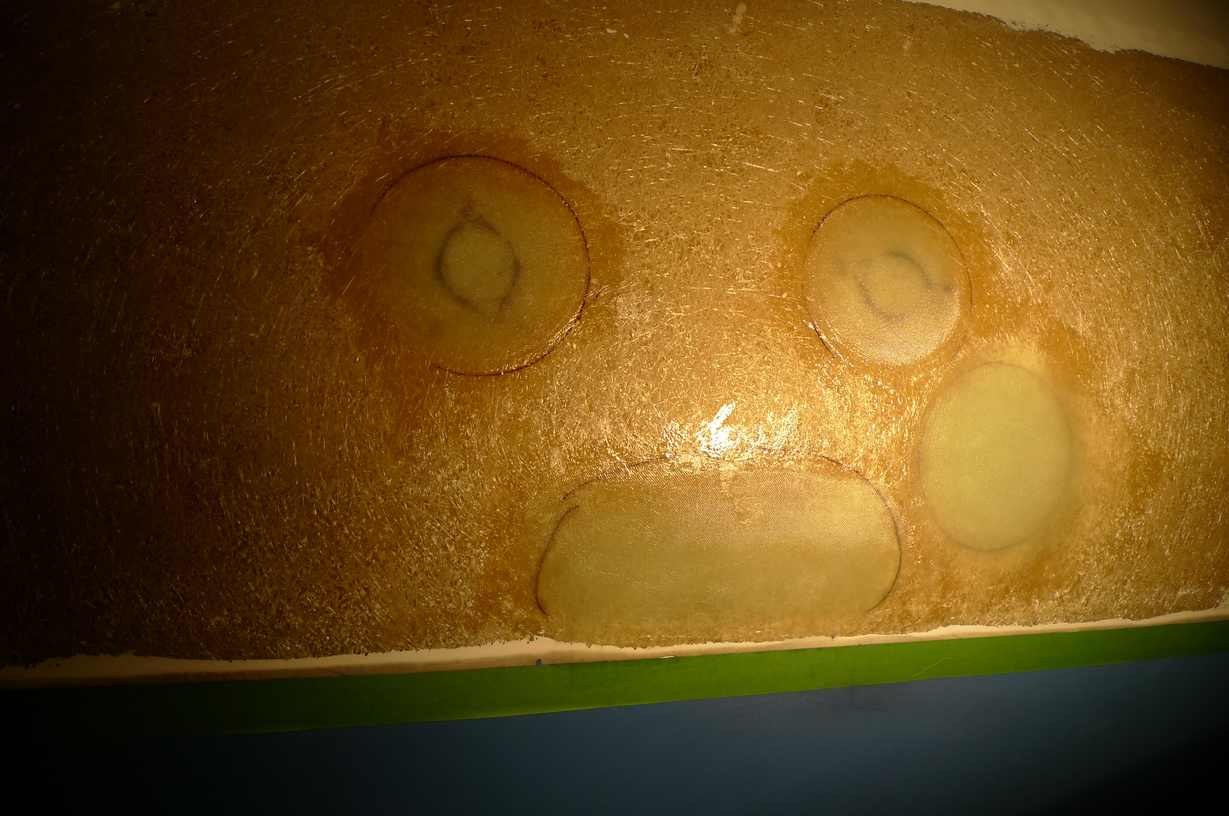
Pics above show the patches that replaced some hydrolized laminate. Most of the grinding was only 3/16 inch deep. It took 8 layers of 10 oz. fiberglass cloth to fill the voids.
Woodwork: Milling the handrails
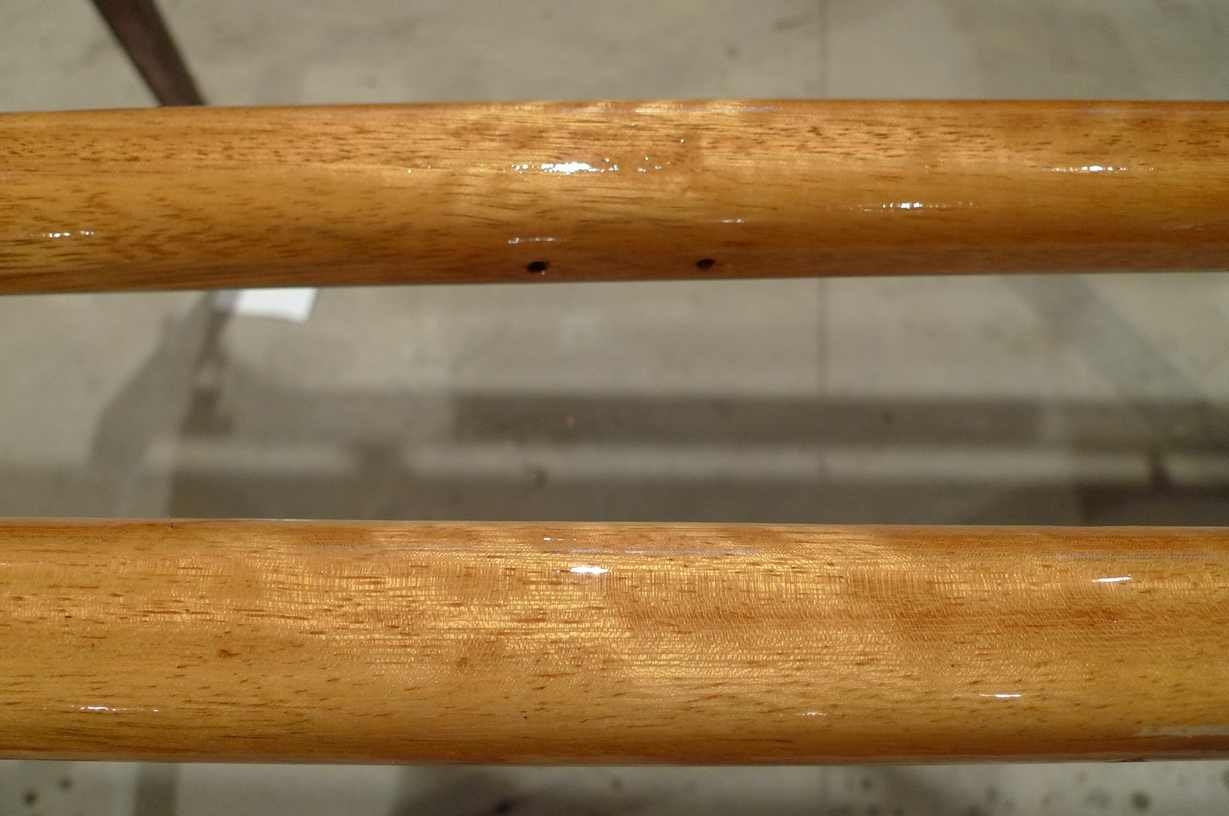
As I wait for my fiberglass/epoxy patches to cure (a week ought to do it) I turned to other projects. I had previously milled some round handrails out of teak. As I said before, it is very hard to mill round stock without the proper equipment. I had used my shaper and router without much success. So, I remade the handrails, this time opting to do a more oval shape. This allows the router bit to have a flat surface for it's guide bushing to ride on to make nice quarter round cuts. I used 1 1/2 x 1 1/4 inch stock to start with. This method turned out much better looking handrails. Pics below:
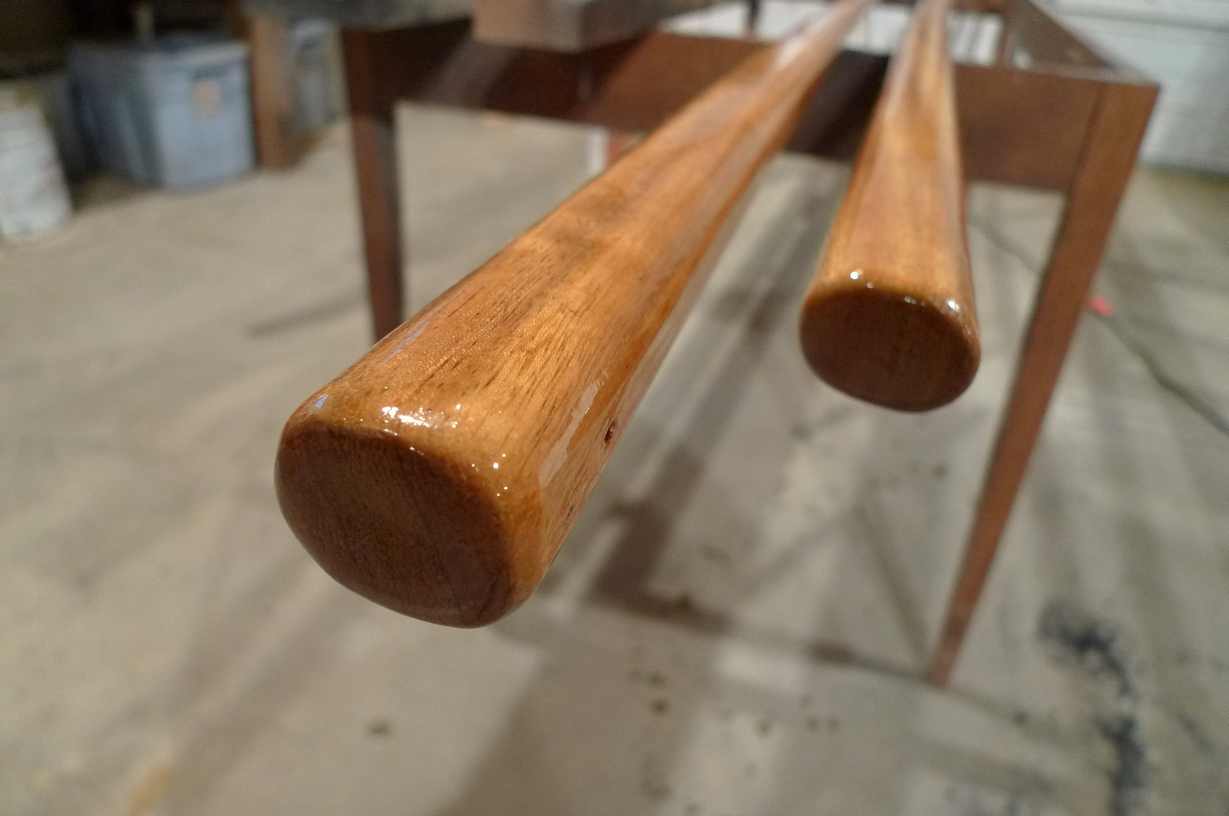
Oval handrails were much easier to cut and turned out superior to the round ones I had cut ealier.
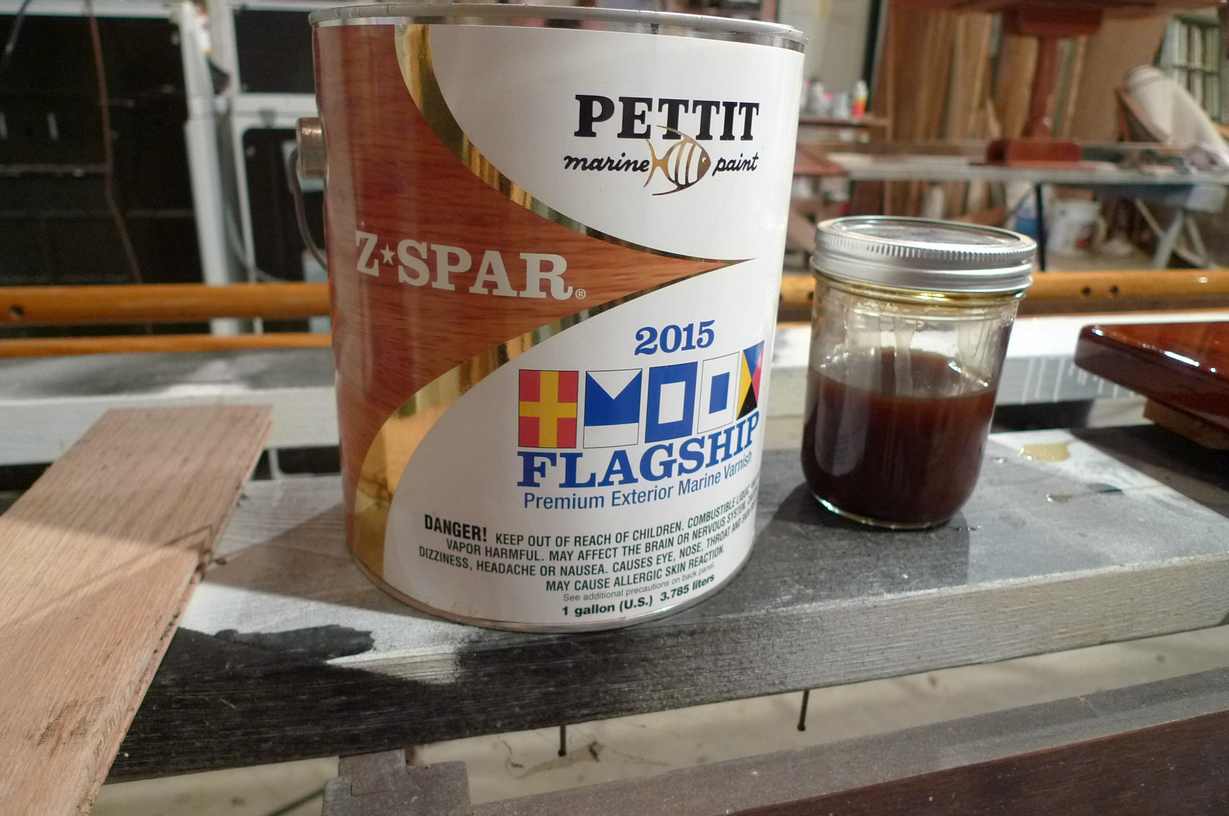
I dry fit the handrail and drilled all screw holes prior to finishing. I am using Petit Z Spar Flagship varnish and like it very much.
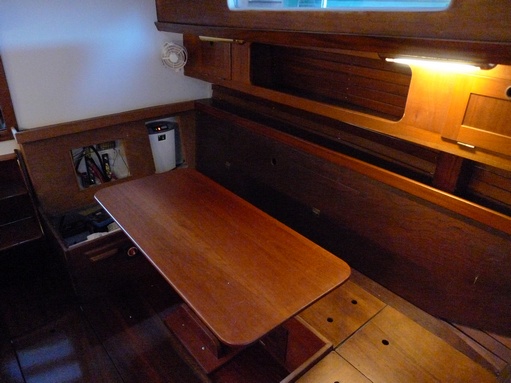
Painting: Cherry table
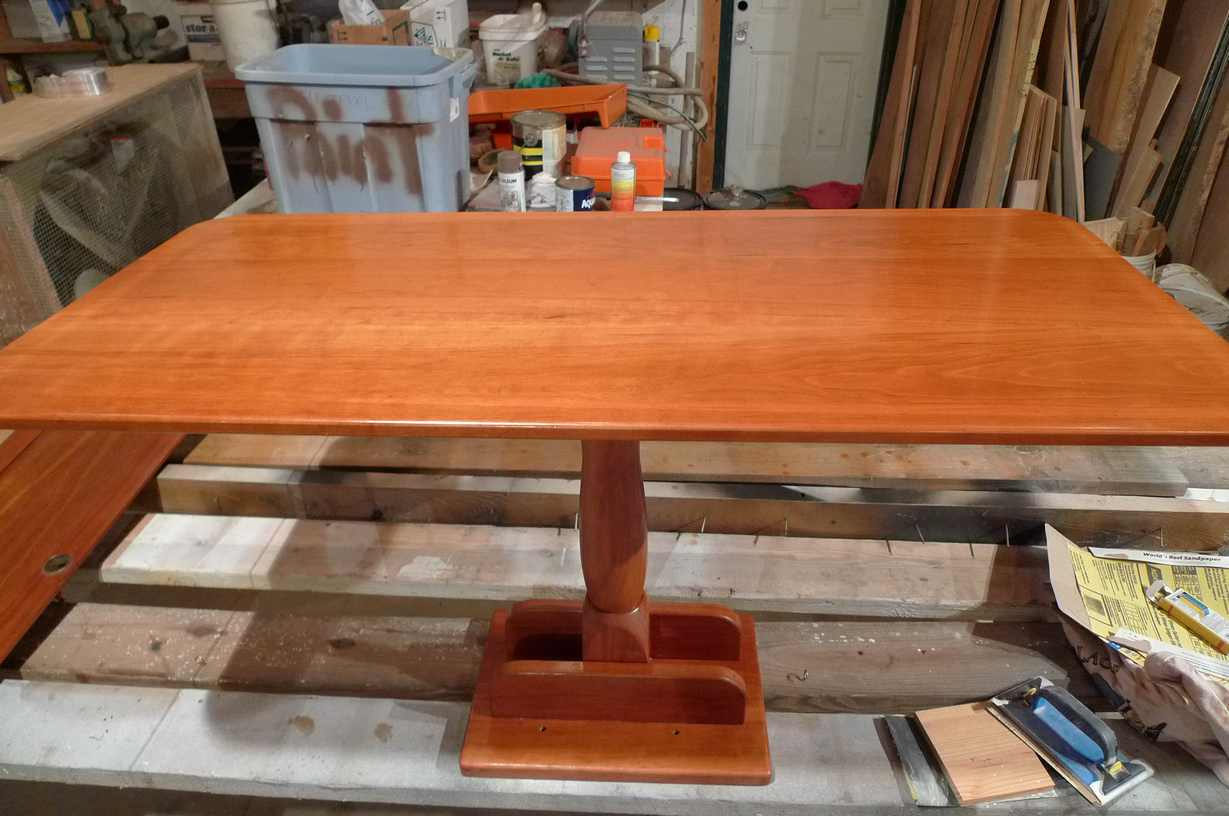
I have started to finish out the cherry galley table with Old Masters semi gloss varnish. It gives I nice pleasant look.
Chaos, Fear, and Spirit
Its been almost a month since I have worked on the project. Arkansas and much of the southern U.S. has experienced some of the most destructive weather in a century and I was not spared from the onslaught. First a tornado ripped through Little Rock about a month ago and dropped a large tree in my mom's yard. She was lucky. Then a week later a series of tornadoes ripped through the entire state. One was headed our way. I cleared out a spot under the stairwell and kept an eye on the tv and outside. When we lost tv reception I went outside and kept watch. I watched the most impressive storm I have ever seen build up around us. Then the wall cloud became visable and I screamed at the appoaching storm to skip over us and then ran in telling everyone to take shelter. I stood out for a few more seconds until the wind became violent. I dove into the closet and held on to my family. After a few seconds we heard a loud crunch. I thought we lost our roof. When we came out and looked we could see a large ash tree had fallen on our house. We went outside and walked up the driveway to the road and saw it had taken the roof off our nieghbors house and every tree in their yard. It also took about a hundred large trees and crushed the garage from the neighbor on the other side of us. Someone listened to me. It had skipped over me for the most part. It was headed straight for us and turned almost 90 degrees before hitting us. A week after that tornado, we recieved 12 inches of rain in two days and flooded the entire valley. My house floor level was built 6 inches above the one hundred year flood level. The rising water crested 4 inches below my floor level. The water swept through all my barns and under my house. It cleared out everything that floated and piled it all up against fences and trees. So, in three weeks I have been working to clean up from two tornadoes and a hundred year flood. But I feel lucky after seeing the devastation in other parts of the south.
Hull: Topsides Gelcoat Replacement: 4/19/2011
I have previously removed part of the topside gelcoat because it was in such bad shape. Today I mixed three pumps of epoxy at a time and added milled fiberglass. I rolled this on the topsides and then used a 10 inch sheetrock knife to smooth it out and work the epoxy into the pits. After two coats of the epoxy/milled fiberglass mixture, I filled all remaining pits and holes with an epoxy/wood flour mixture. I bladed this on with a 10 inch sheetrock knife and worked it all over and as fair as possible. It looked reasonably fair. I then let this set a bit and then went over the area with System Three Quickfair. Tomorrow I will sand this out and continue to add fairing putty and sand until fair.
Hull: Topsides Gelcoat Replacement, Fairing, and Painting: 5-10-2011
I have been working on and off on the topsides for about a month now. It has turned out to be much more work than I had anticipated. I have the port side looking pretty good now. This is what I have done: 1)I took off a section of bad gelcoat with 36 grit orbital sander on port and starboard sides. 2)I then patched some bad areas with epoxy and glass. 3)Next, I rolled on a coat of epoxy on the exposed fiberglass. 4)Before that cured I rolled on another coat of epoxy thickened with milled glass. 5)I then used a 10 inch sheetrock knife to blade the epoxy into the pits. I repeated steps 4 and 5. 6) I then mixed epoxy and wood flour to peanut butter consistency and used my 10 inch sheetrock blade to apply. 7)Before that cured I applied System Three Quickfair fairing compound over the area and smoothed it out best I could with the sheetrock knife. Steps 3-7 must be done on same day and it took me about 4 hours to do a 2 foot by 12 foot area. Next comes all the tedious work of sanding the fairing compound, reapply, sand, reapply, sand. This involves much more work than I had thought. After I had had enough fairing, I sprayed on Interlux Primekote epoxy primer to the entire topside. Below are some pictures of the work.
System Three Quikfair has been applied over epoxy-milled glass and epoxy-wood four coats to build up the new starboard gelcoat(above).
Port side showing Interlux Primekote layer(above).
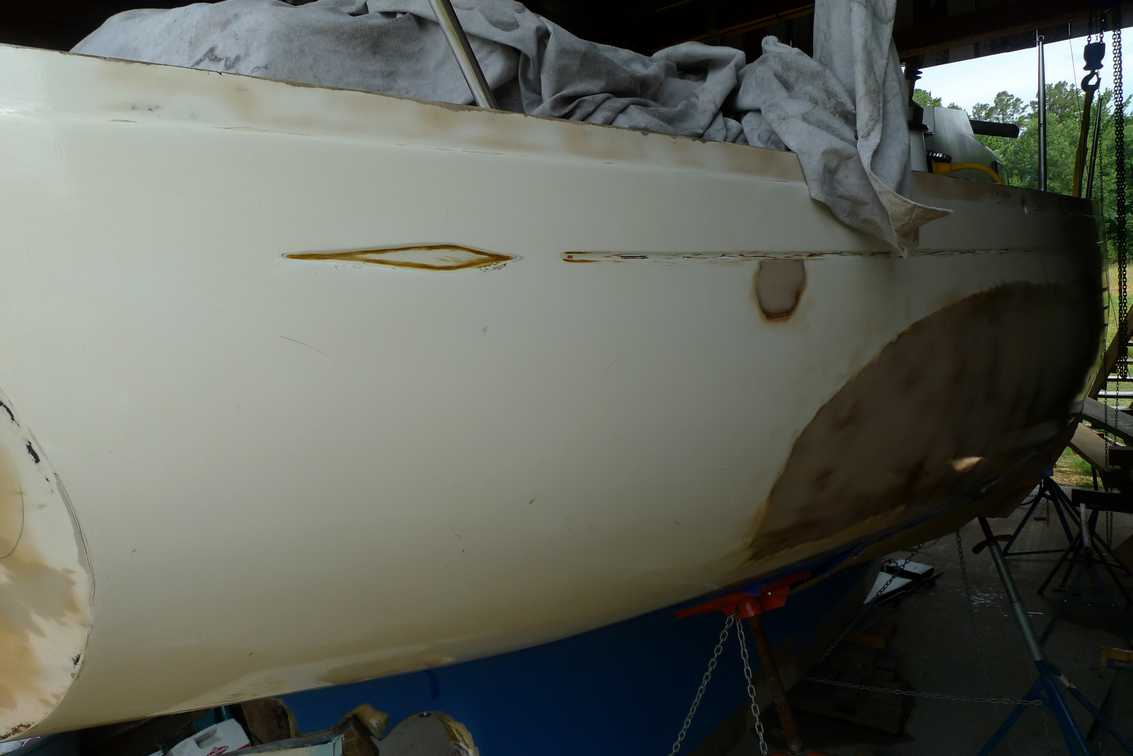
Replacing epoxy putty on stearn center line. The Rasmus was built in halves and bonded together and faired at the factory using epoxy putty. This putty will crack and chip over time and needs to be replaced. Below is a picture of new putty on the stearn centerline(above).
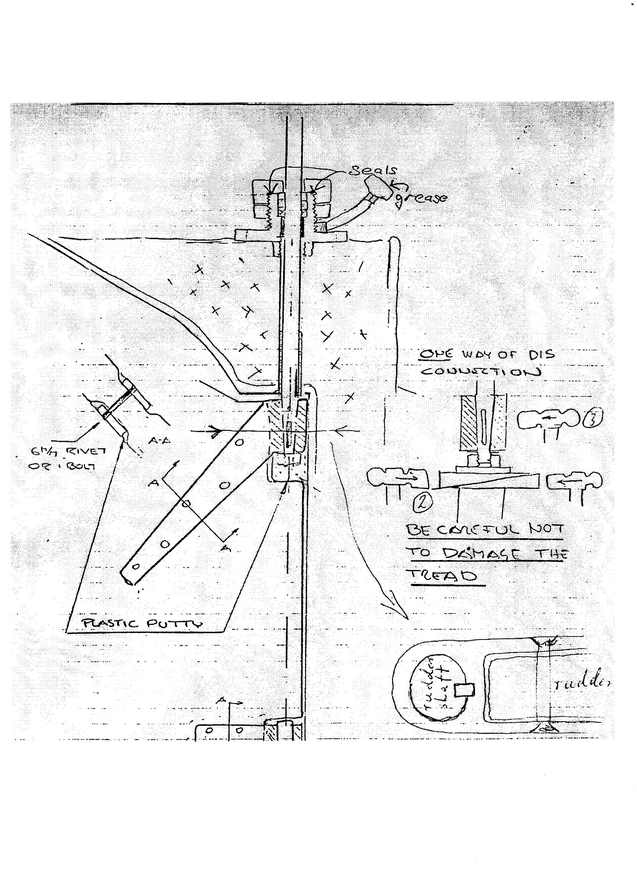
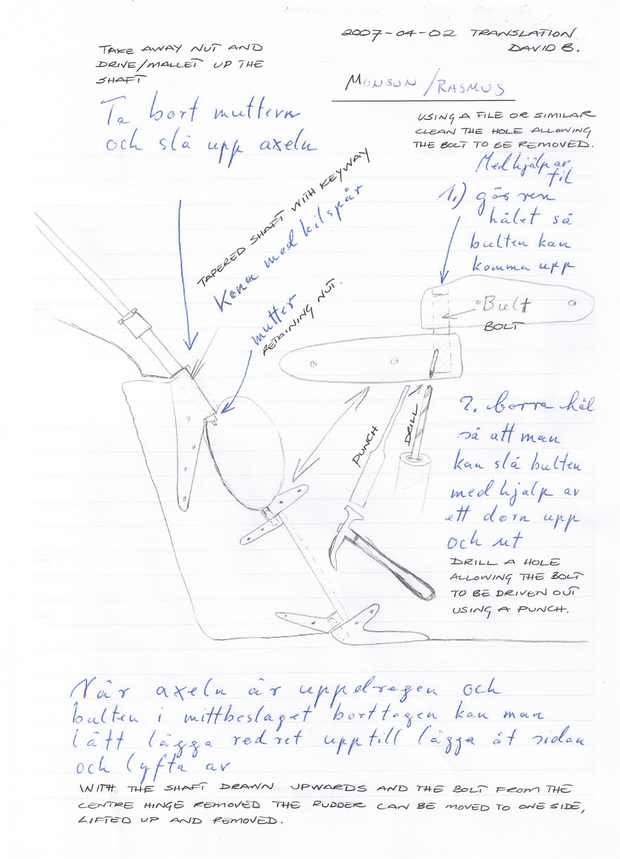
Hallberg Rassy Rasmus 35 Rudder Assembly
Below are schematics of the rudder assembly if anyone is interested.
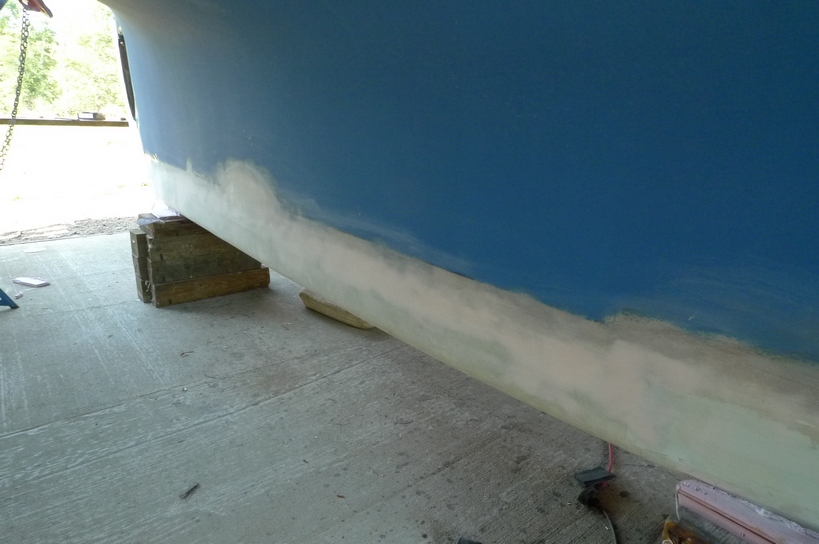
Hull: Topside Fairing 6-20-2011
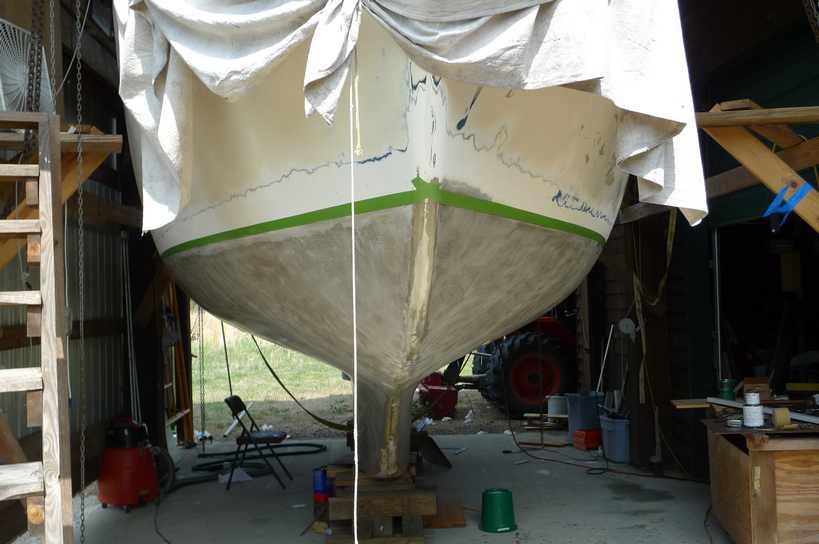
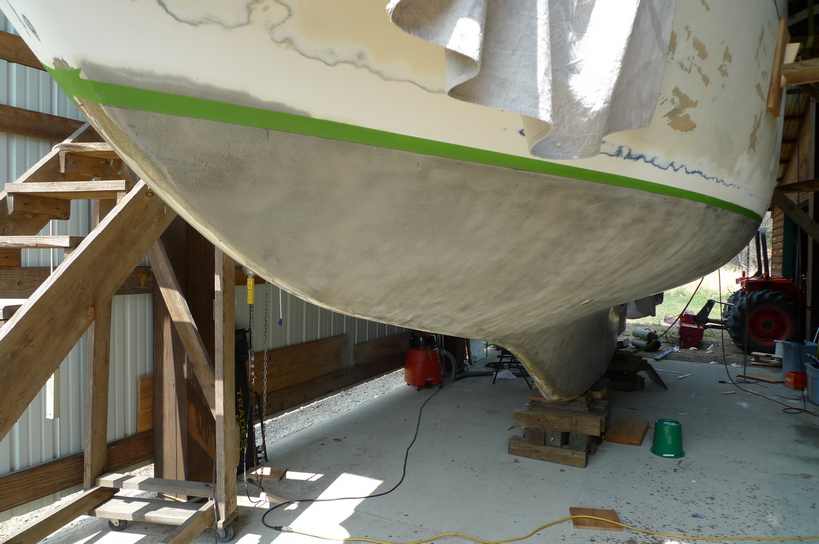
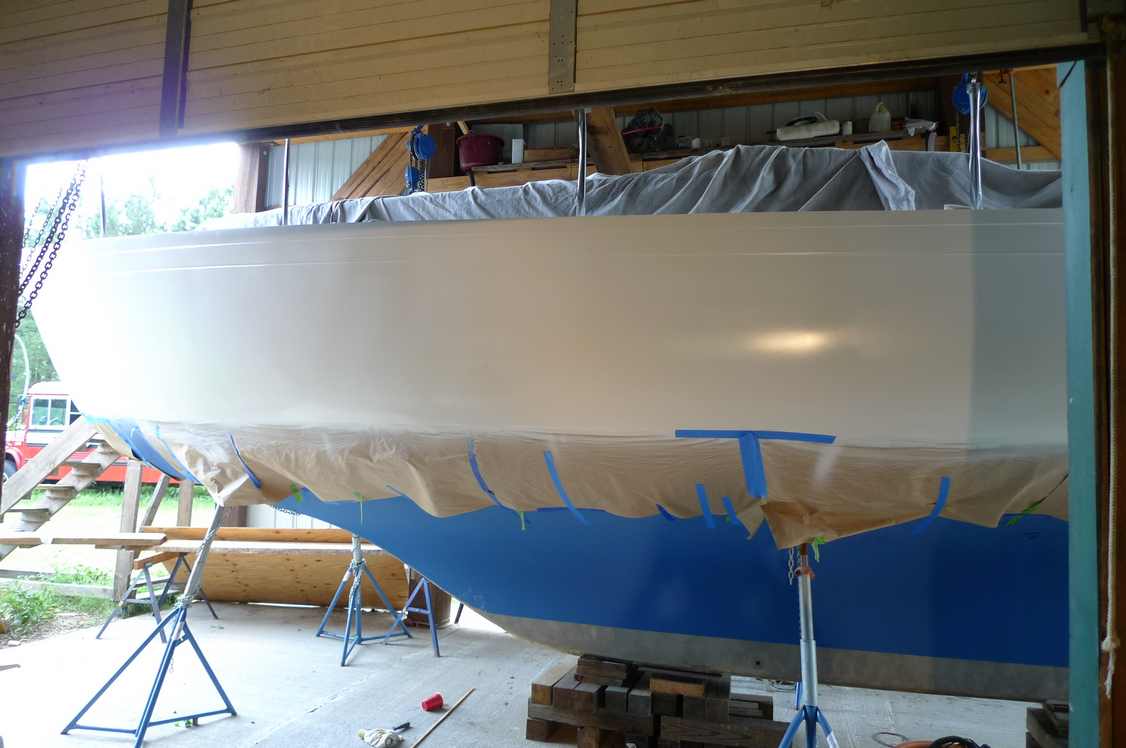
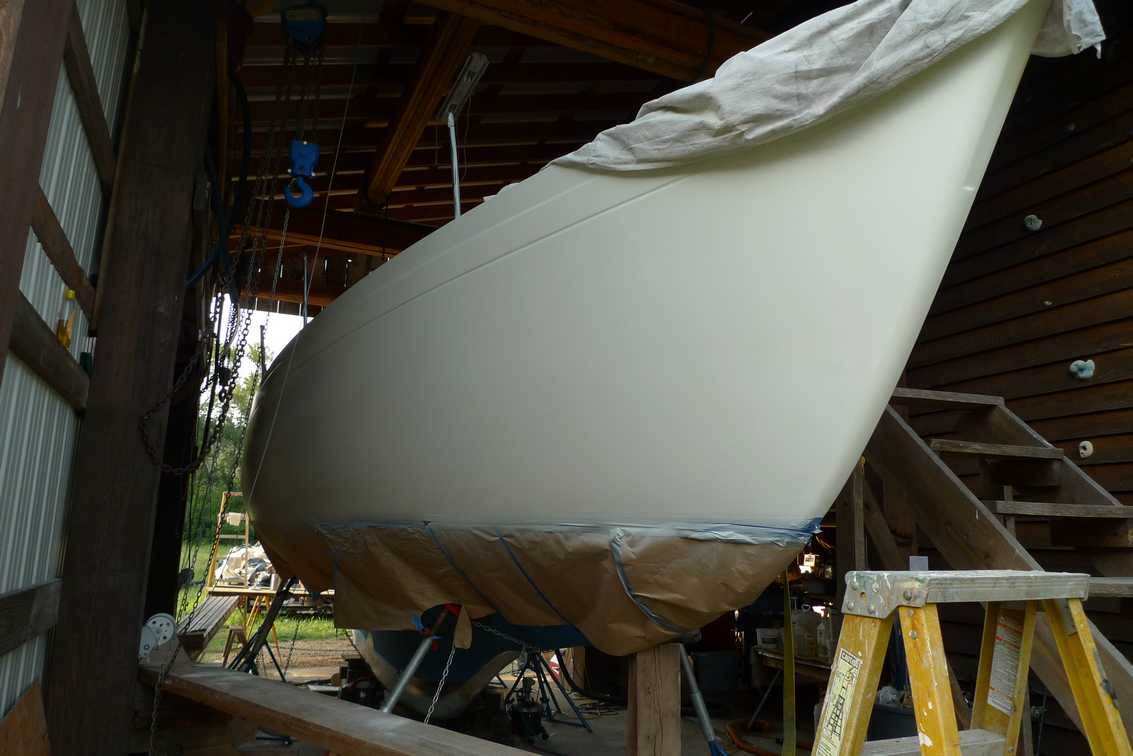
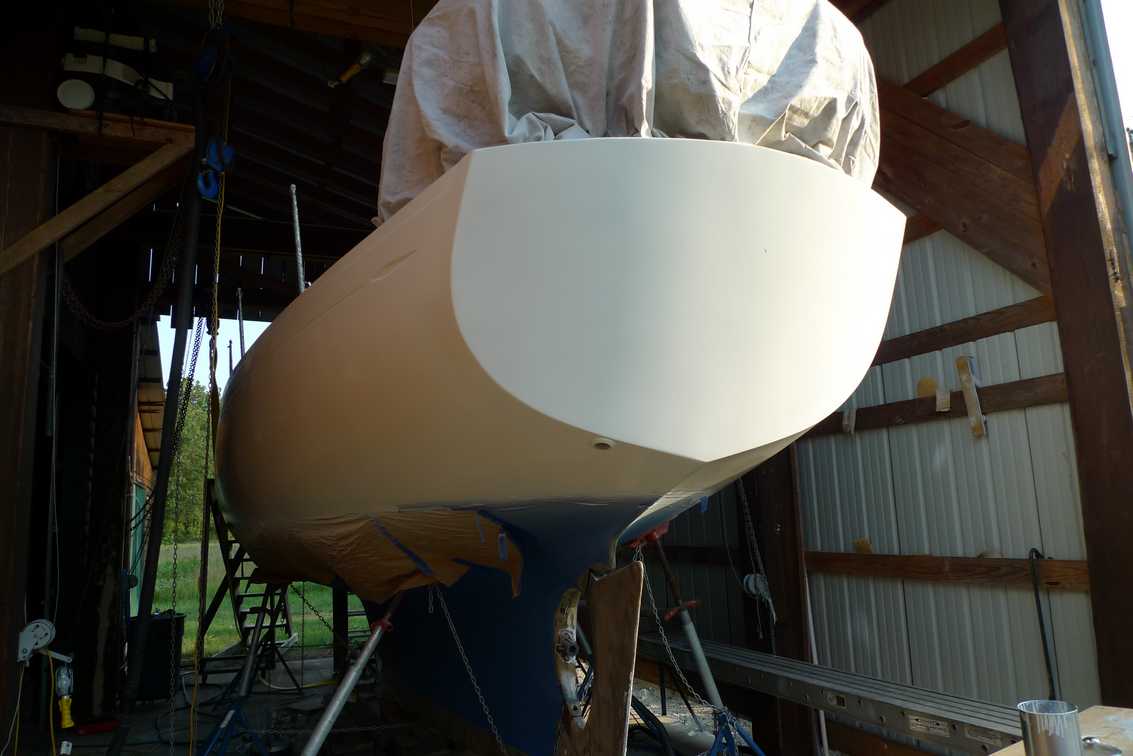
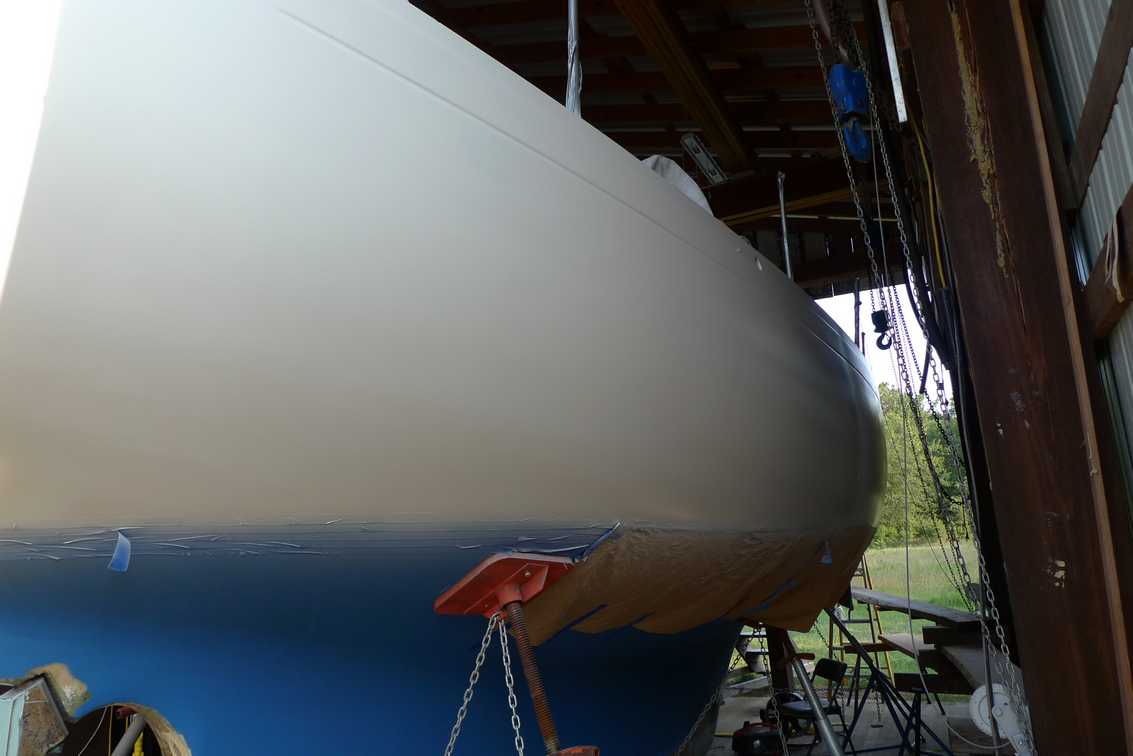
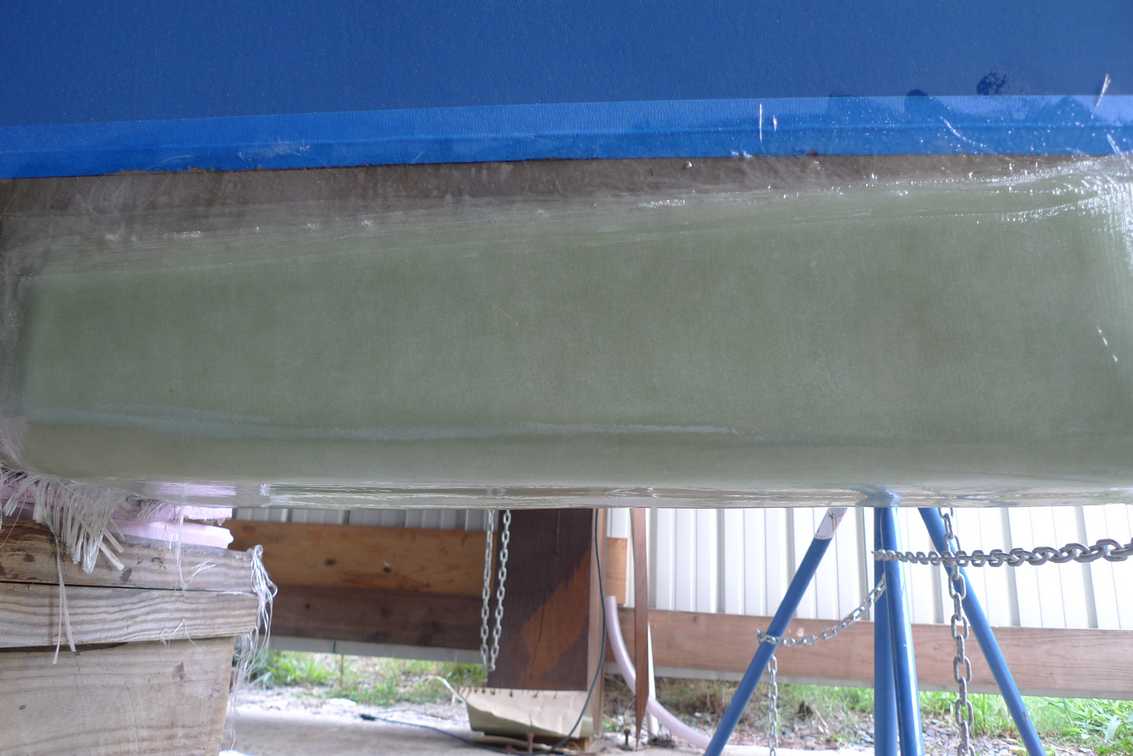
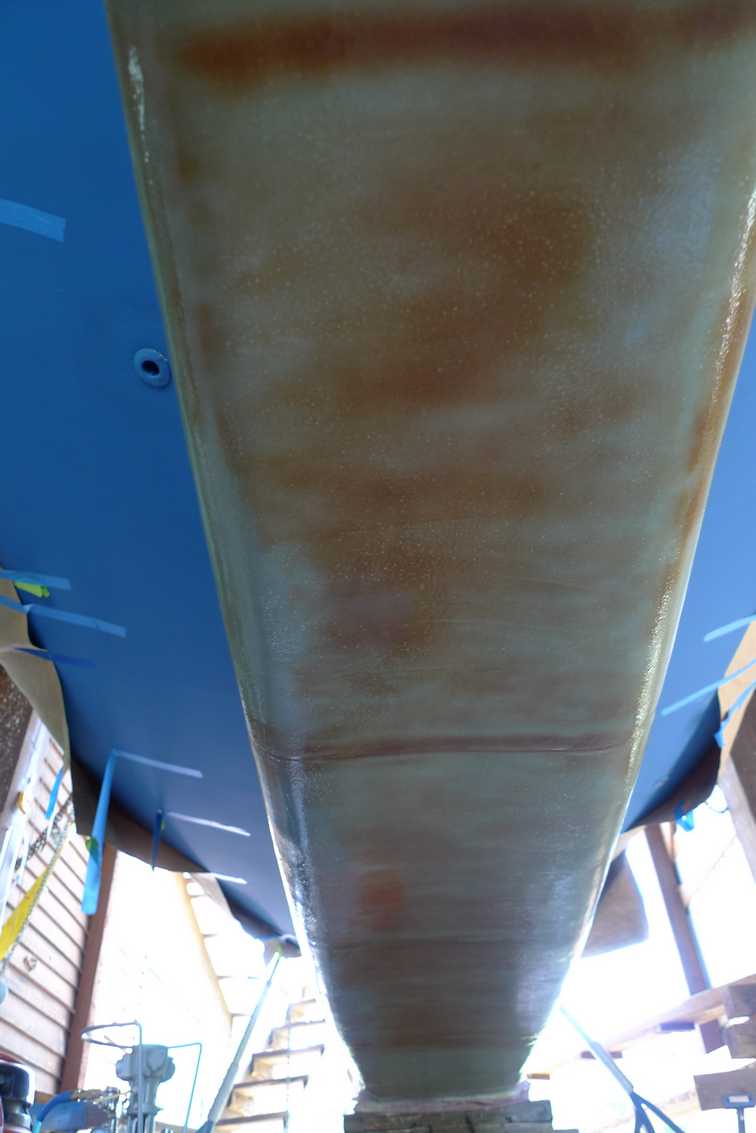
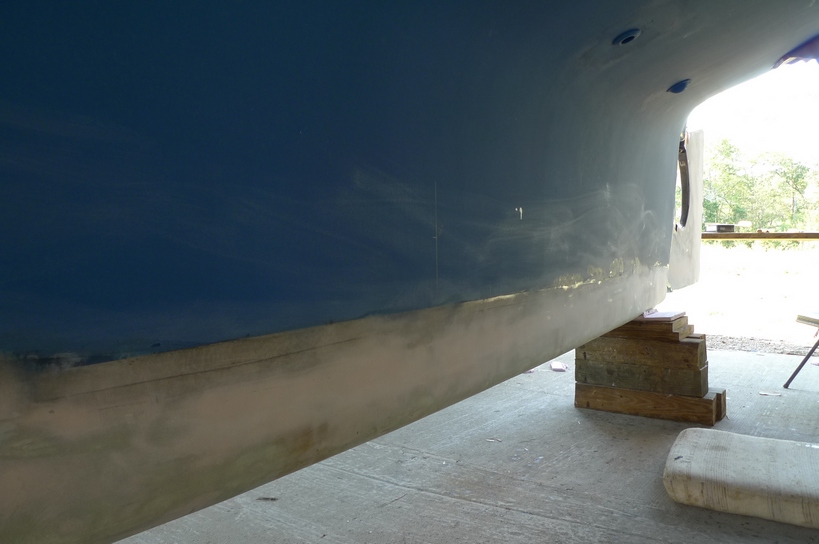
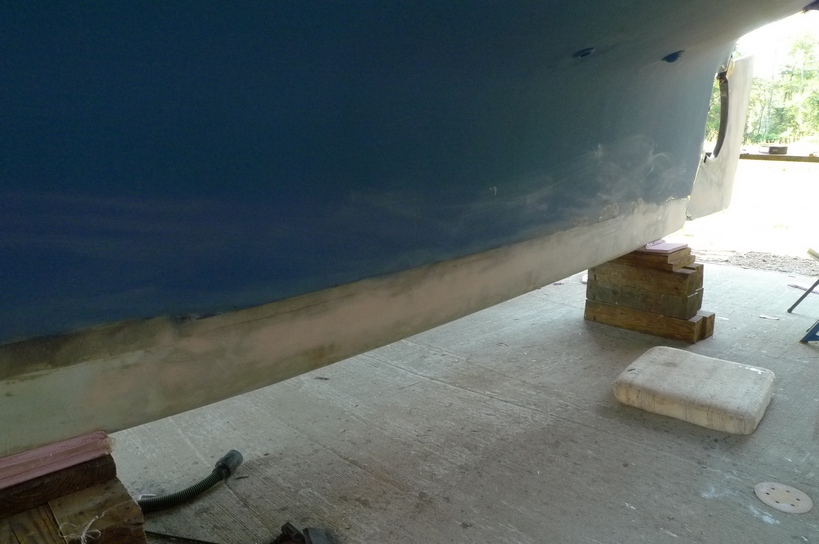
I have been working for two months on the topside gelcoat application and fairing. It has been much more work than I ever could have imagined. I am thankfully nearing the end of it, no matter how it turns out. So to recap, I have removed the crumbling gelcoat down to the FRP from the midsection of the Rasmus on both sides, removed any damaged FRP and repaired with epoxy and glass, coated with two coats of pure epoxy, then a coat of epoxy thickened with wood flour and milled glass, then system three quickfair, sand, more quickfair, sand, quickfair, sand, etc, etc. You get the picture. Last week I got the fairing to an acceptable level and applied a final coat of pure epoxy to seal. I have let it cure for a week and will now remove amine blush, sand with 80 grit, prime with Interlux Primekote and finish with Interlux Perfection. Below are pics of the starboard side after it had been sealed with pure epoxy. Next comes the Primekote.
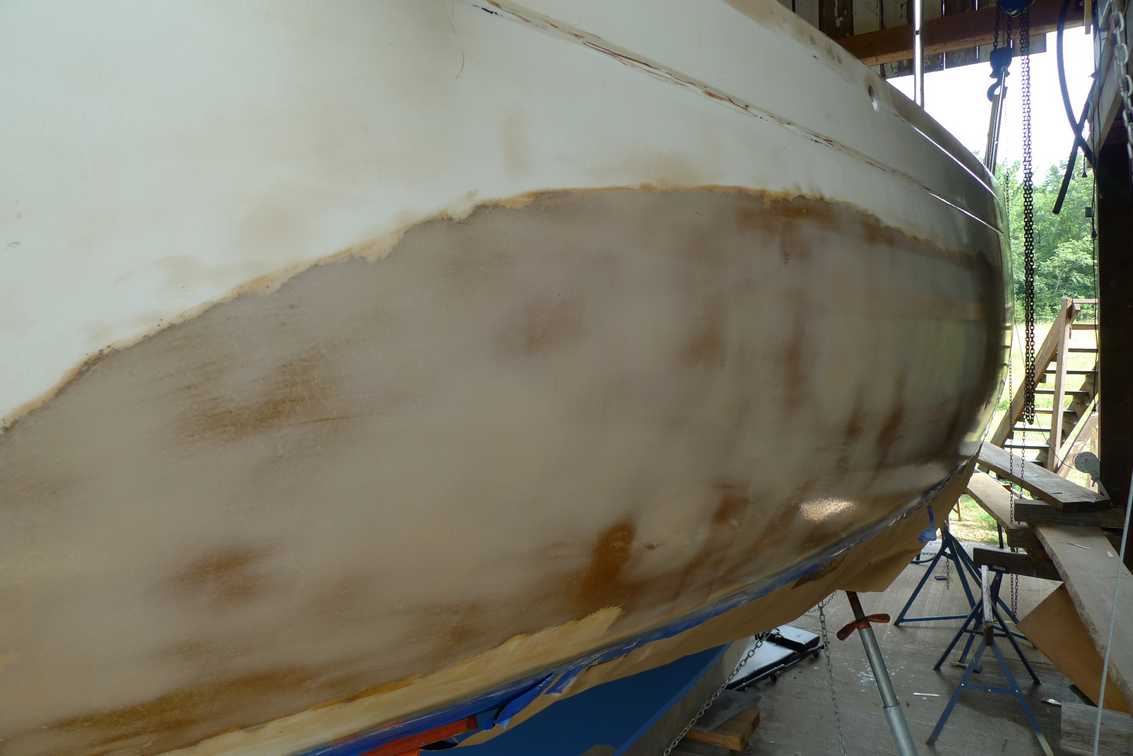
Starboard side that is sealed with epoxy and ready for Interlux Primekote.
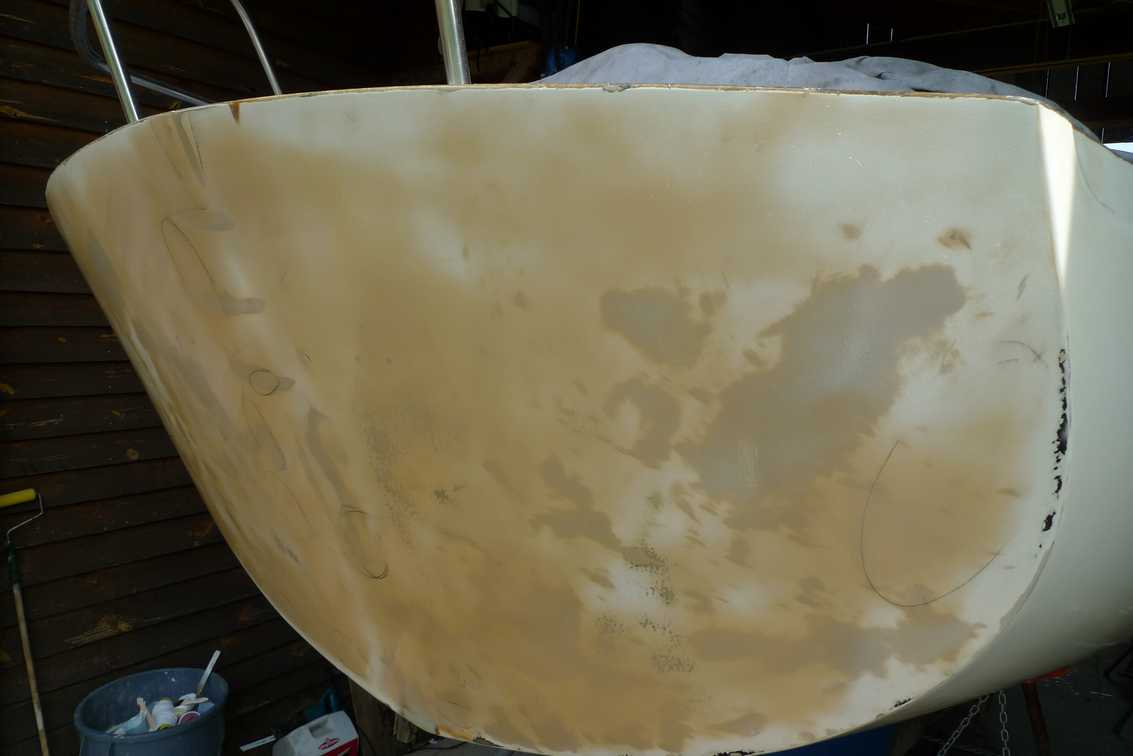
Transom ready for Primekote.
Starboard side.
Starboard midsection.
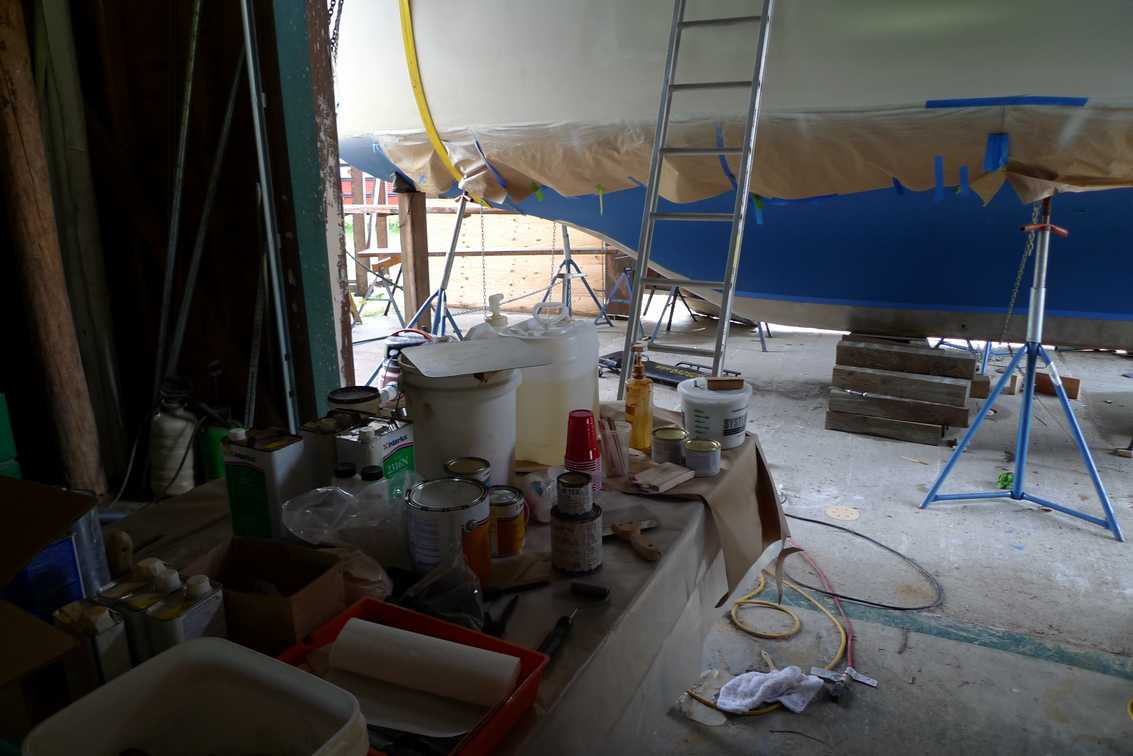
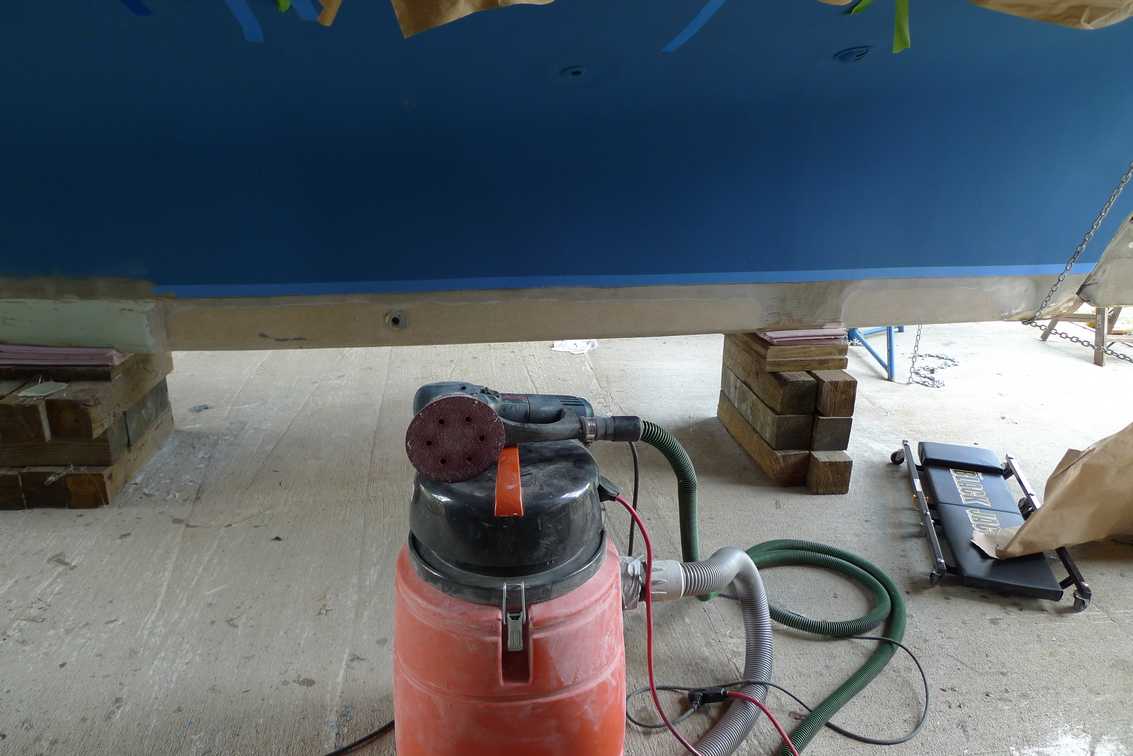
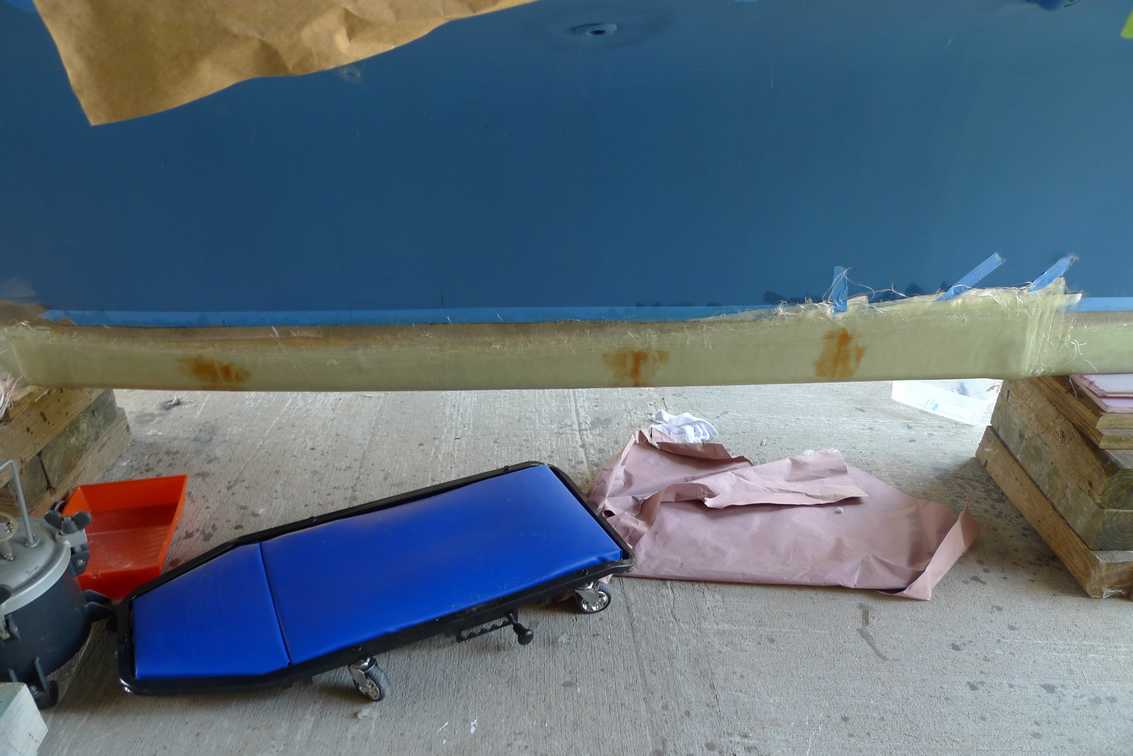
Work table next to the Rasmus.
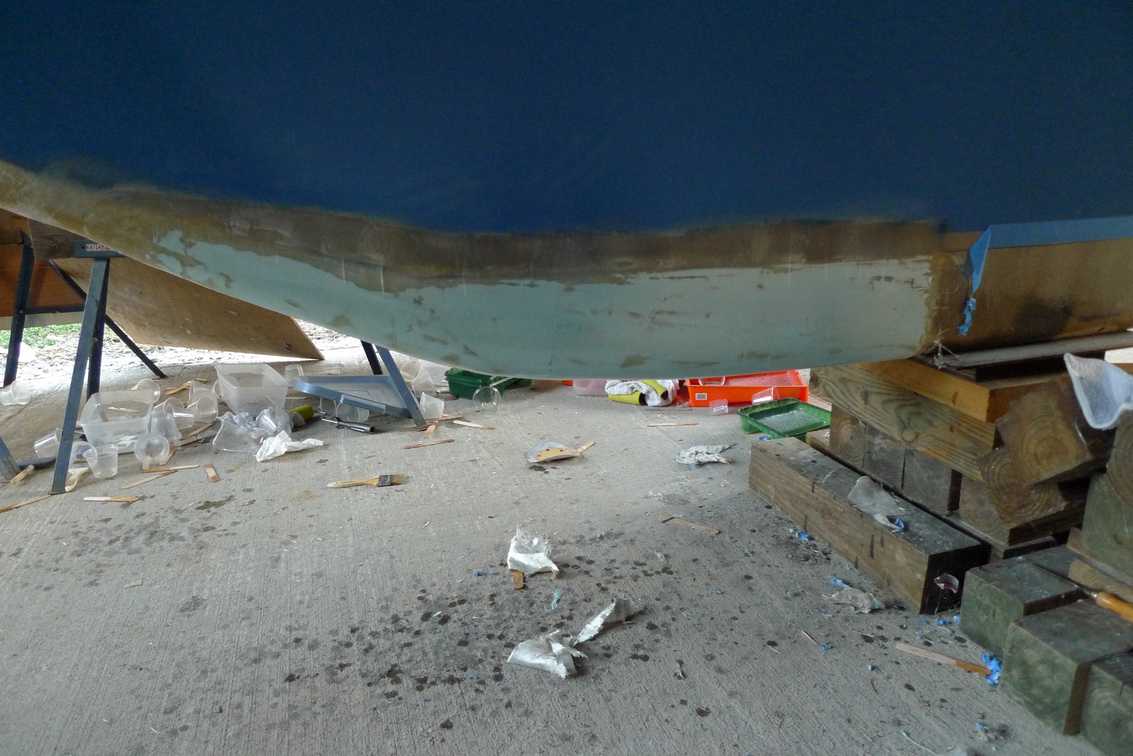
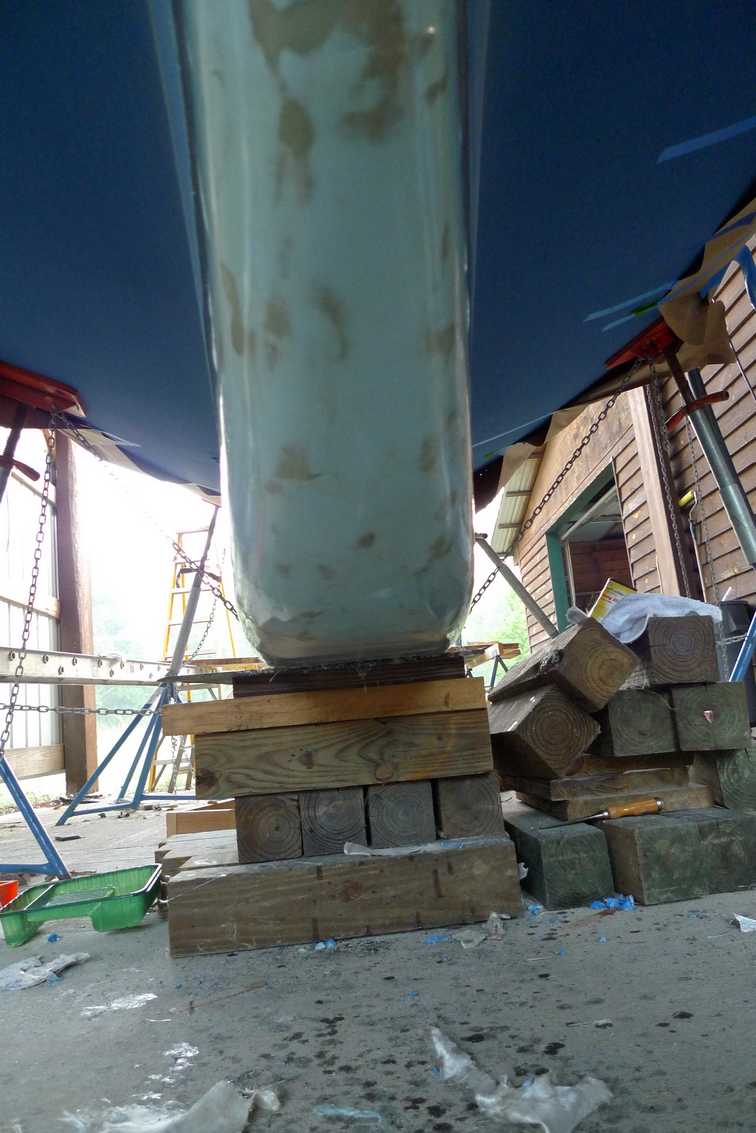
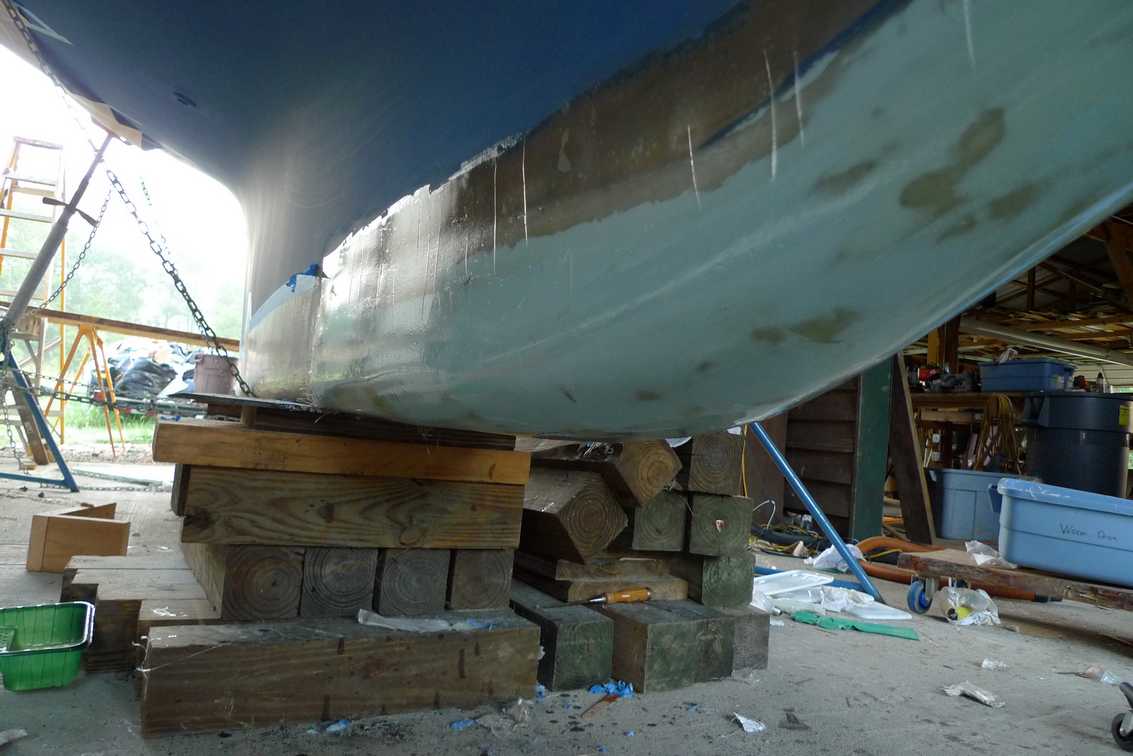
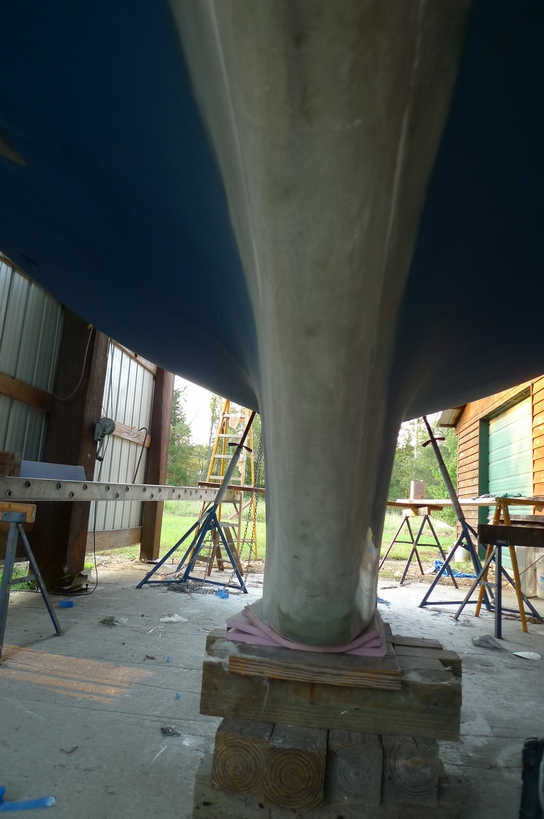
Hull: Keel FRP Repair
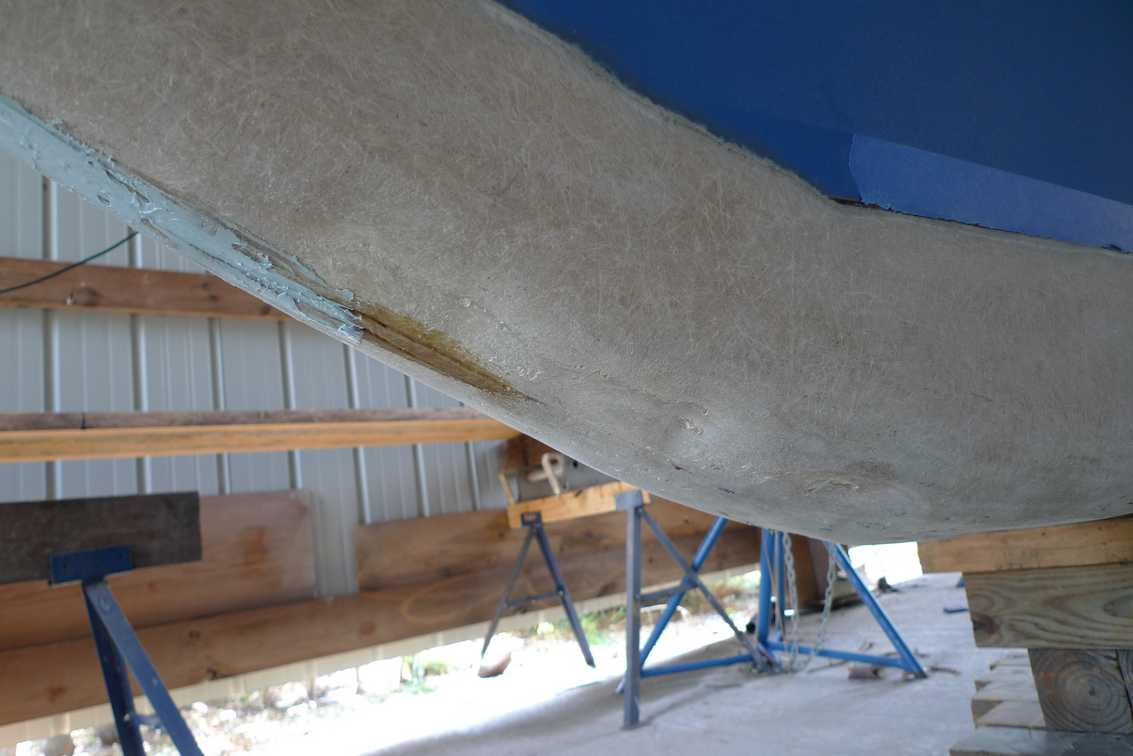
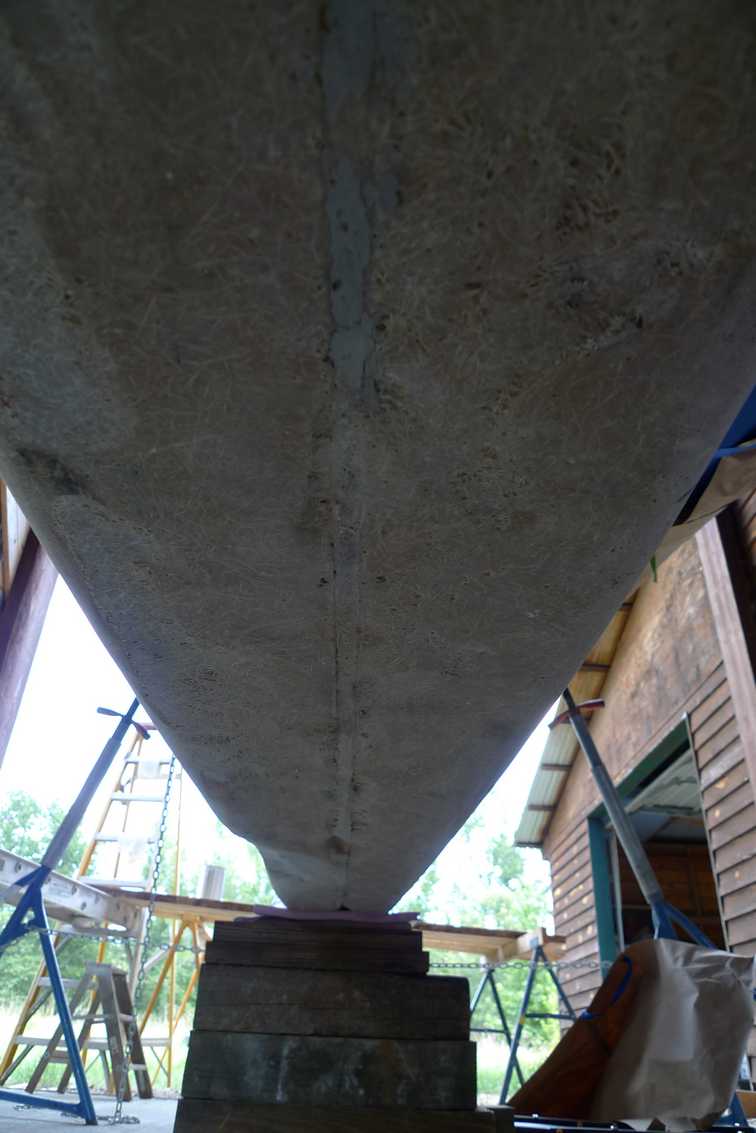
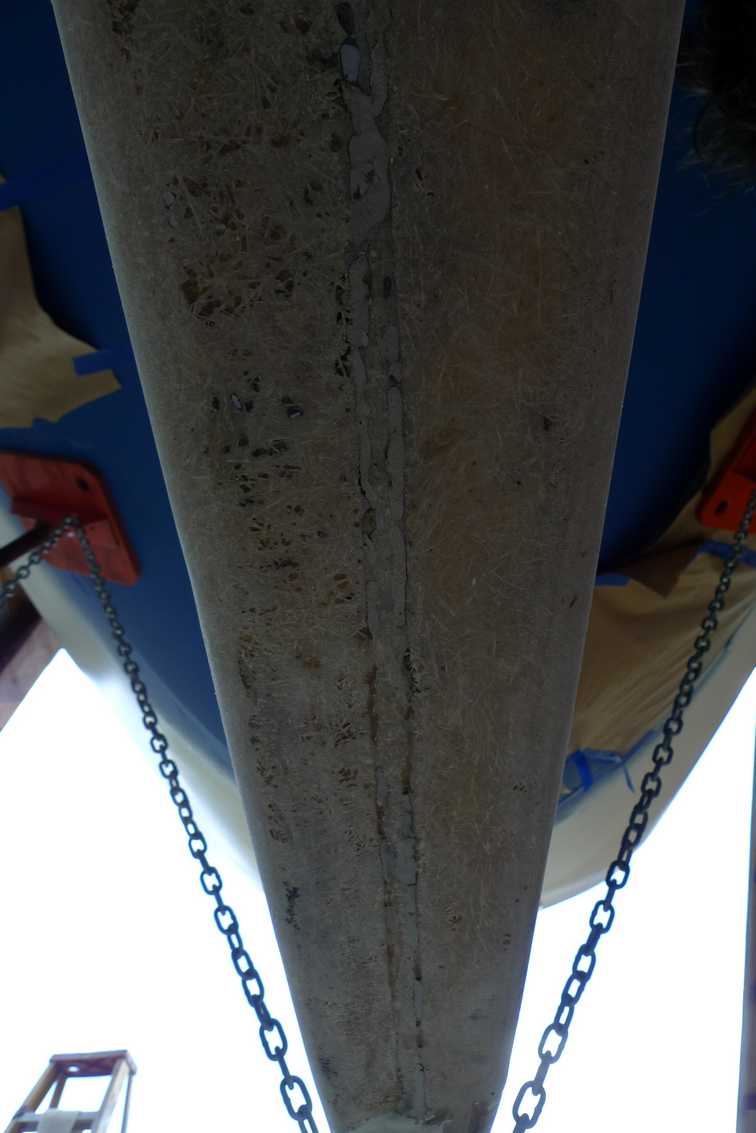
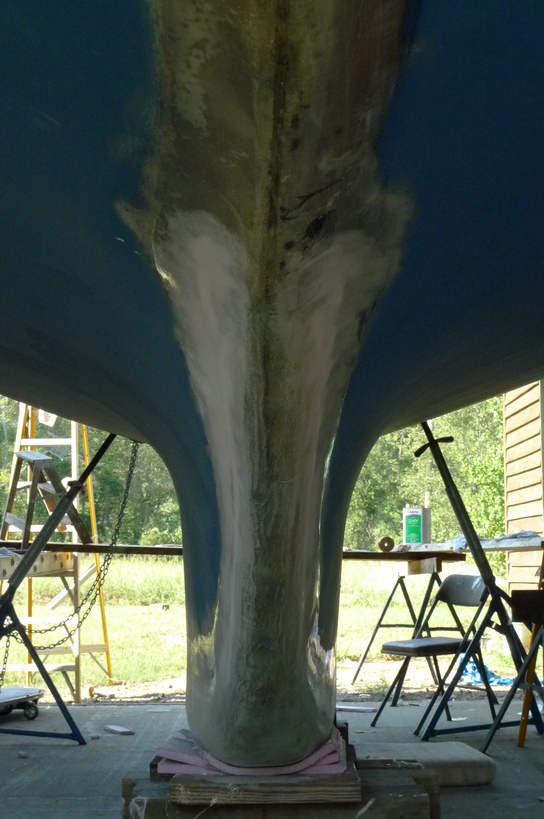
I have started the keel repair. The front edge and some of the bottom of the keel has been damaged through the years and there has been FRP degradation and delamination as a result of little to no maintenance. I had to make a decision here, do I grind out all the damage and repair or do I grind the worst of it and not go too deep with the grinder and cap the bottom with another skin of fiberglass. I decided not to grind deeply, who knows where there damage ends. I will fiberglass another skin on top of the bad fiberglass and in effect "cap" it like a tooth cap. I will wrap the knew fiberglass around the bend of the keel bottom and go nine inches up the sides to ensure I have attached the cap to undamaged fiberglass. I will do it in sections and will start with the forward edge of the keel. I have ground around one quarter of an inch of damaged fiberglass off the bottom and front edge of the keel. Pictures below.
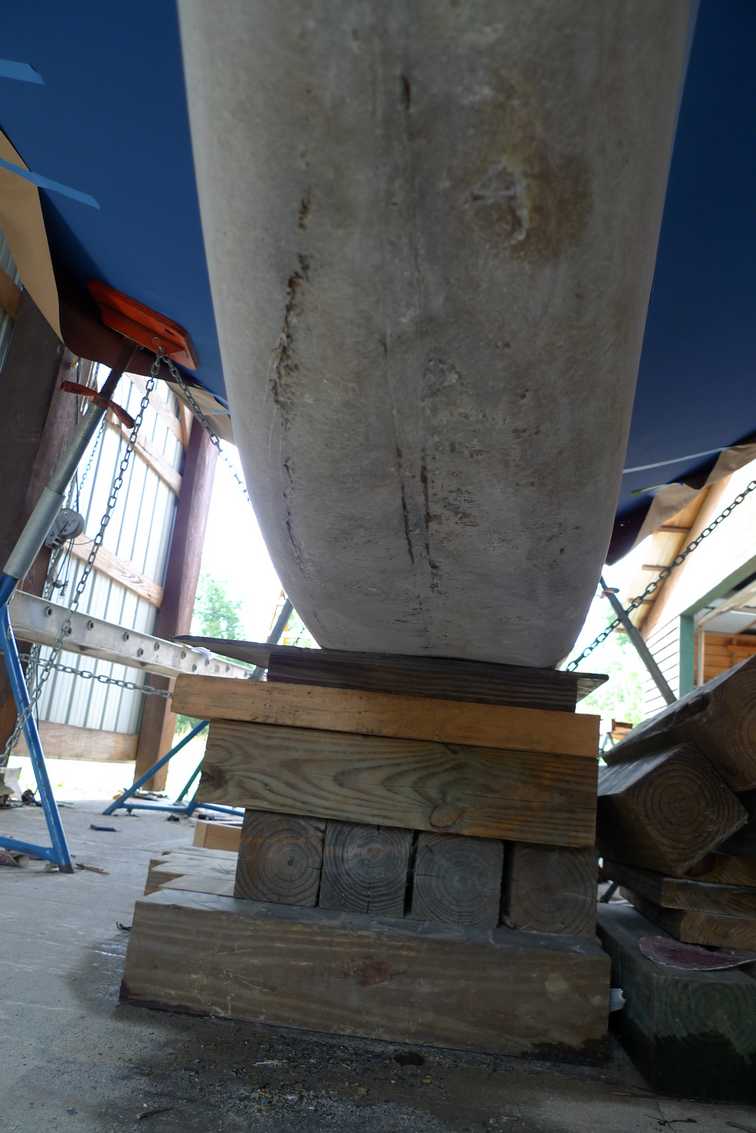
You can see the delamination on the left edge of the keel bottom. It looks to me like there has been about 3/8 inch of FRP removed from groundings and grindings. I will build this back up with new fiberglass and wrap it up the sides 9 inches to "cap" the bottom of the keel.
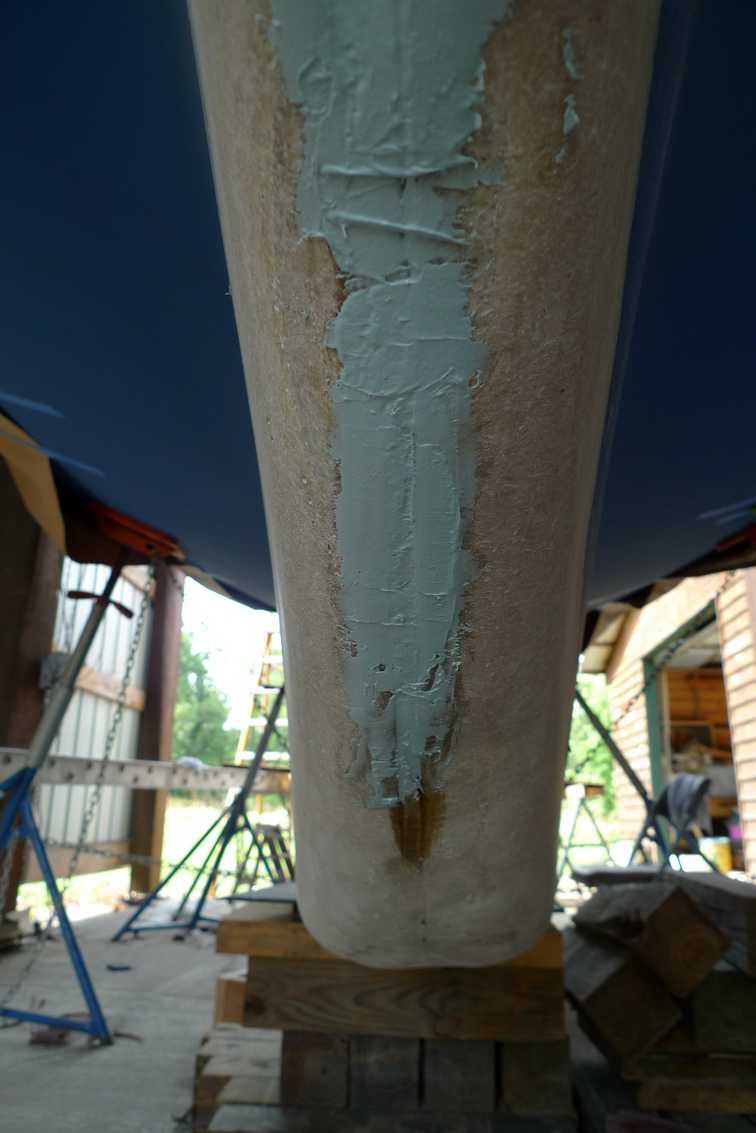
I removed the old epoxy putty from the centerline groove and replaced with Interlux WaterTite Epoxy Putty.

I will "cap" up to the paint line.
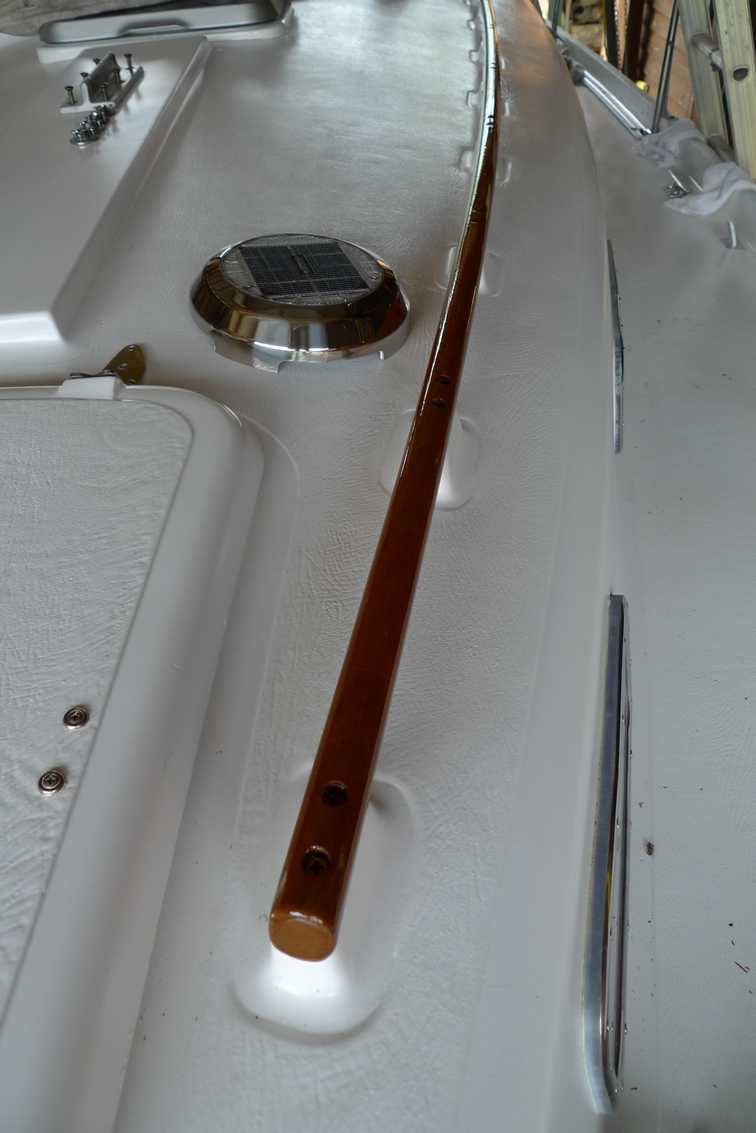
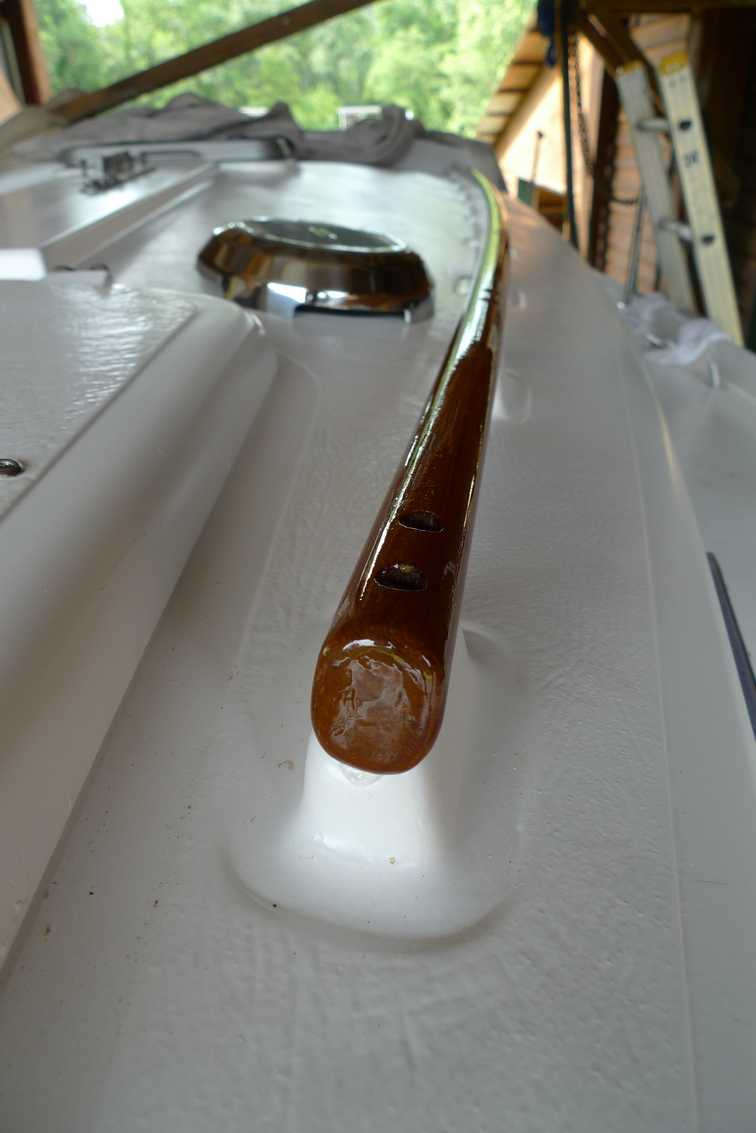
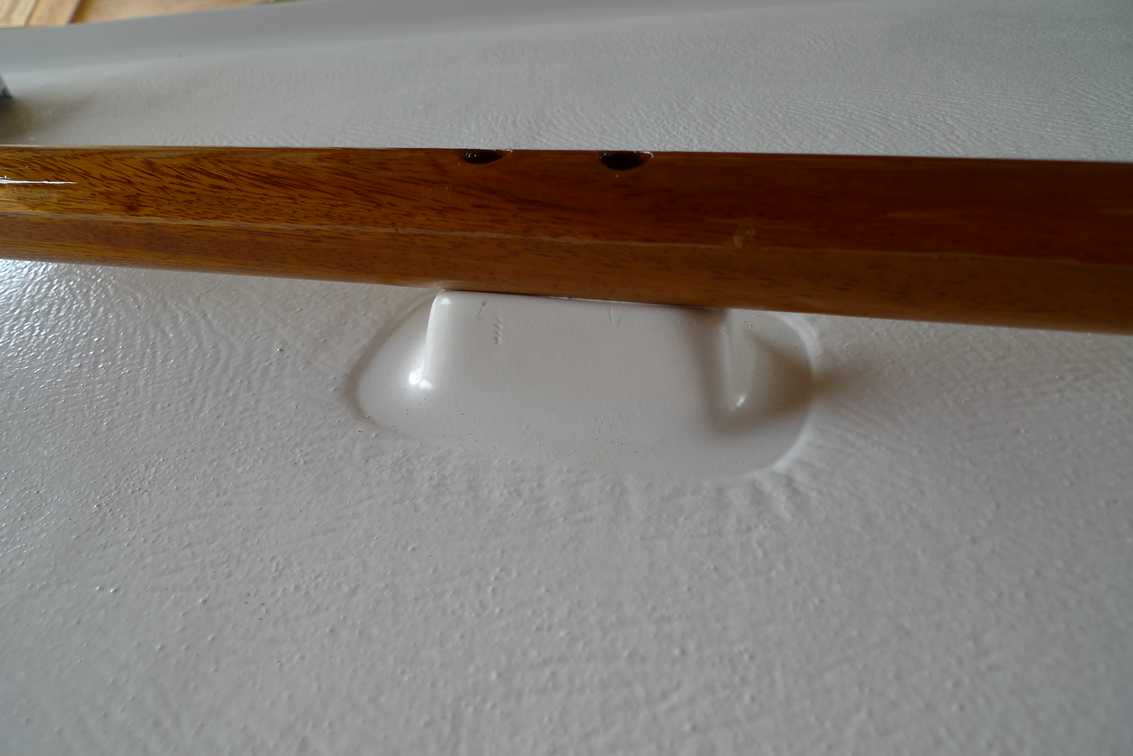
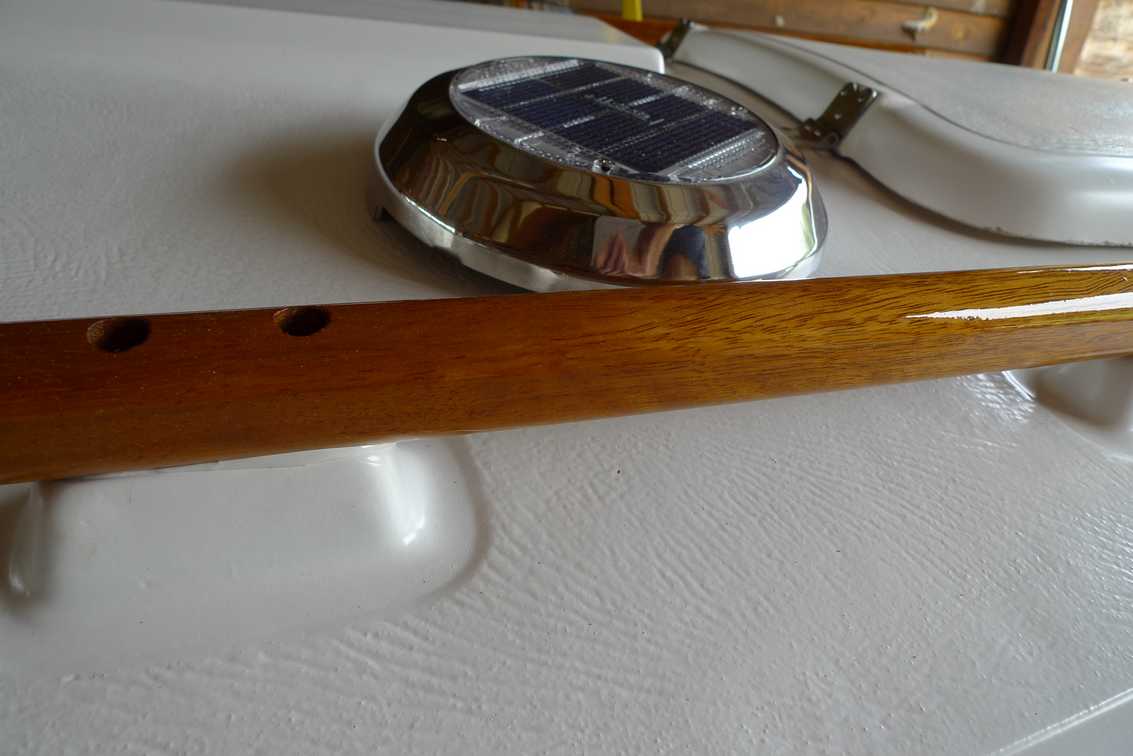
Woodwork: Handrail Installation
I screwed on the handrail using silicone bronze screws and 3M 5200 caulk. No, I don't want them to ever come off. Below are pics.
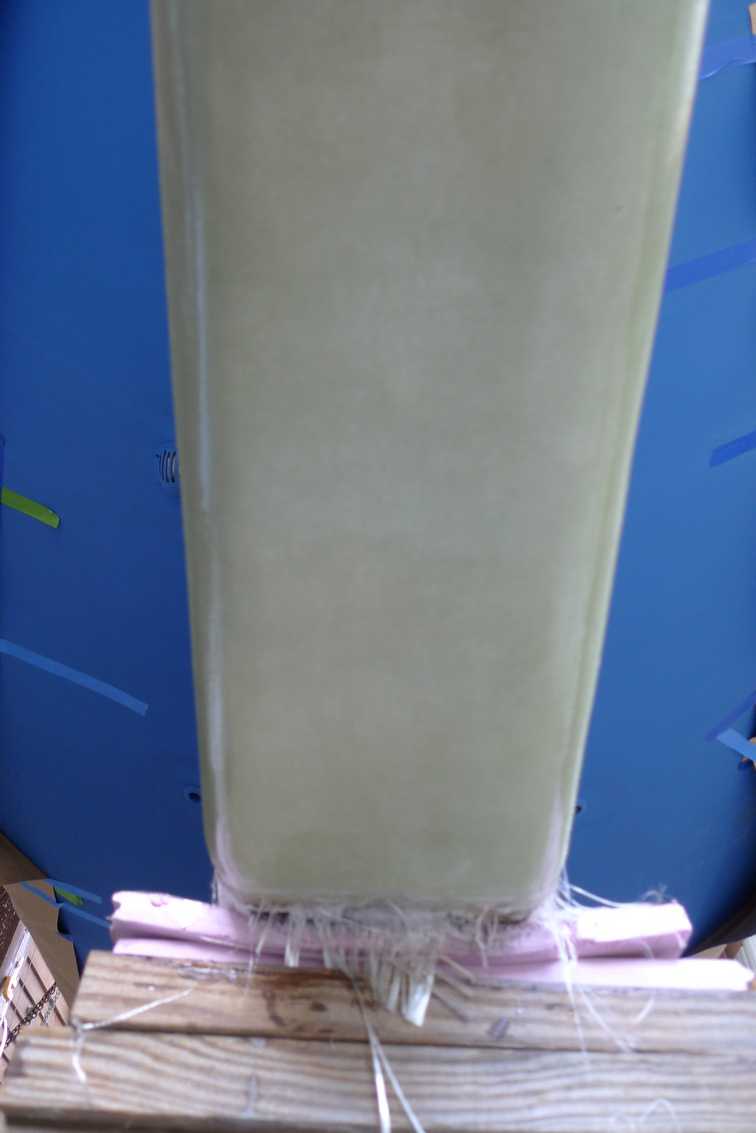
I have nearly finished the first phase of the keel repair. I have "capped" the front edge of the keel for four feet. This took three days of layup work with 6 oz. fiberglass and epoxy. Below are pics.
First phase of keel repair complete.
The blue material is Interlux Watertite Epoxy putty used for fairing.
I am applying 9 coats of epoxy to seal the work from water intrusion.
Before
After
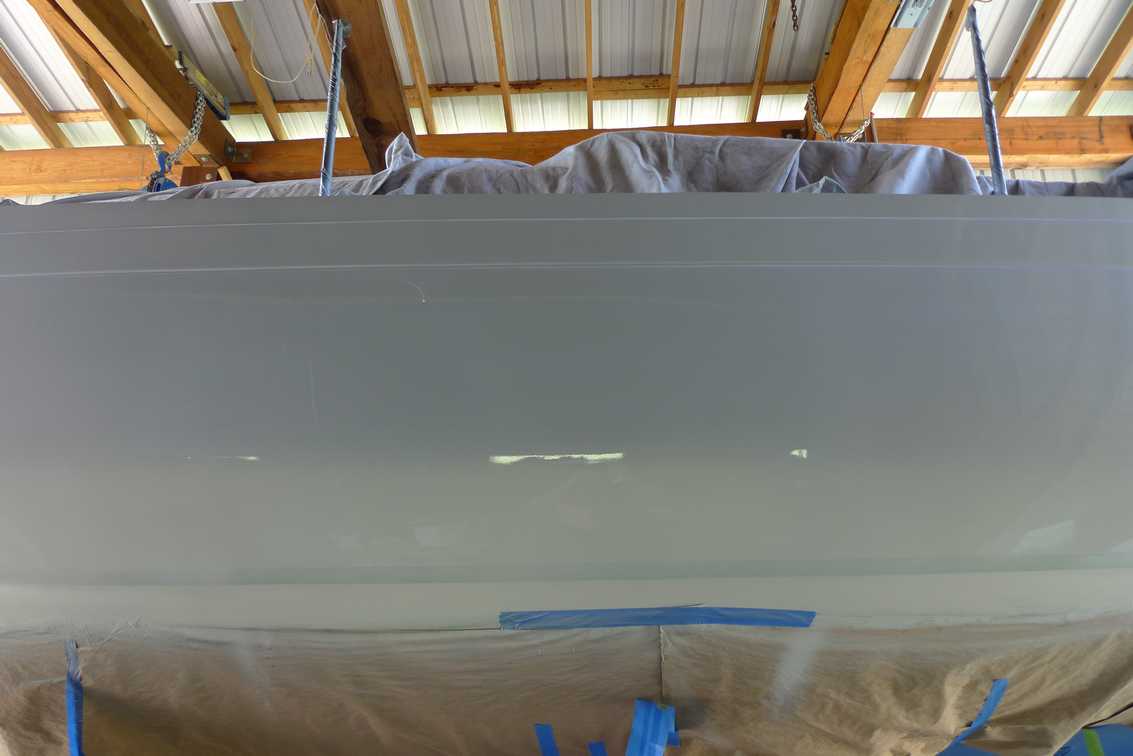
Painting: Topsides
Today I sanded the epoxy clearcoat with 80 grit and applied Interlux Primekote on the transom and starboard sides. It was joyous, having completed all the prep work prior. It went on nice and easy even with the ridiculously steamy weather we have had lately. Below are pics.

Hull: Repairing Damaged Keel Bottom
I have finished the front section of the keel repair and put the weight of the boat on the repair area. It seems to have taken the load with no problems. I have ground the rest of the keel bottom and ground 6 inches up the keel sides with 36 grit sandpaper. That should give the new fiberglass "cap" a rough surface to hold to. I will fill all holes with epoxy/wood flour putty, lay in 18 oz roving fiberglass into the putty, and then lay 20 layers (1/4 inch) of 6 oz fiberglass to make the repair cap. Pics below.
I ground out the worst of the rotten fiberglass and you can see there is still plenty bad fiberglass left. I believe a new fiberglass "cap" is the best way to deal with this problem.
I have ground the keel bottom and sides in order to have a good "tooth" for the "cap".
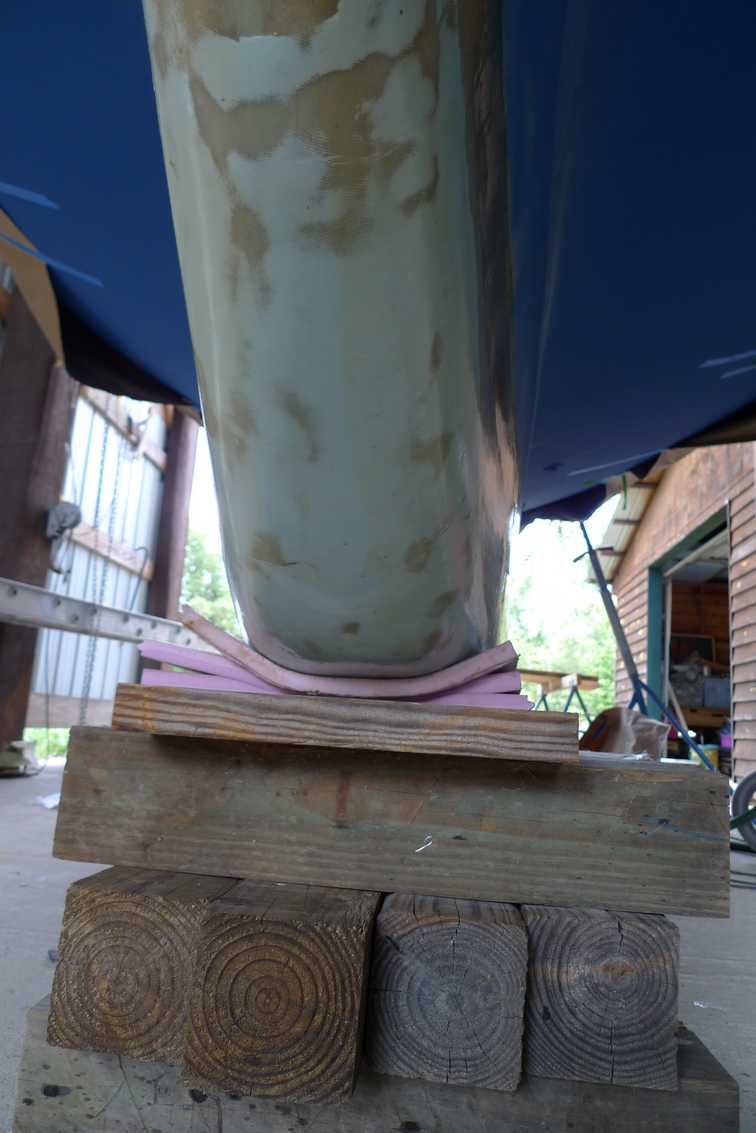
The new cap at the front edge of the keel. I have put put most of weight of the boat on this new "cap" and it seems to have taken the weight with no problems.
Hull: Keel Repair
I have capped the aft 26 inches of keel bottom with 1/4 inch of new fiberglass. It took 20 layers of 6 oz glass to get the 1/4 inch thickness. I will smooth out edges with grinder and fair later. Pics below.
Before
After
I will fair the edges later.
Hull: Keel Repair (7-26-2011)
Last week Darryl and I laid down the fiberglass/epoxy "cap" over the bottom of the keel. It takes about 20 layers of 6 oz. glass to make 1/4 inch thick laminate. It was hard work but we had no problems putting it on. I laid on my back doing the laminate work while Darryl mixed epoxy. I would lay a layer on and wet it out real nice, let it sit until it just got tacky so the next fiberglass layer would stick and not slump off, then wet it out, etc. etc. Pics below:
Fiberglass "cap" on bottom of keel above
Before fiberglass "cap" above
After fiberglass "cap" above
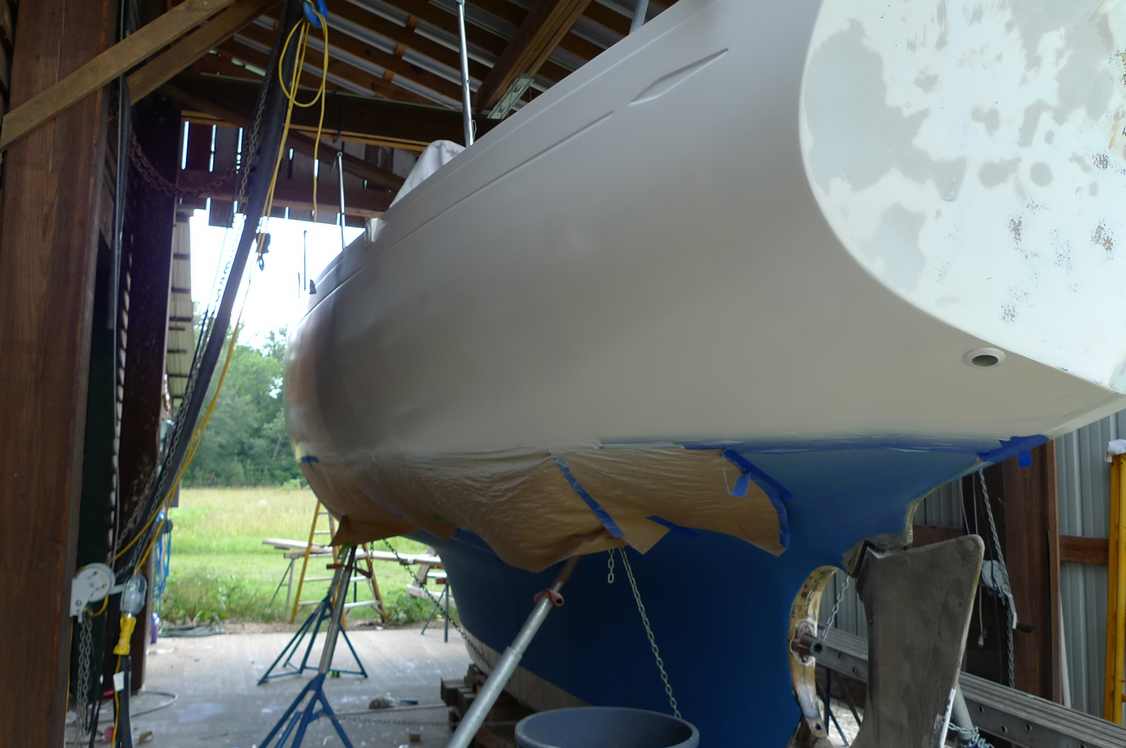
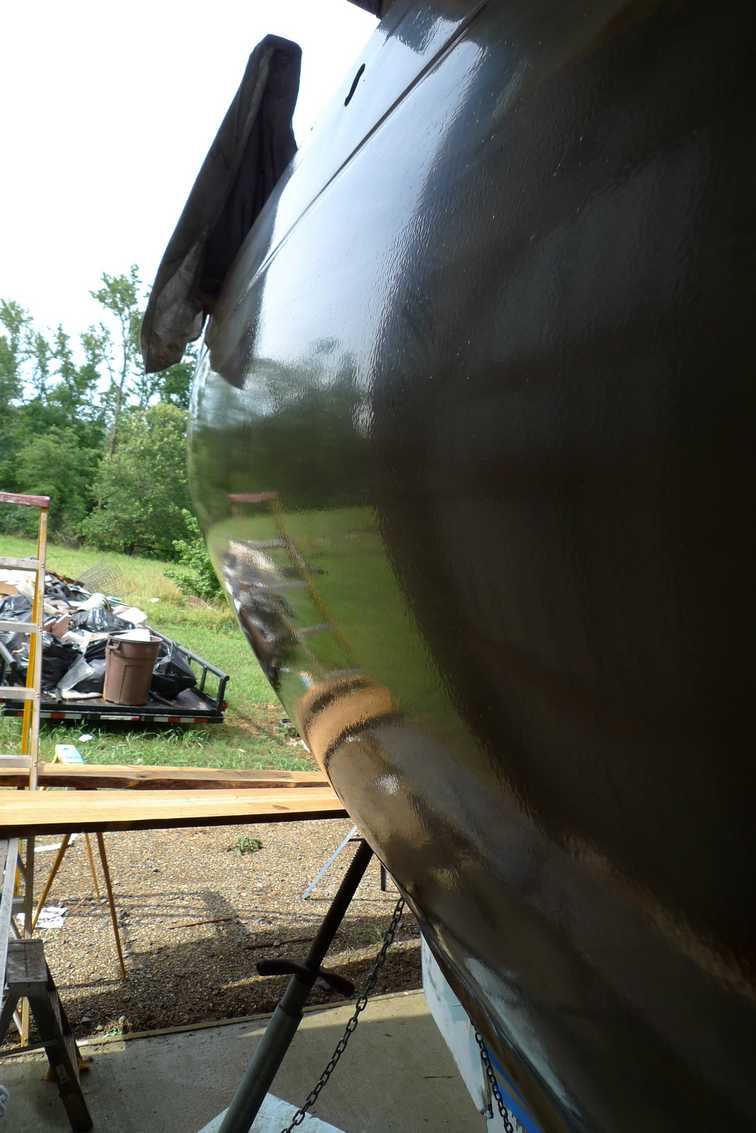
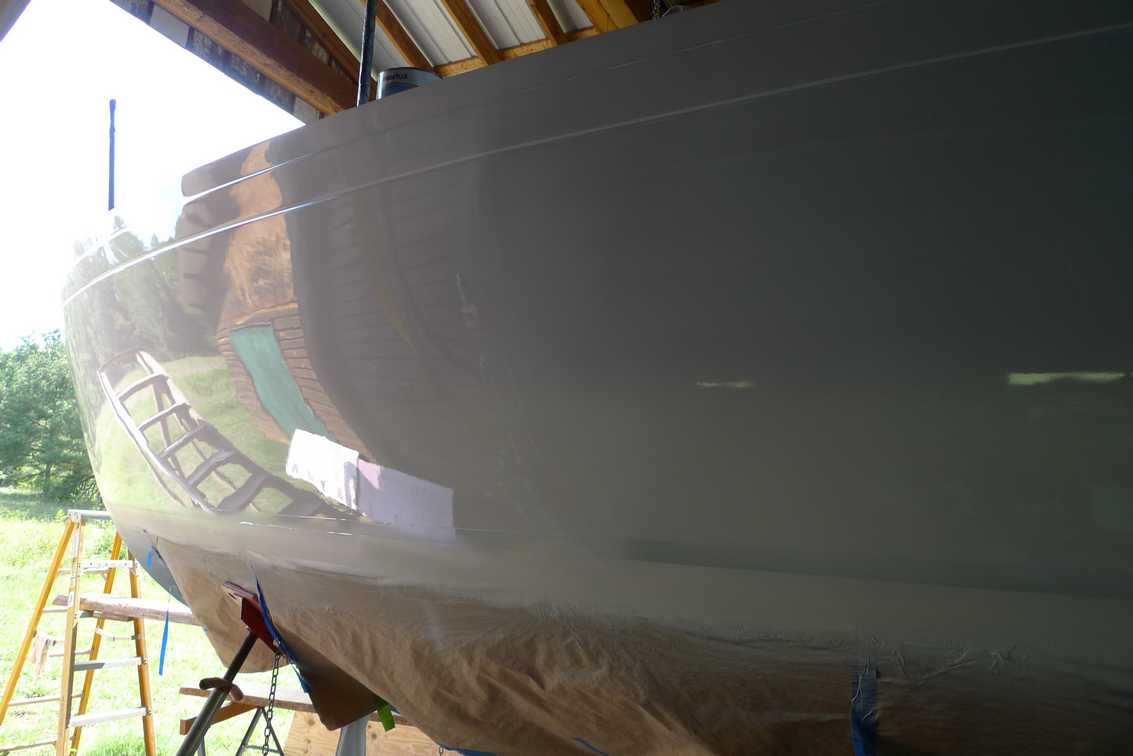
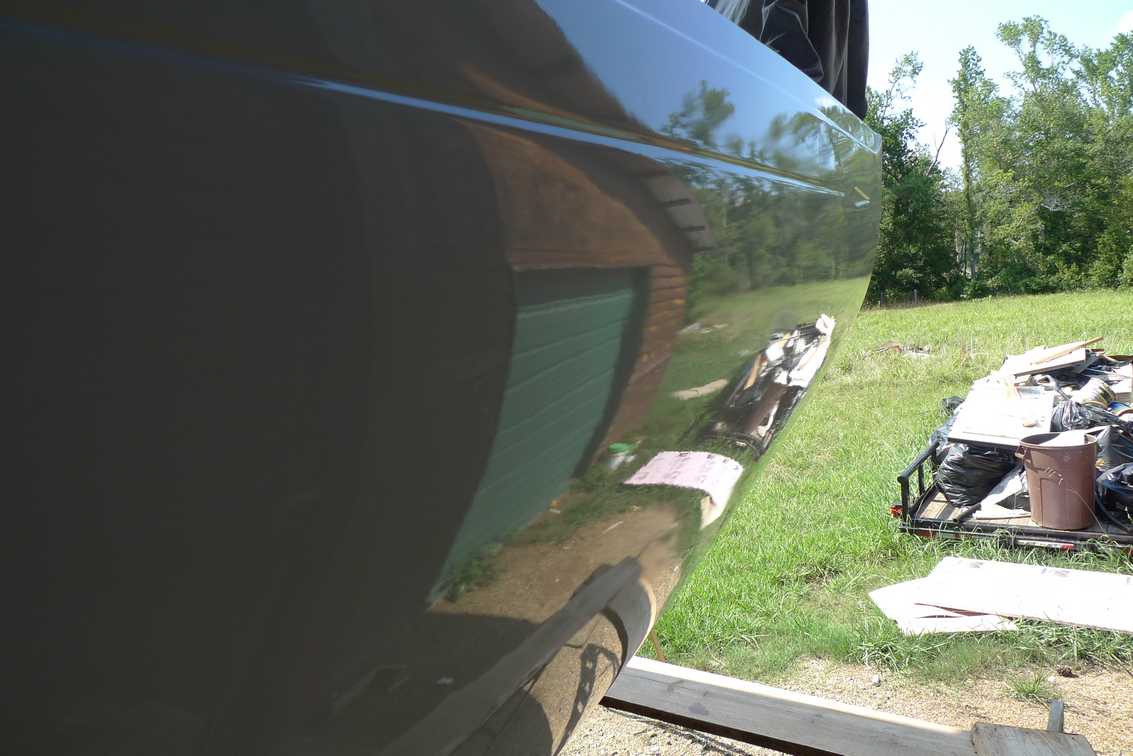
Hull/Painting: Topside Painting with Interlux Perfection
Today I sprayed on the first coat of Perfection two part polyurethane paint. It sprayed on really nice except for overheating in my tyvek suit and full face positive pressure respirator. I got so hot I had to stop and get inside to cool off before I could go back out and finish the job. Prior to painting I sanded with 240 grit sandpaper using a festool finish sander with vacuum attachment. I wiped hull clean with Interlux 2333N solvent and then vacuumed the hull. That produced a very clean hull to paint. Humidity was 65% with 94 degree F temps. Below are pics.
8-24-2011 Hull: Fairing Keel and Painting Bootstripe
It was cool here today(72) and was a great day to grind down my keel cap and get it ready for epoxy gelcoat. Also I applied the port side bootstripe. Pics below.
Two coats of Interlux bootstripe one part polyurethane enamel
.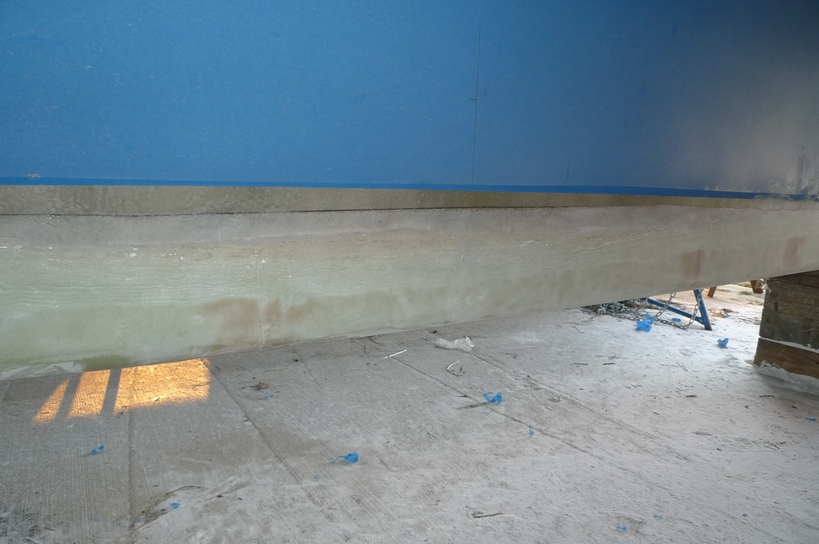
I faired the keel cap with rotary sander and 36 grit disc. It is ready for fairing compound and epoxy gelcoat.
Front edge of keel repaired with glass/epoxy and ready for fairing and epoxy gelcoat
Hull: Keel Cap Fairing and Epoxy barrier coat 8-29-2011
I first appled 2 coats of System Three epoxy on the surface of the keel cap that I laminated on the bottom of the keel and also on the rudder that I patched and faired. I let that dry to a tacky state and then faired using System Three Quickfair and Interlux Watertite. I let that dry for three hours then sanded smooth. I then applied two more coats of epoxy for a barrier coat. Tomorrow I will apply at least three more coats of epoxy, then sand and paint, baby! That will finish the hull work. Really exciting to get through this long and hard hull work. Pics below:
The cap that I laminated on bottom of keel and 6 inches up the side is 1/4 inch thick(20 layers of 9 oz glass and epoxy). I am happy that is will be barely noticeable after the bottom paint is applied.
Rudder faired and ready to finish out
.
Starboard side
Boot stripe looking good.
As you can see, the 1/4 inch thick keel cap will be barely noticeable.
Port sid
e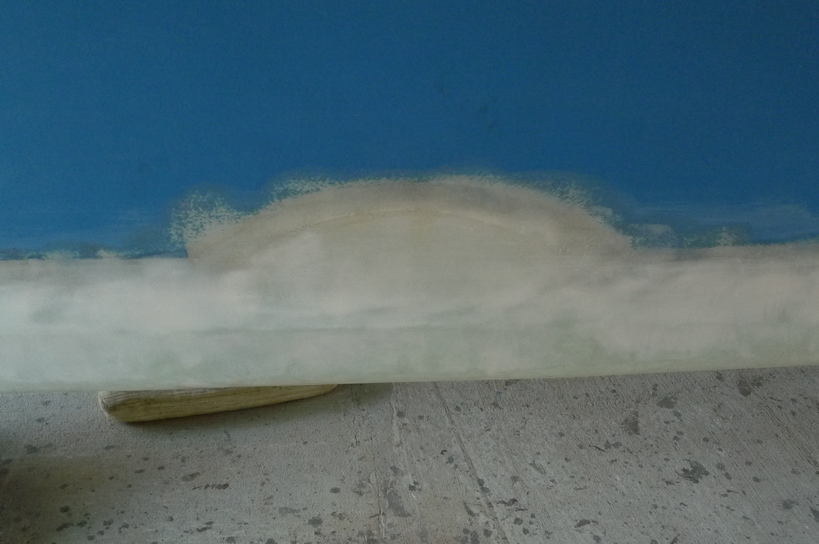
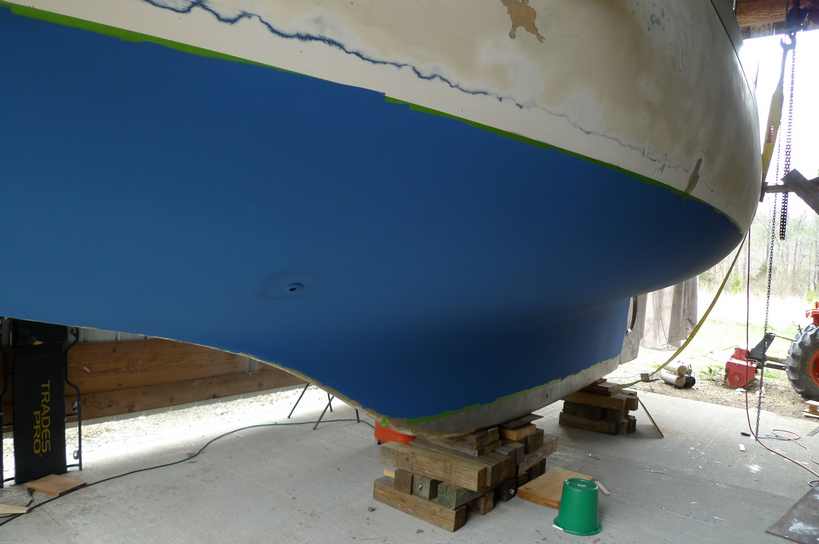
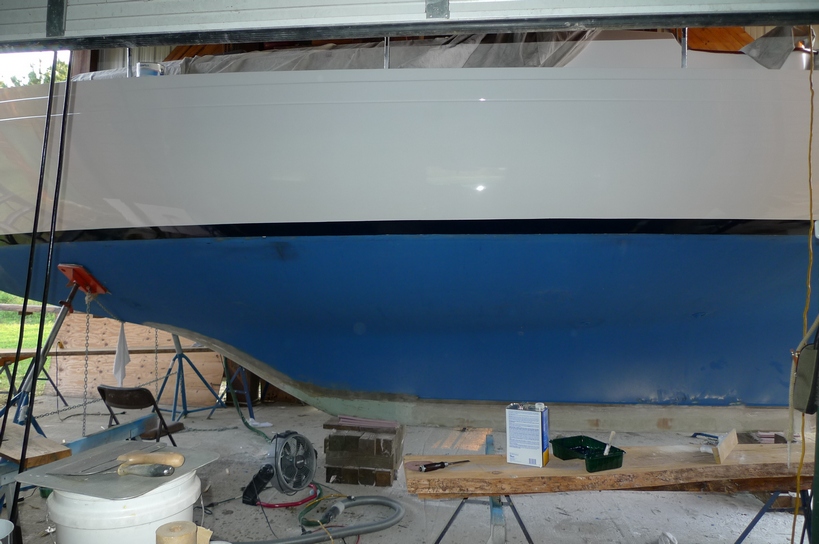
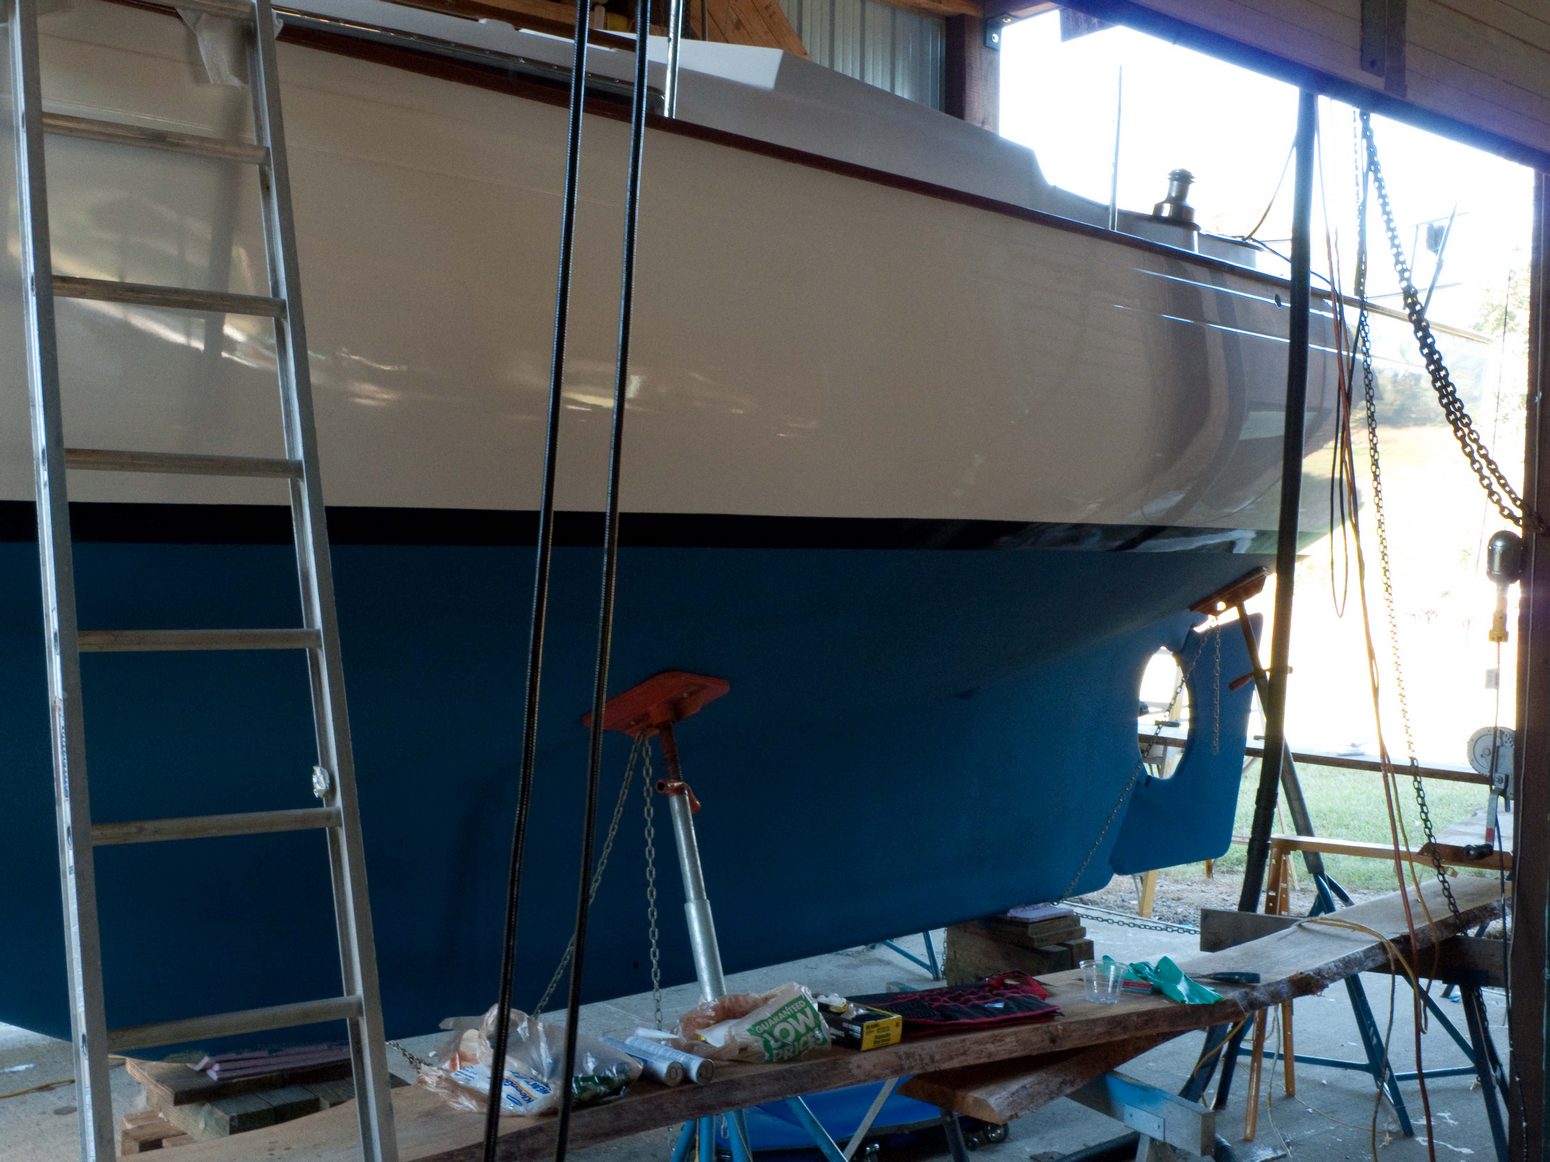
Hull: Painting Bottom
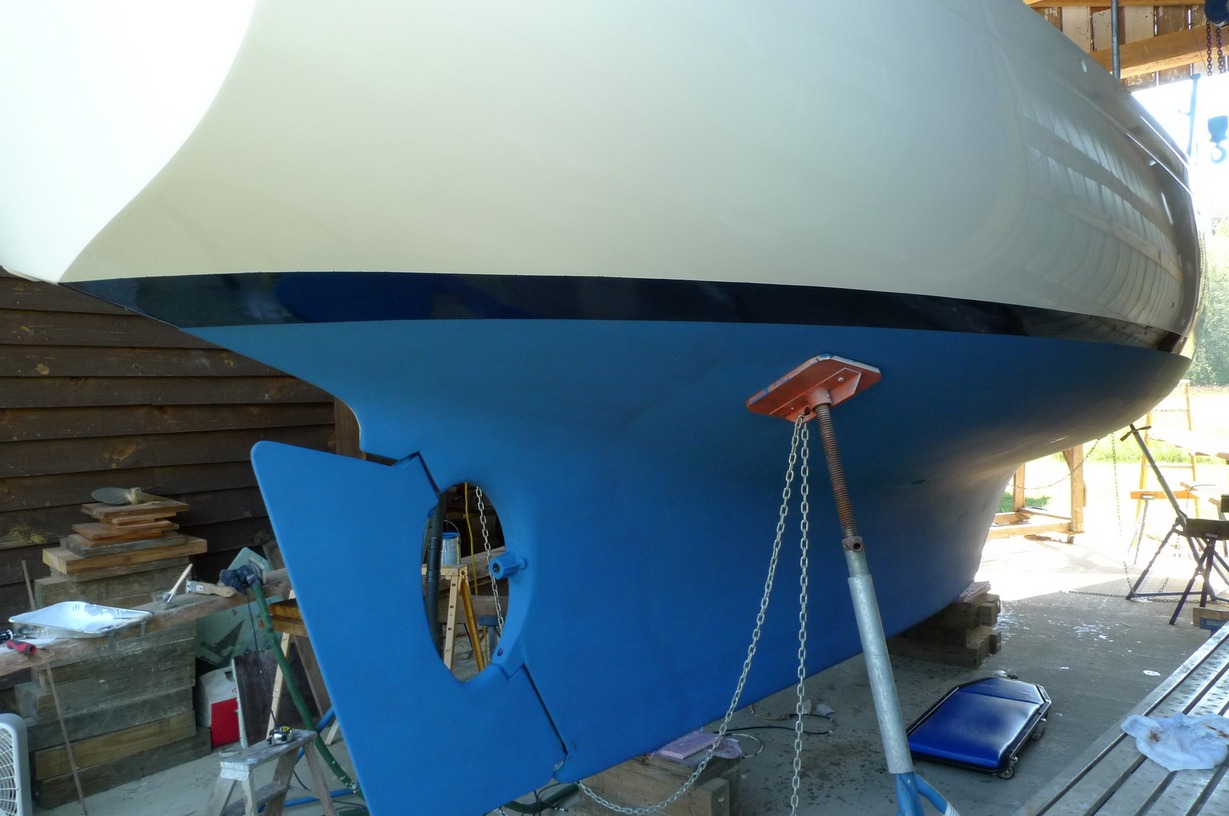
I applied a coat of Petit Hydrocoat bottom a couple of days ago. It is water based paint and very easy to work with. I will apply another coat and then wait for launching to apply the last coat. I was happy to see all the fiberglass work pretty much disappeared when the paint went on. I am still not completely satisfied with my topside Perfection paint job but will see if I have the time and energy to recoat that later. Pics of bottom paint below.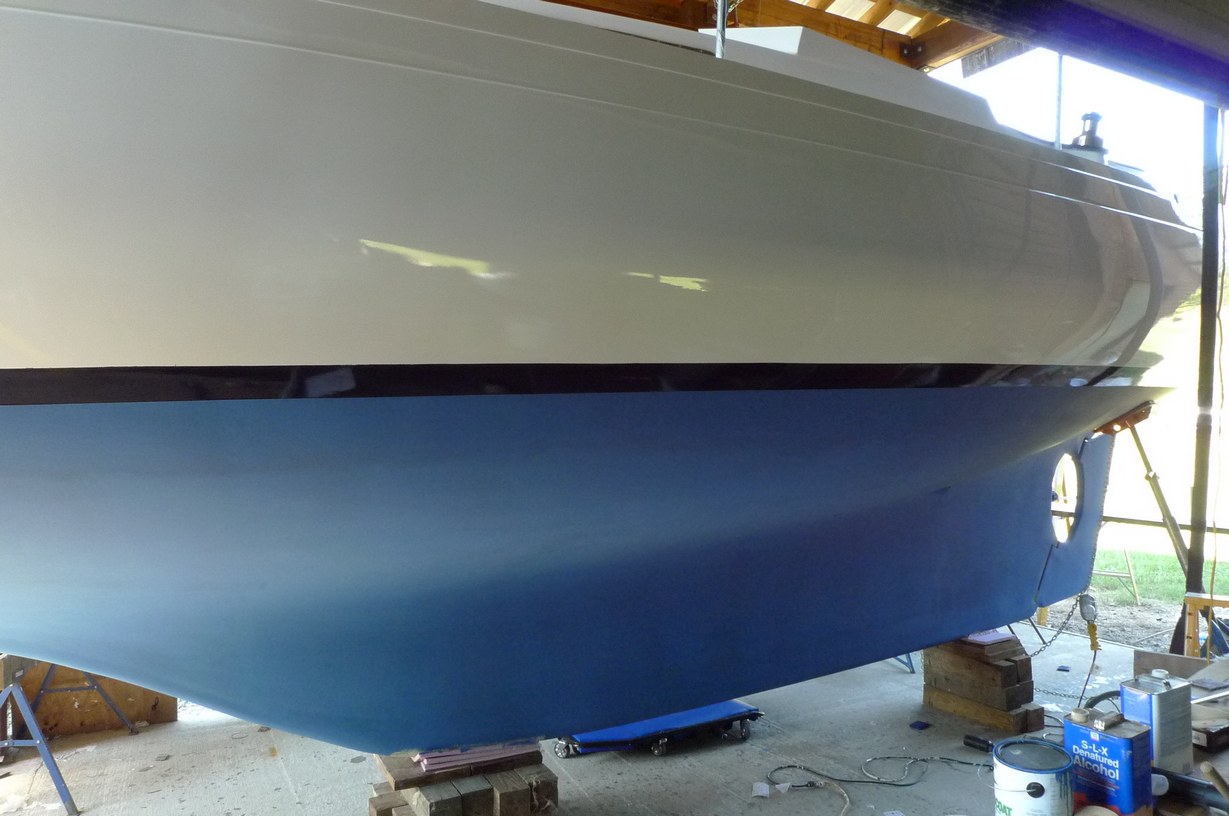
Painting: Toerail and Exterior Trim
I have also been coating the toerail with Interlux topside paint and will put a final coat of Petit Brown Brightwork enamel.
Deck Hardware: Mounting Windlass, Anchor platform and Installing Toerail
The first week in October I have been busy bolting this boat back together. I have installed the Lofrans Royal manual windlass just aft of teh chain locker hatch. I used a 1/2 inch thick aluminum backing plate bedded in epoxy for strength. Below is pic.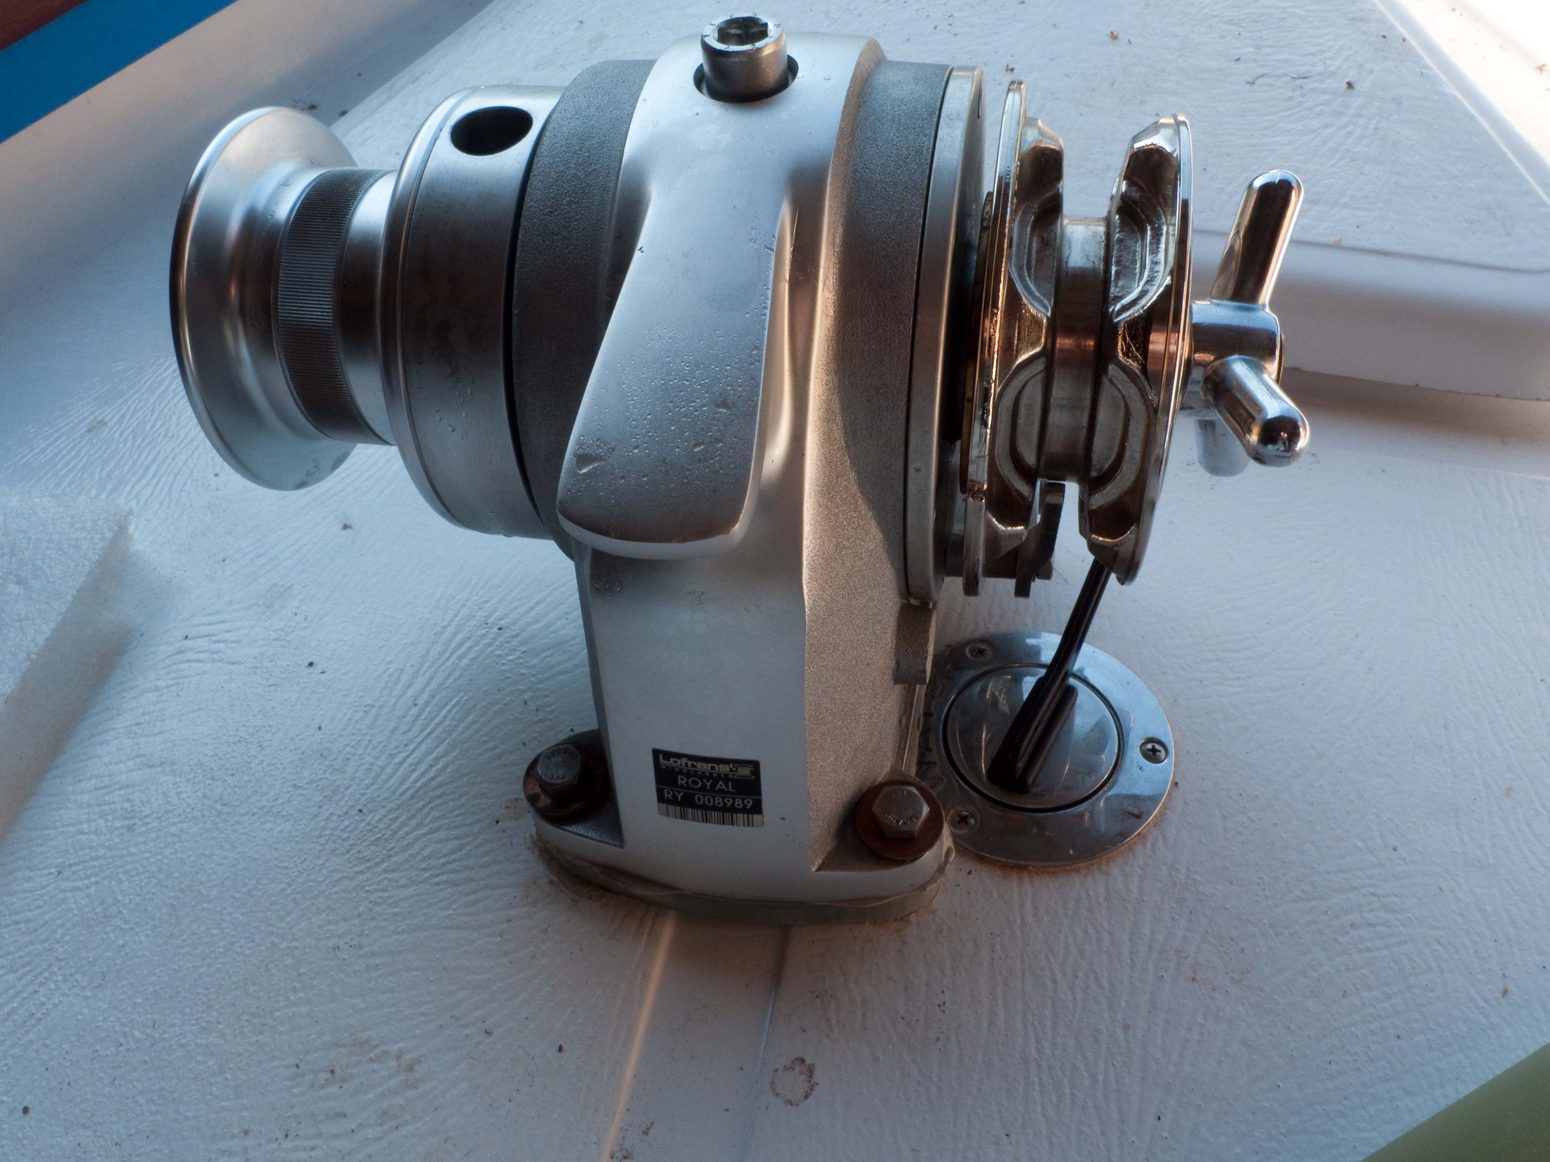

I had to fabricate a base to lay the windlass on out of g10 fiberglass to allow the hawse pipe (which is actually a water fill fitting that I can make watertight with it's own cap)to fit under the windlass at the right distance for the pipe to have a fair line of entry.
I attached the painted toerail with ss screws and 3M 5200 caulk. I do not intend to take take it off. It would be next to impossible using 5200.

I built another anchor platform that is longer than the original so I could fabricate an extra base so I could bolt the platform down a bit better than the original. I used 3/8 inch bronze allthread and a 1/2 thick g10 fiberglass backing plate bedded in thickened epoxy. Pics below.
Mounting system for the anchor platform.
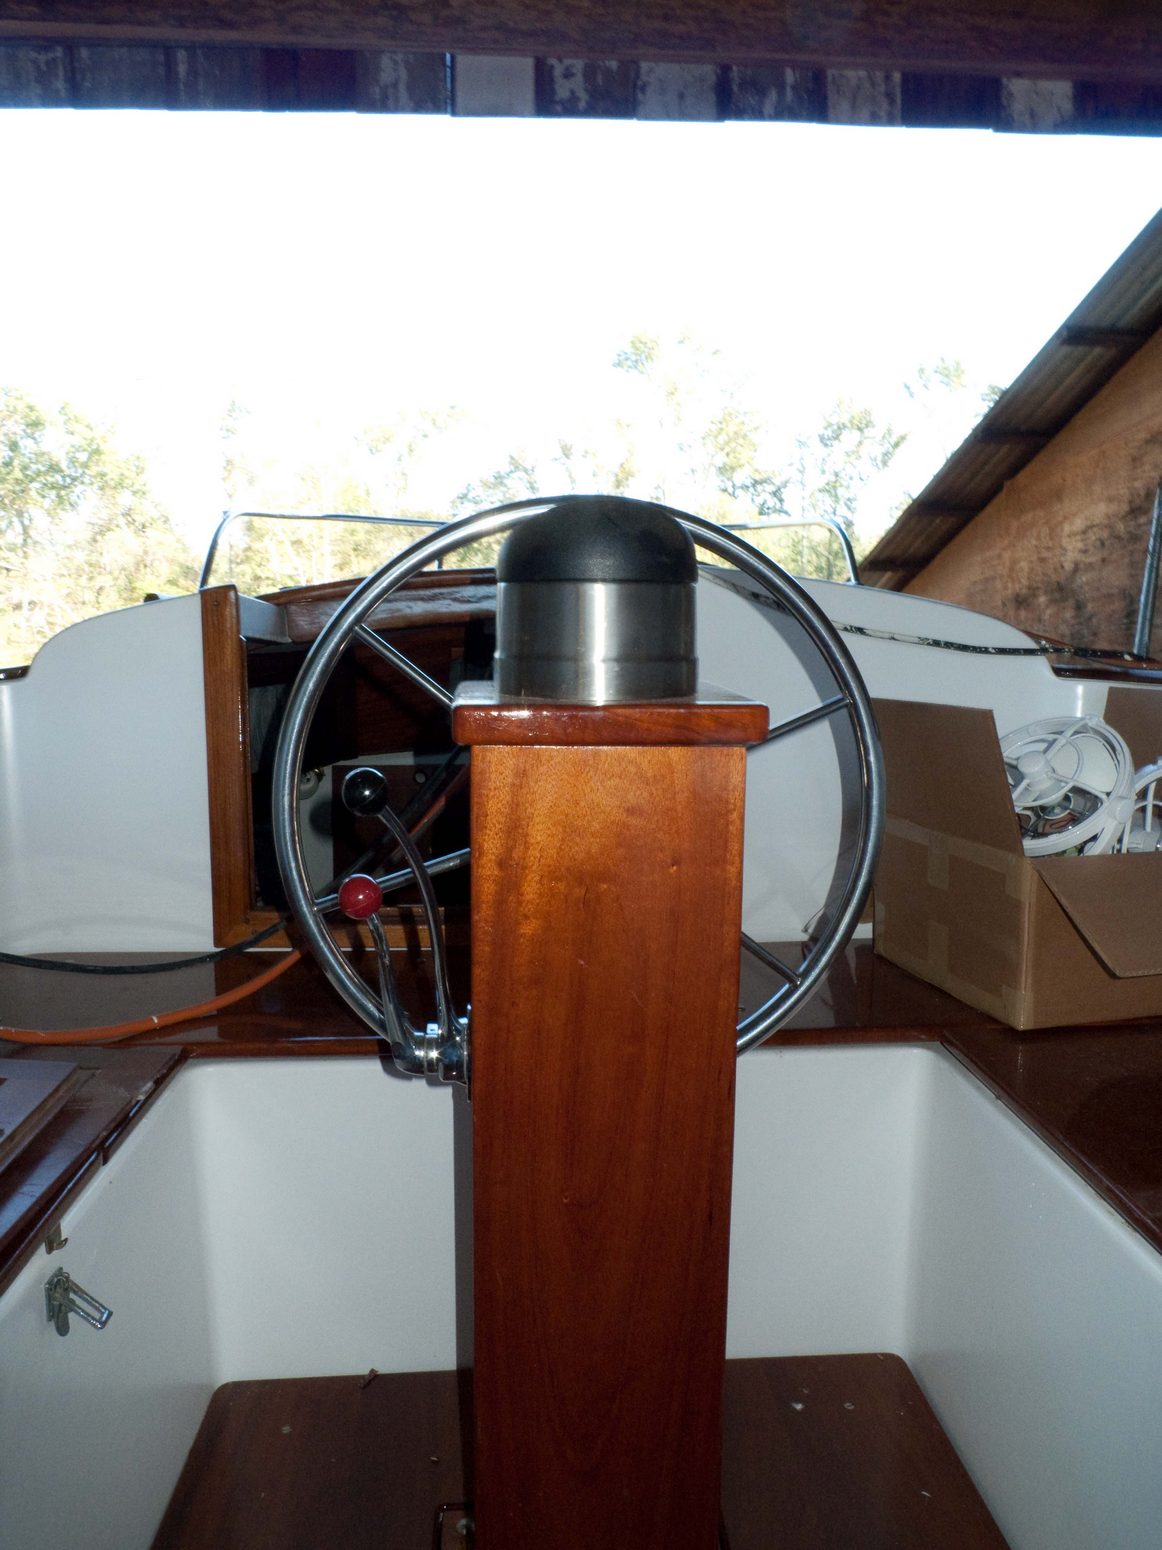
Hydraulic Steering: Installation
I contemplated getting Edson steering for the boat but just couldn't justify the cost at this point. So I flushed the old hydraulic pump out with hydraulic fluid and ran new copper lines to the piston. Everything went together nice and easy and seems to be working pretty well.
Plumbing: Bilge pump installation
I have installed a two stage bilge pump system. A smaller 1100 gph pump is mounted on the bilge floor using 3m 5200 caulk to glue the lower housing to the floor. Another larger 2000 gph pump is mounted two inches above the bilge floor. The smaller pump will take care of bilge water most of the time. The larger pump will only pump if the smaller pump gets overwhelmed. Pics below:
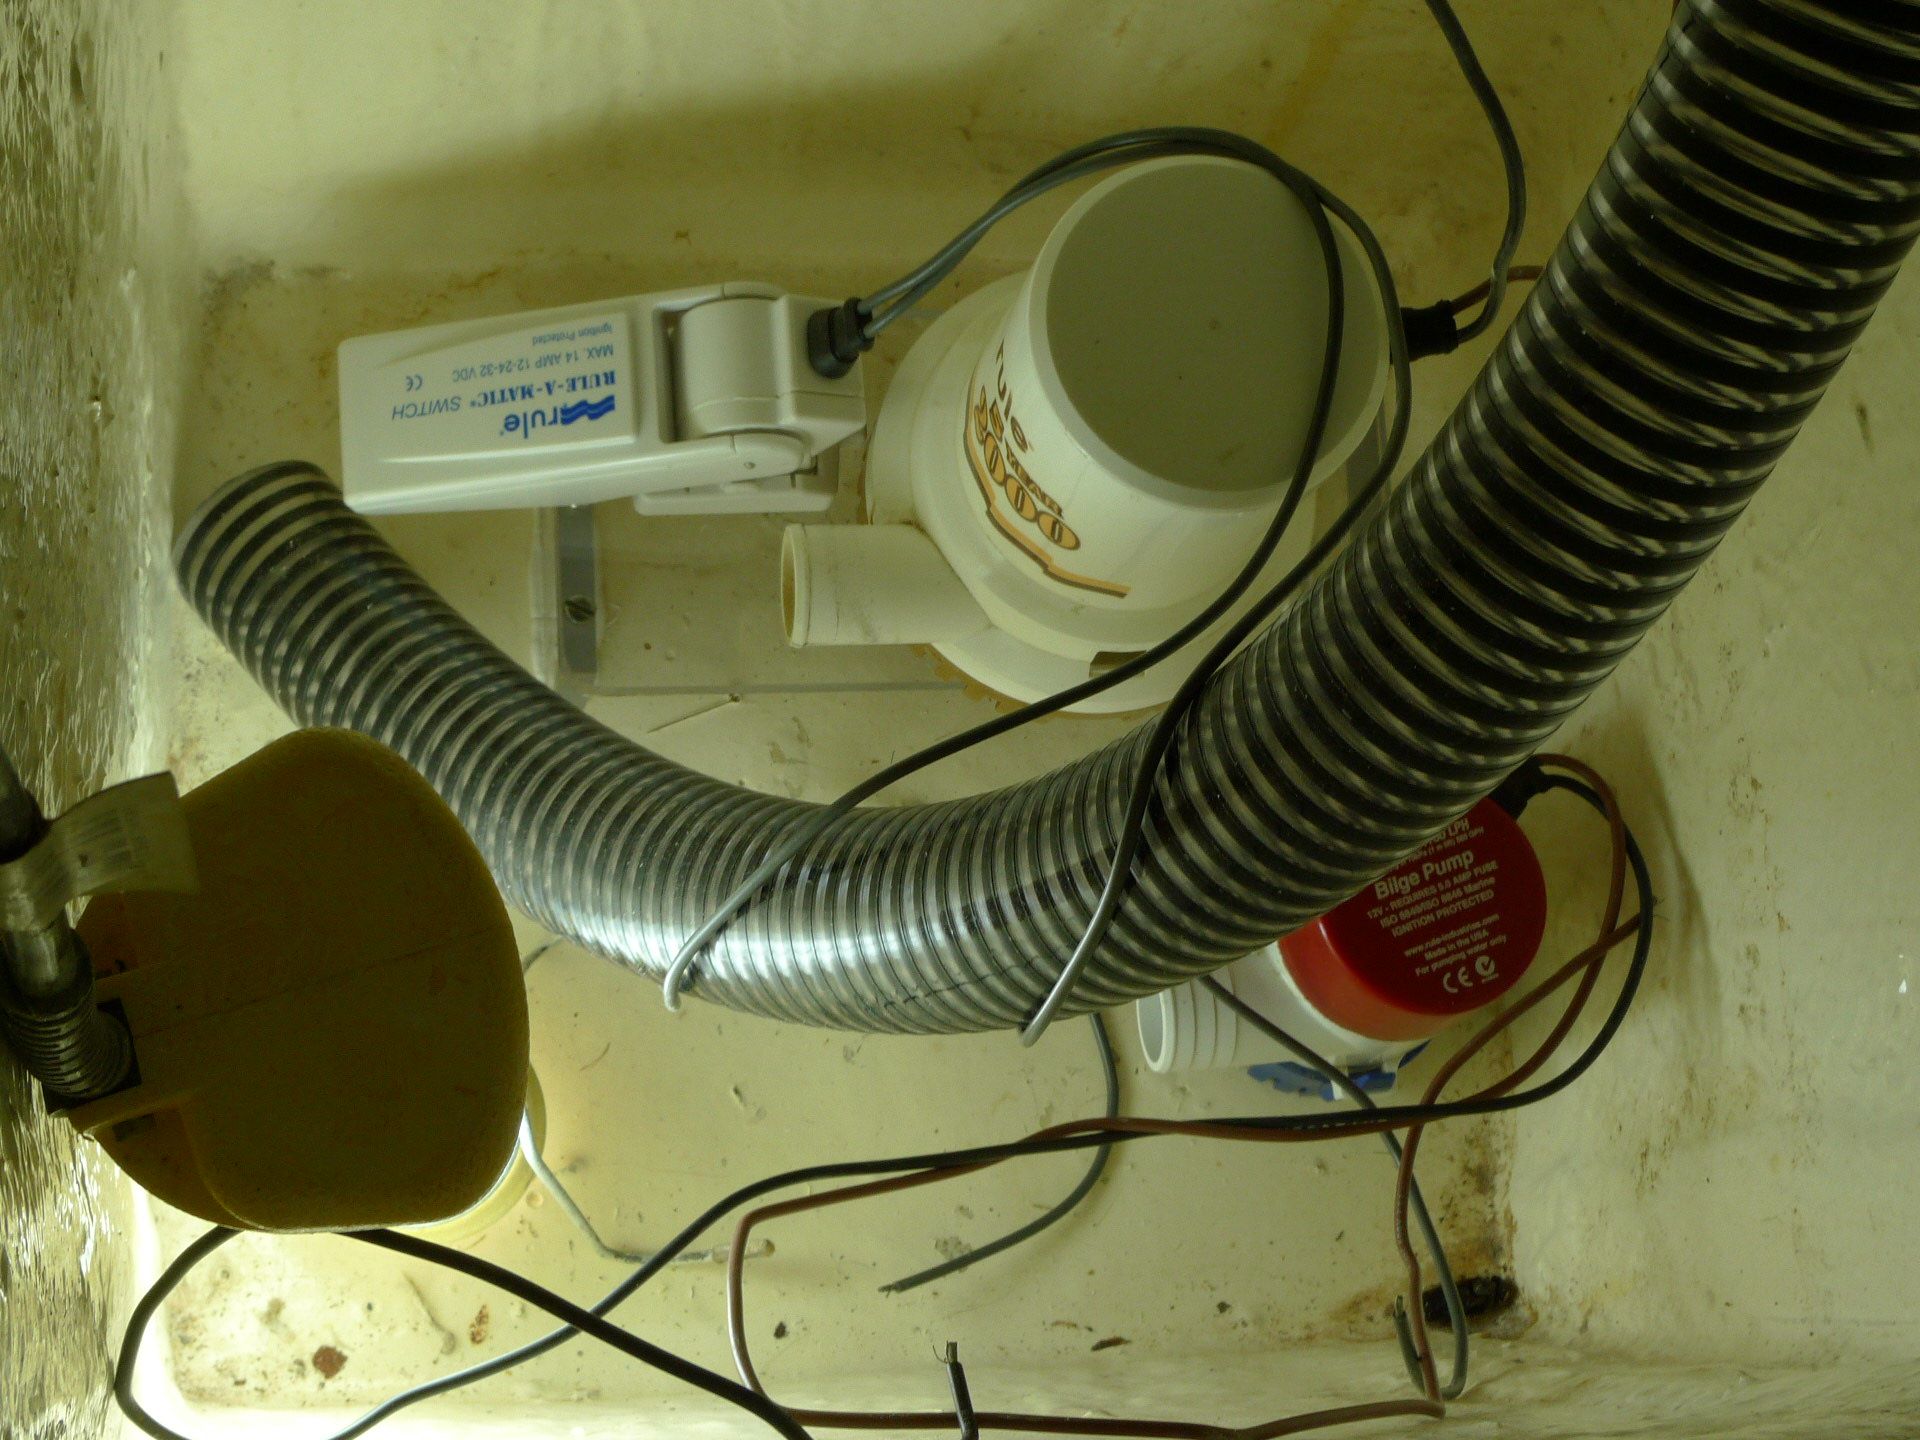
The larger pump is mounted on lexan shelf bonded to bilge floor with 3m 5200.
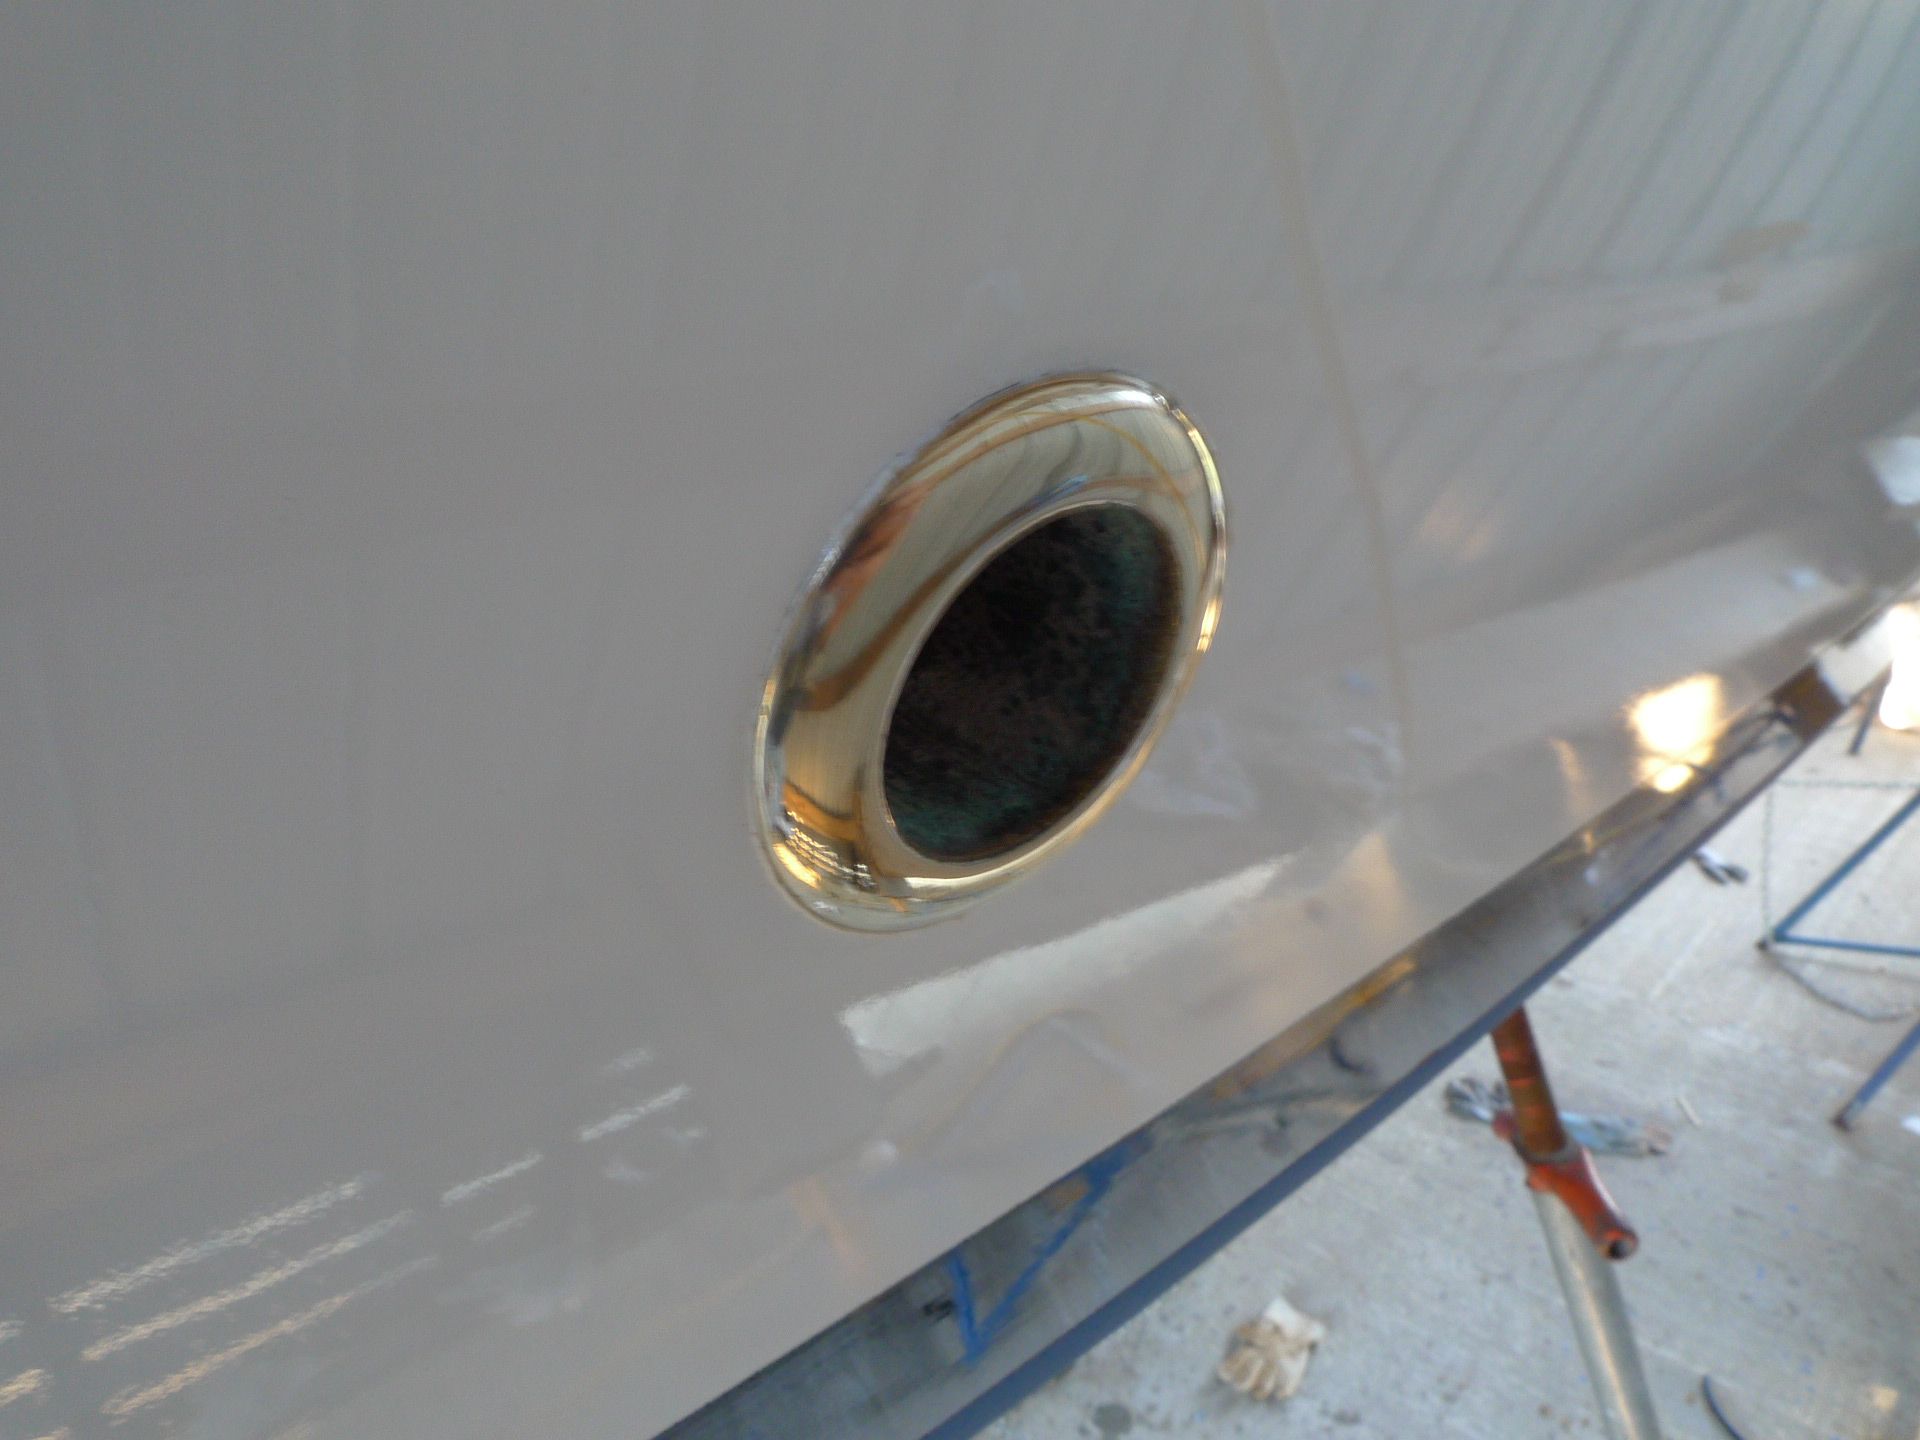
The bilge thru hull is polished and mounted.
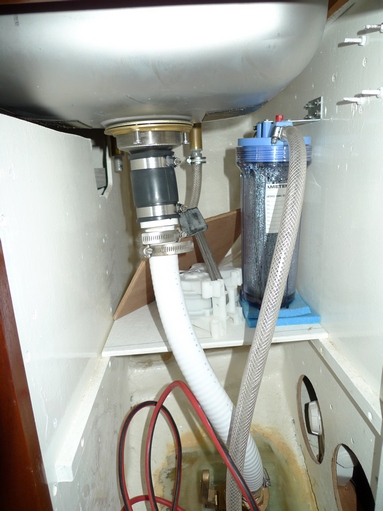
Plumbing: Galley Sink
The galley sink is all plumbed. Pic below:
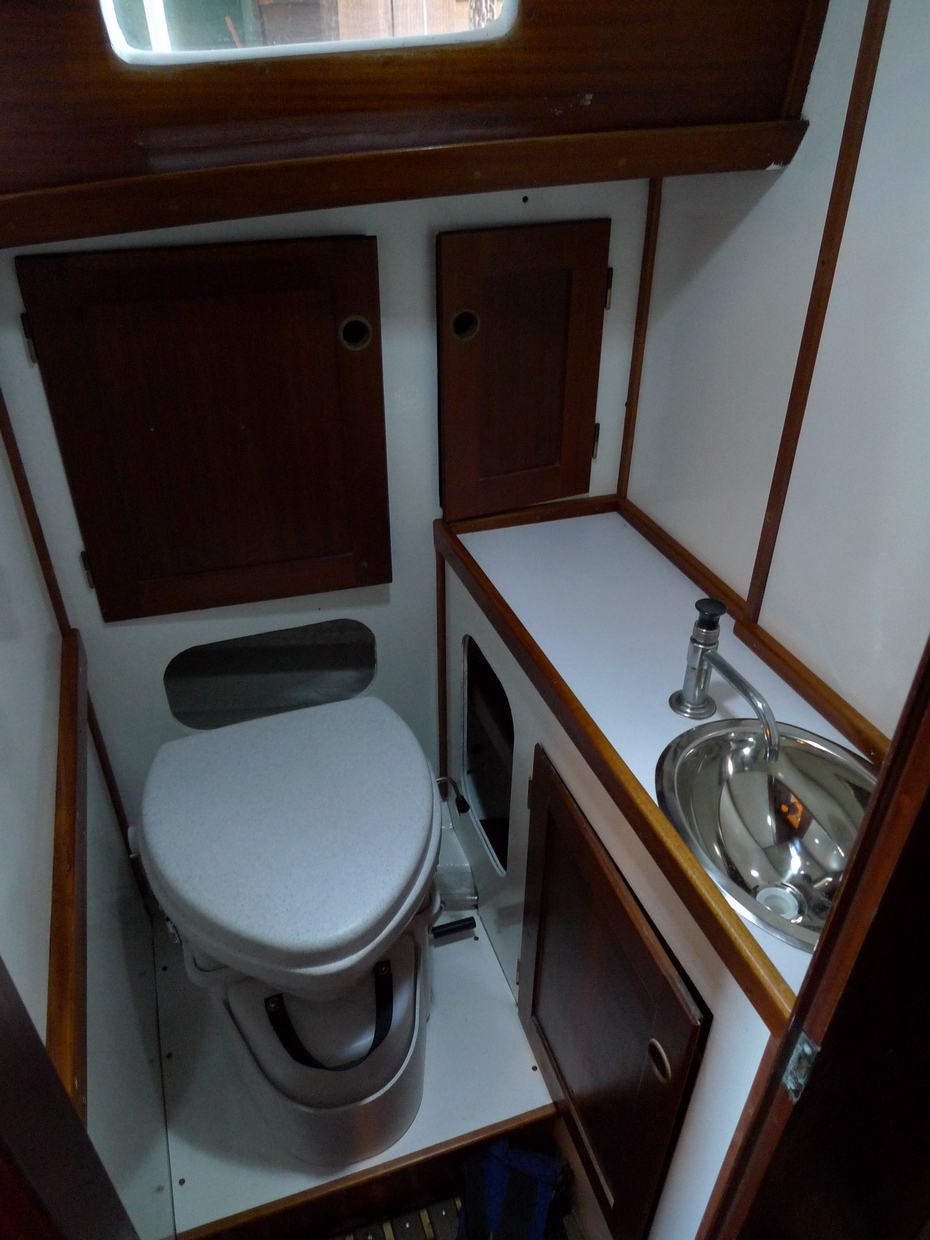
Assembly: Head is Nearing Completion
I have the head nearly completed. Installed the sink, freshwater spigot, and drain lines. Pic below:

New sink installed and old original spigot recycled.
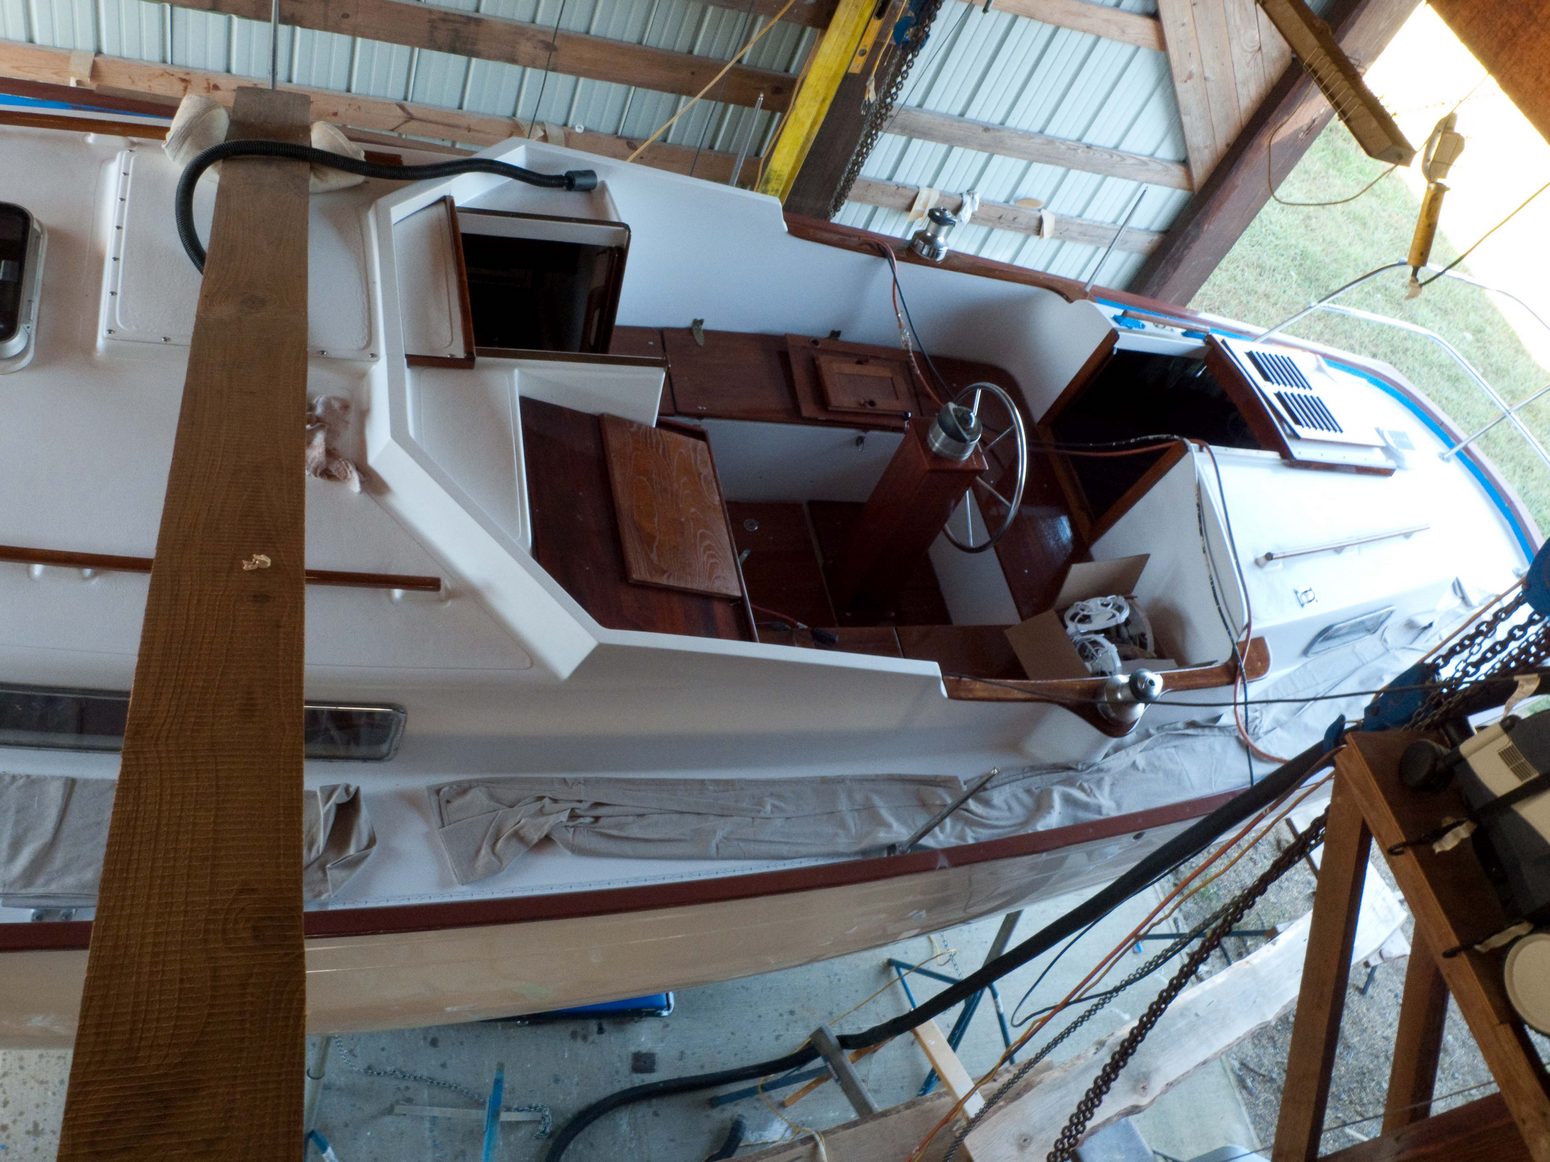
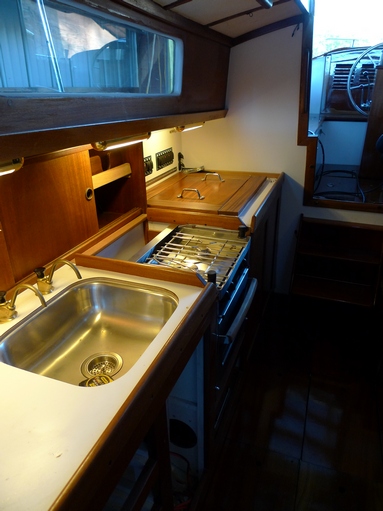
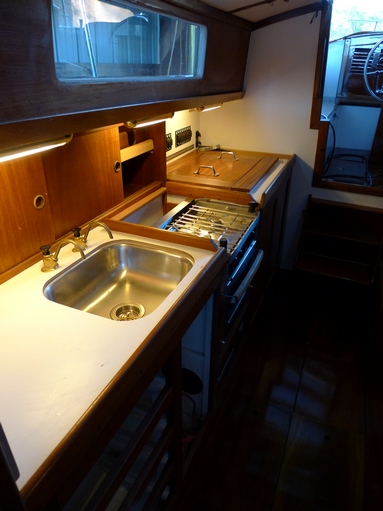
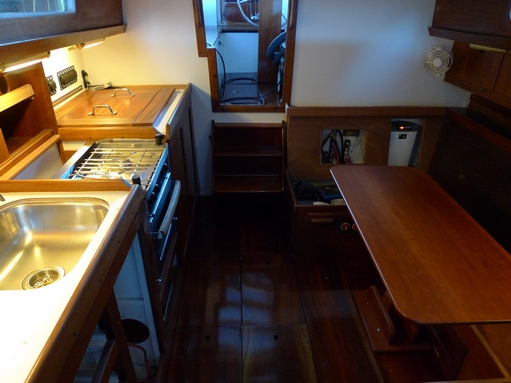
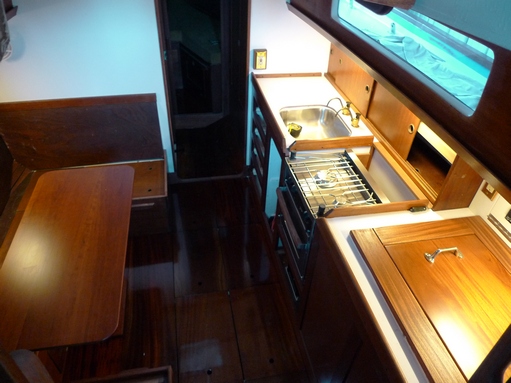
Assembly: Galley Area
Below are pictures of the Galley at this stage.
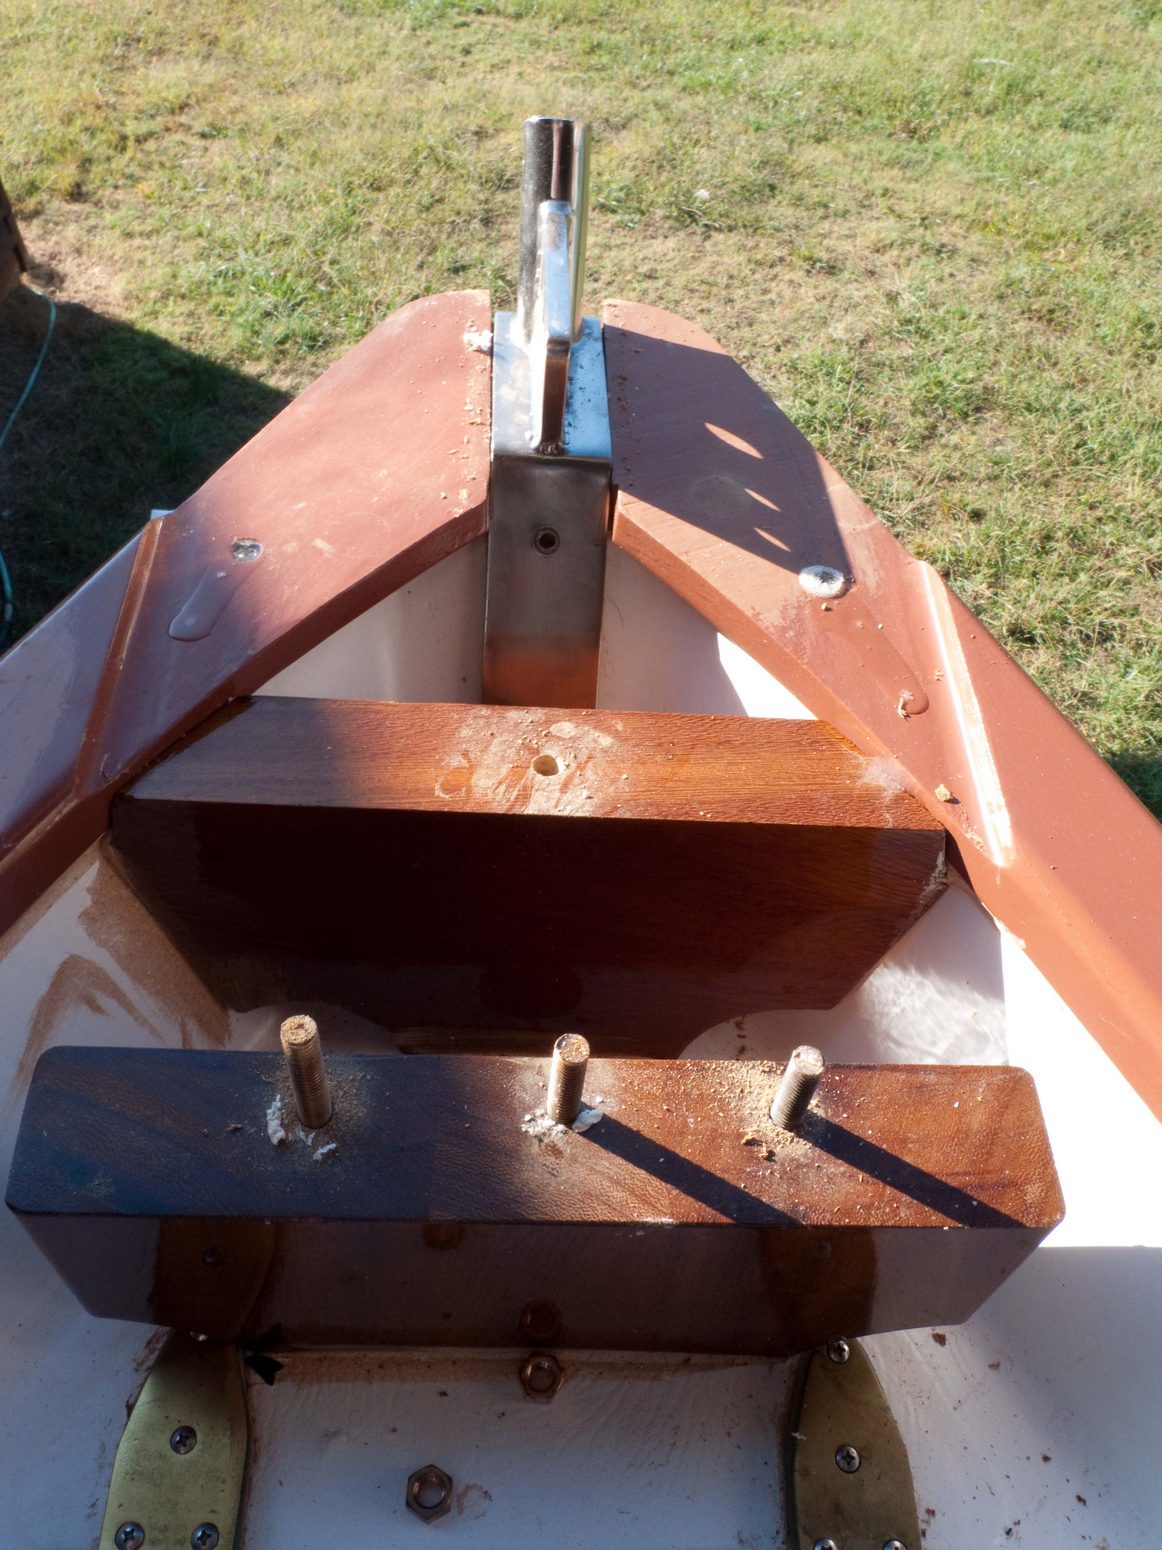
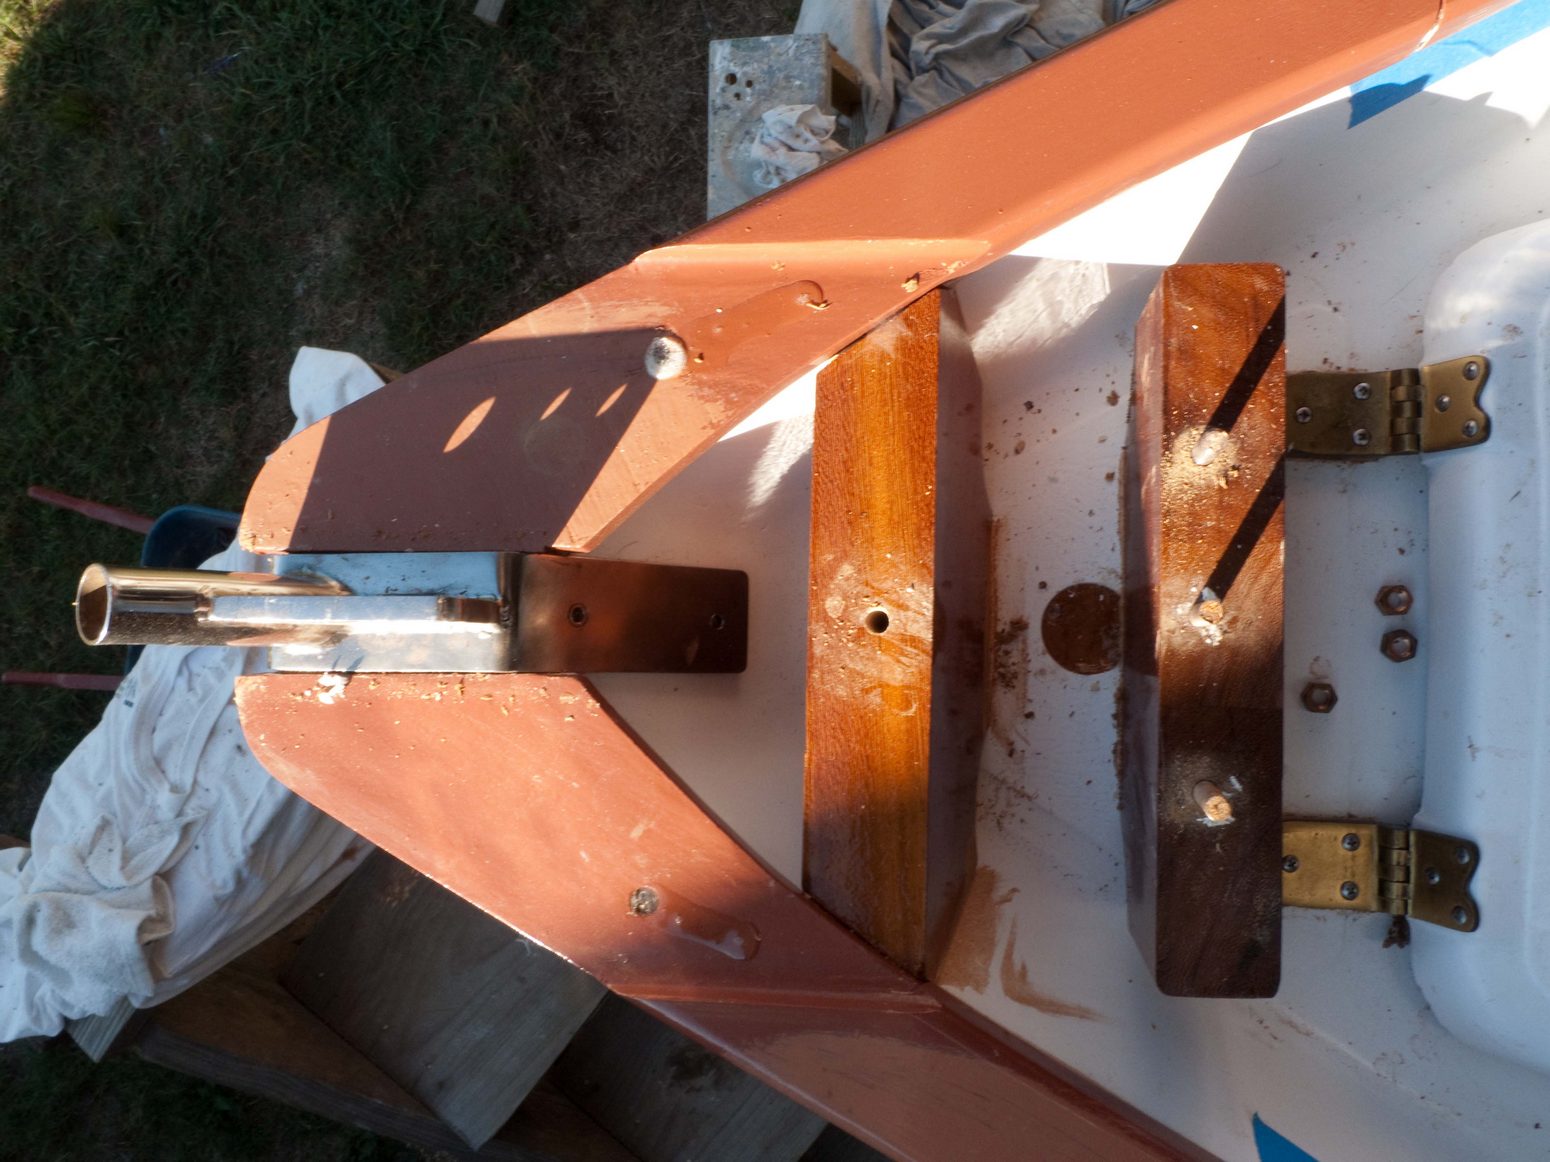
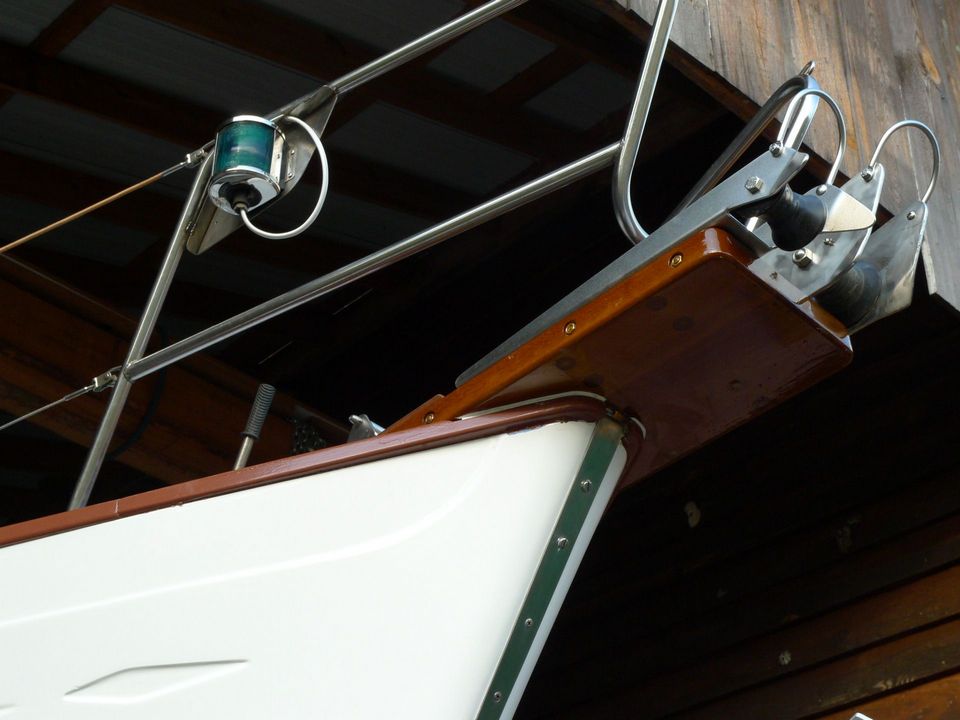
Assembling: Anchor Platform, Pushpit, Nav lights, stemhead fitting, lifelines
I spent the week installing the anchor platform, attaching rollers, installing pushpit and nav lights, stemhead fitting and lifelines. Anyone who has looked over previous entrys will notice that I have built another anchor platform and incorporated windline and ABI anchor rollers. I can mount a delta and fortress anchor on the platform. I am going to run the anchor chain down under the forward birth and store another rope rode in the anchor locker. That will require the least amount of adjustments to the boat. I can always adjust later as I see what I like and dont like. Pics below:
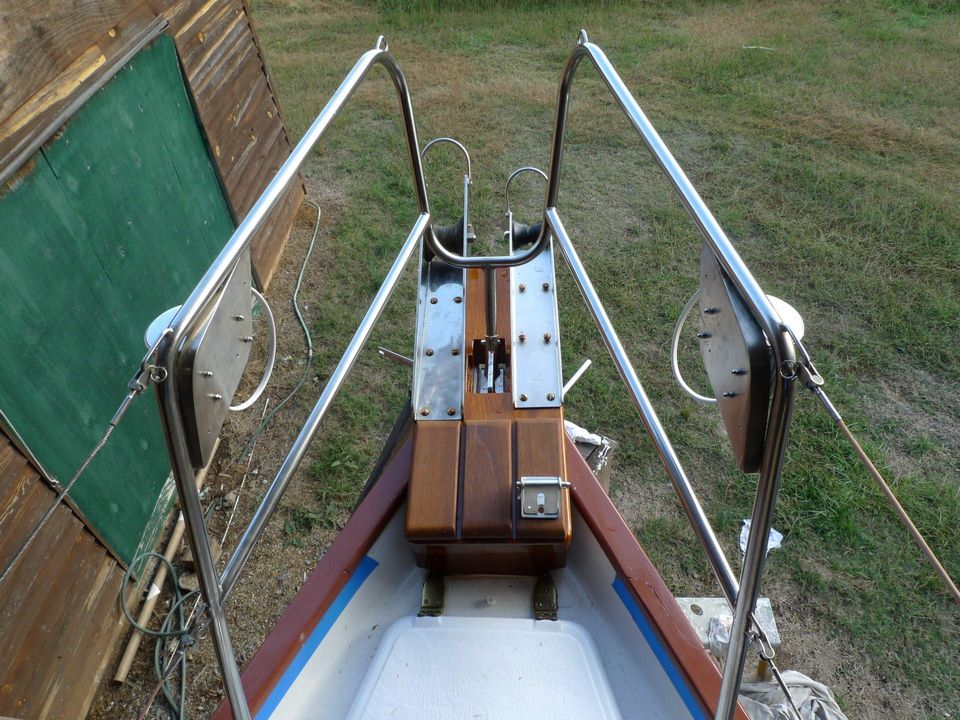
View of the pushpit, anchor platform and rollers.
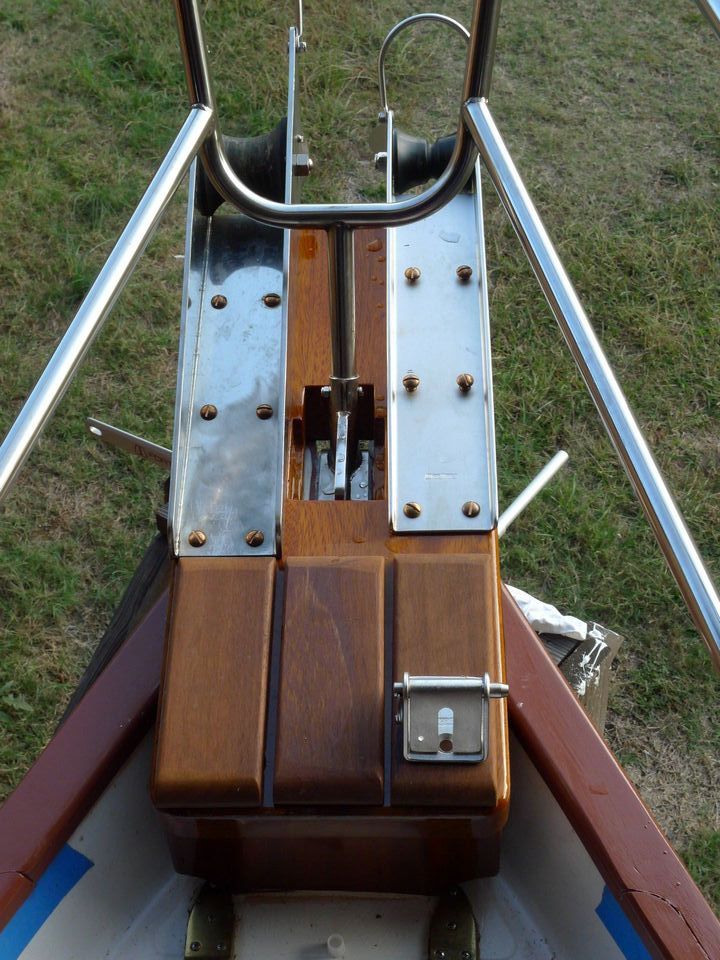
Closer view
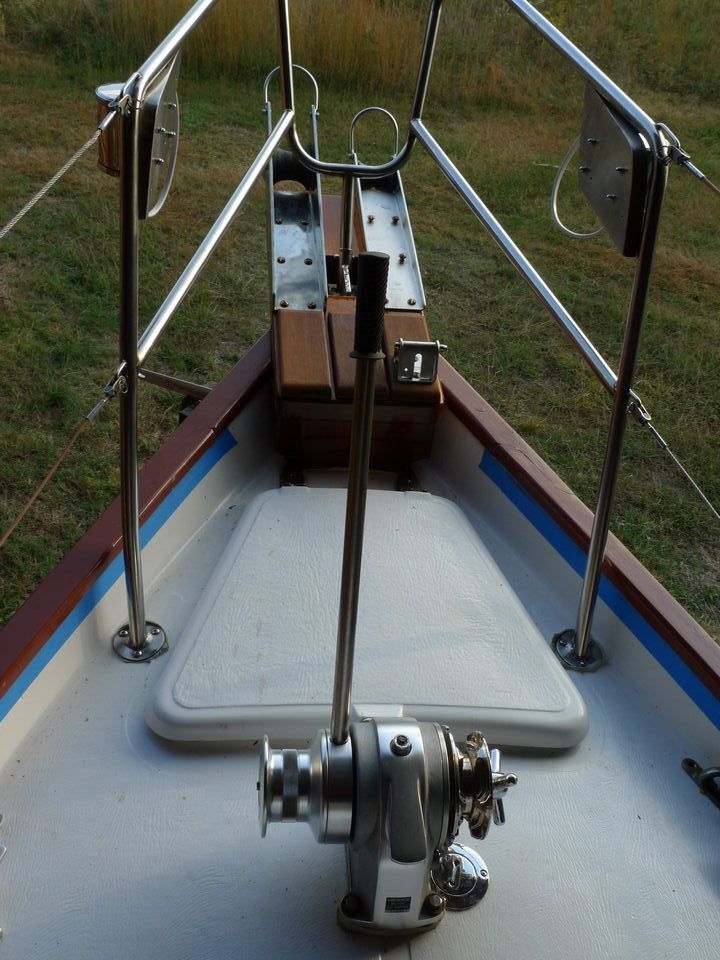
Windlass, and anhoring system.

1/2 inch thick G10 fiberglass backing plate for anchor platform bedded in epoxy/wood flour.
Stemhead fitting and anchor platform and pushpit.